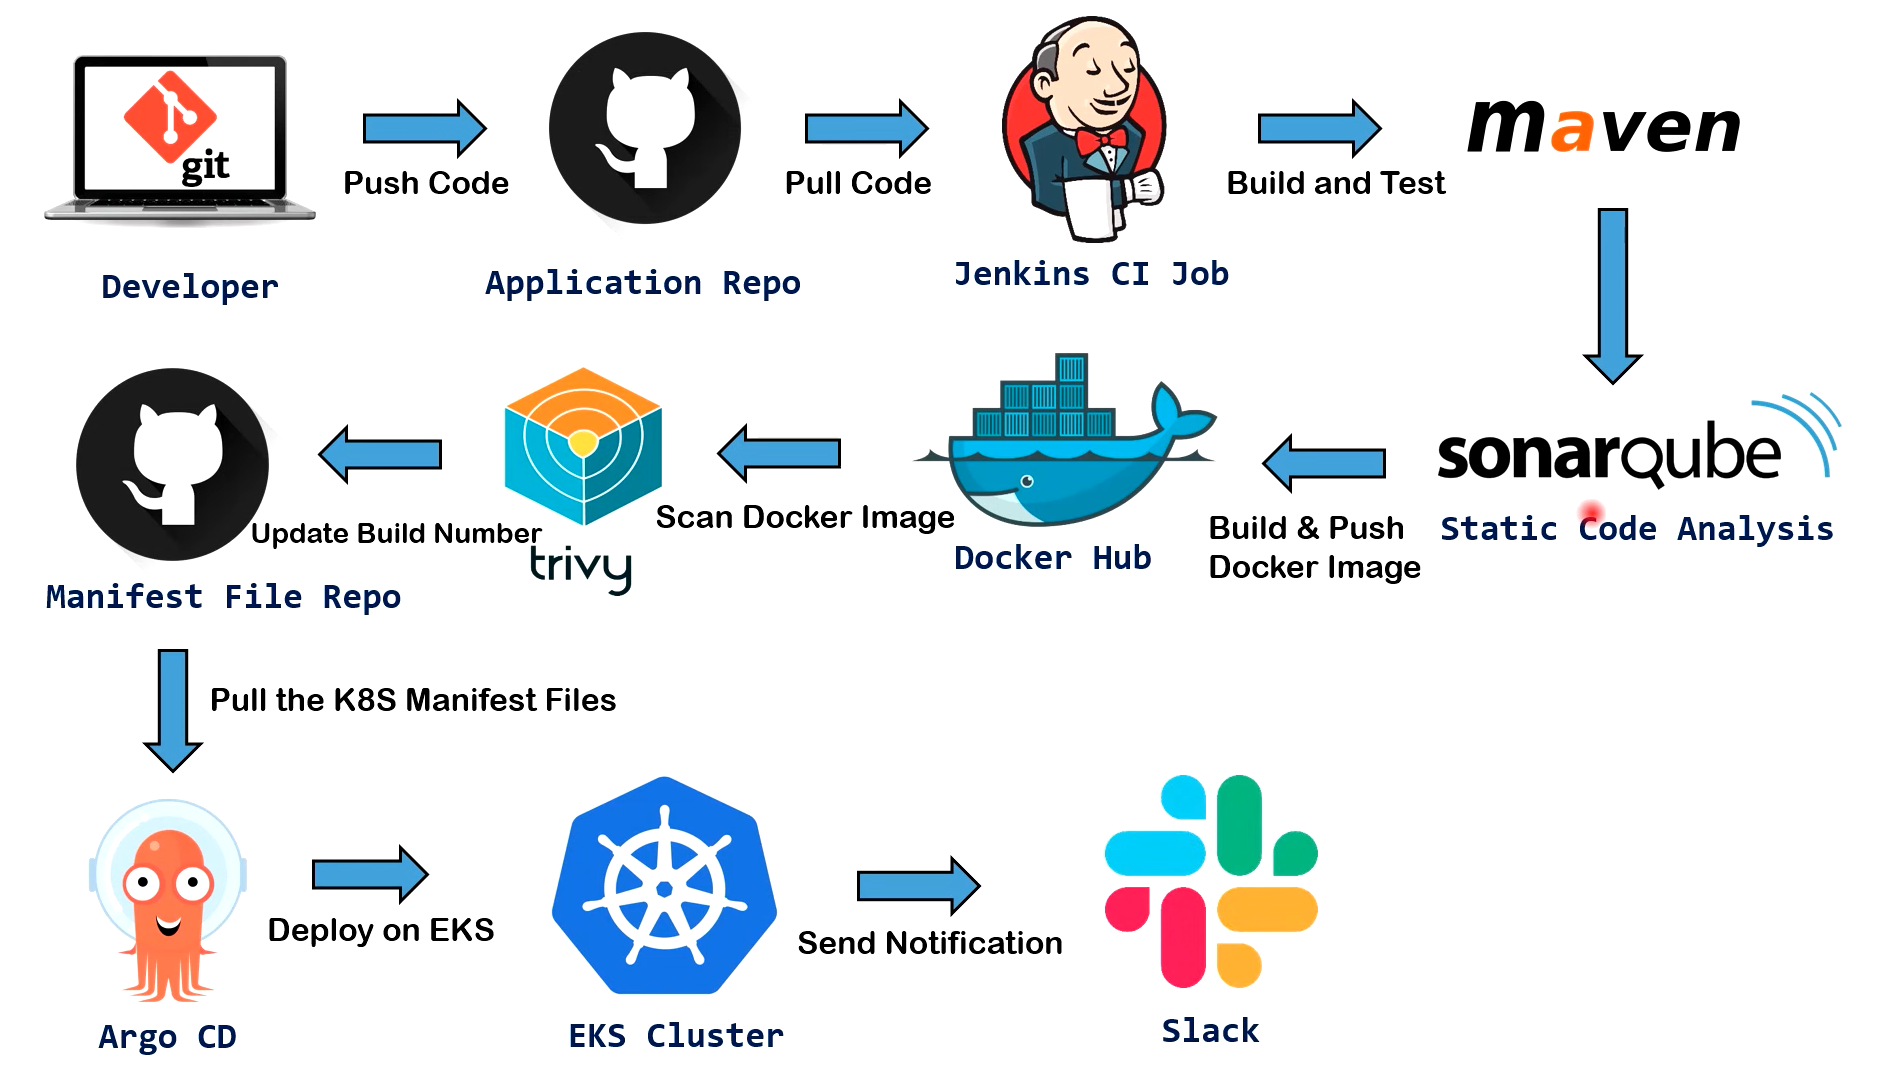
[ 구성 흐름도]
[1] 젠킨스 서버 생성 (마스터 & 에이전트)

- sudo apt update
- sudo apt upgrade
- sudo apt install openjdk-17-jre (자바17 설치)
- java -version


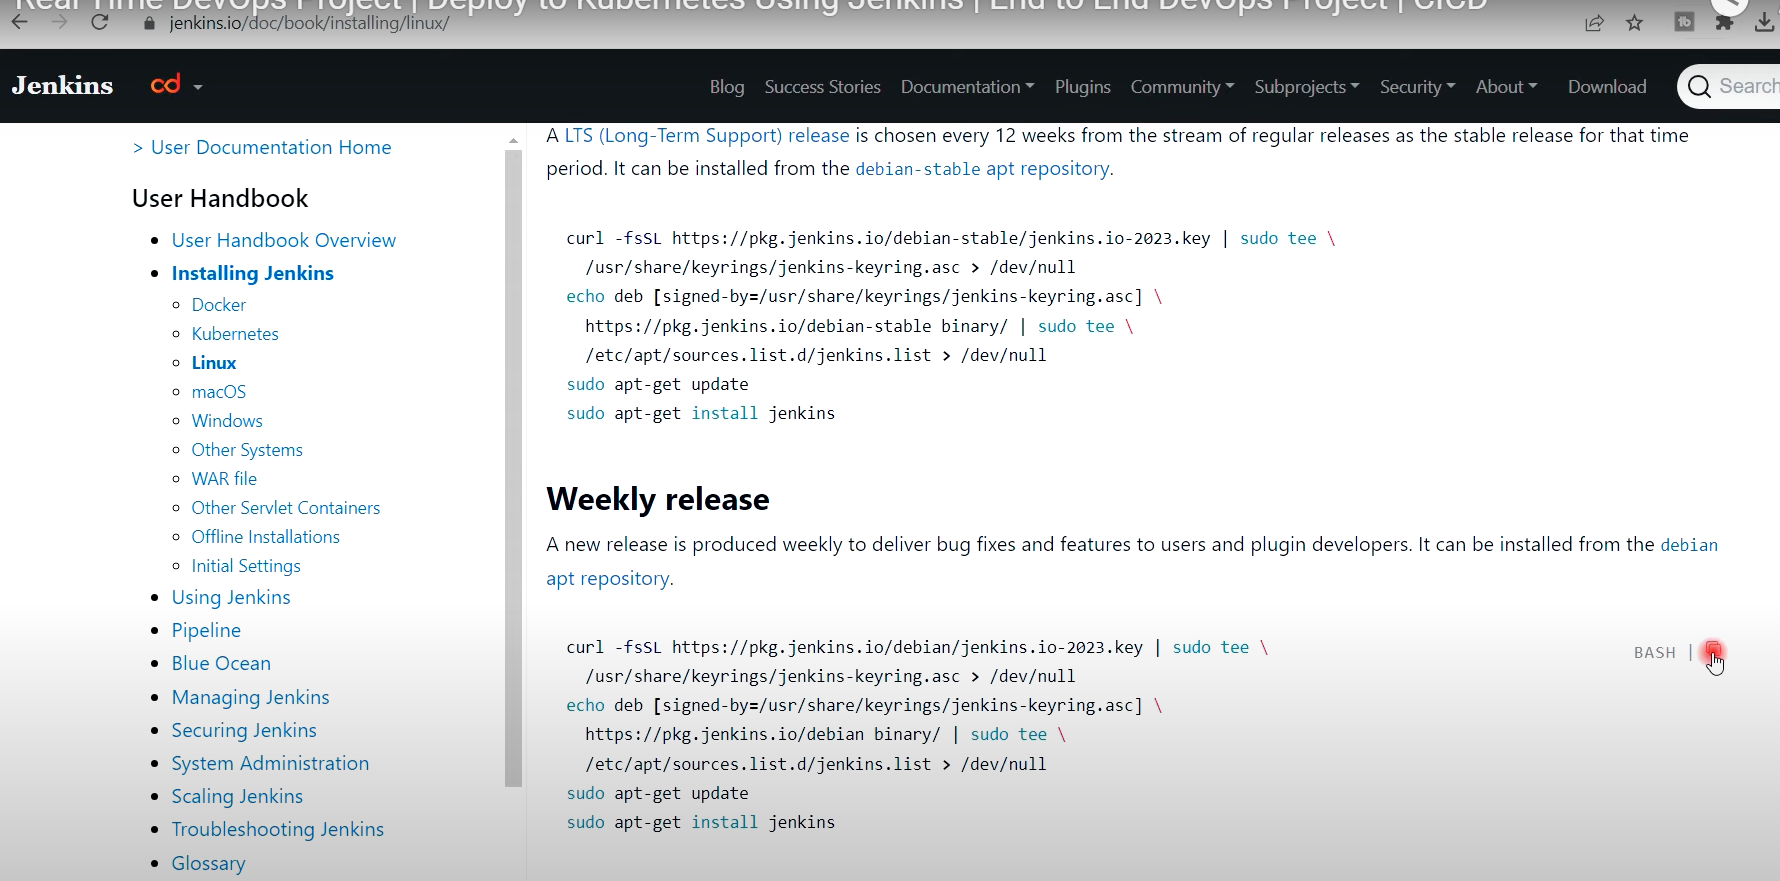
- 젠킨스 사이트 이동 (복사 및 설치)
https://www.jenkins.io/doc/book/installing/linux/

- sudo systemctl enable jenkins
- sudo systemctl start jenkins
- sudo systemctl status jenkins

[1-1] 젠킨스 에이전트 서버 추가 구성 (마스터 서버와 동일 하게 설치)


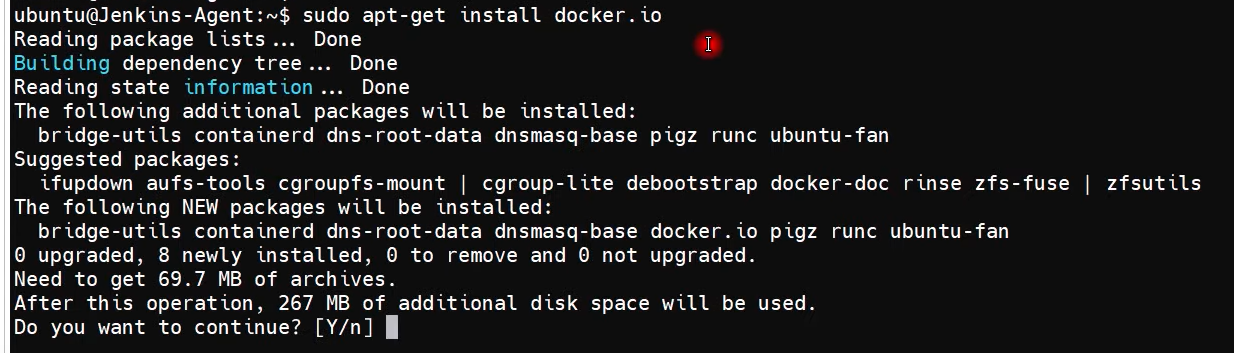
- (젠킨스 에이전트 서버) 모든 빌드가 여기서 수행되므로 도커 설치 필요
- sudo apt install docker.io
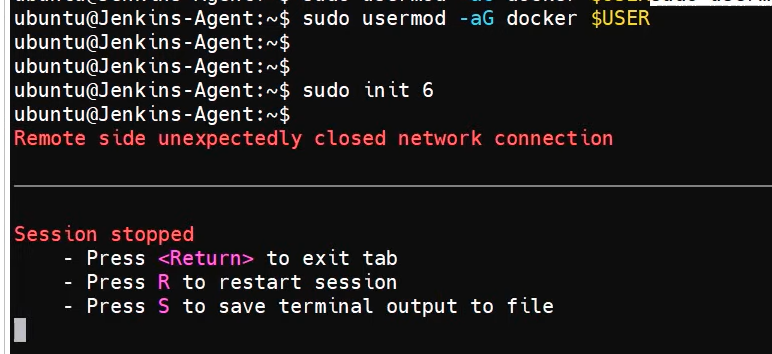
- 현재 사용자 (ubuntu) 도커사용 권한 부여
- sudo usermod -aG docker $USER
(vi /etc/group 확인)

- sudo init 6 (서버 리부팅)
- (젠킨스 에이전트 서버) /etc/ssh/sshd_config 파일 수정 --> 젠킨스 에이전트와 서버간 통신을 위한 설정
- sudo service sshd reload


[1-2] 젠킨스 마스터 서버


- sudo service sshd reload

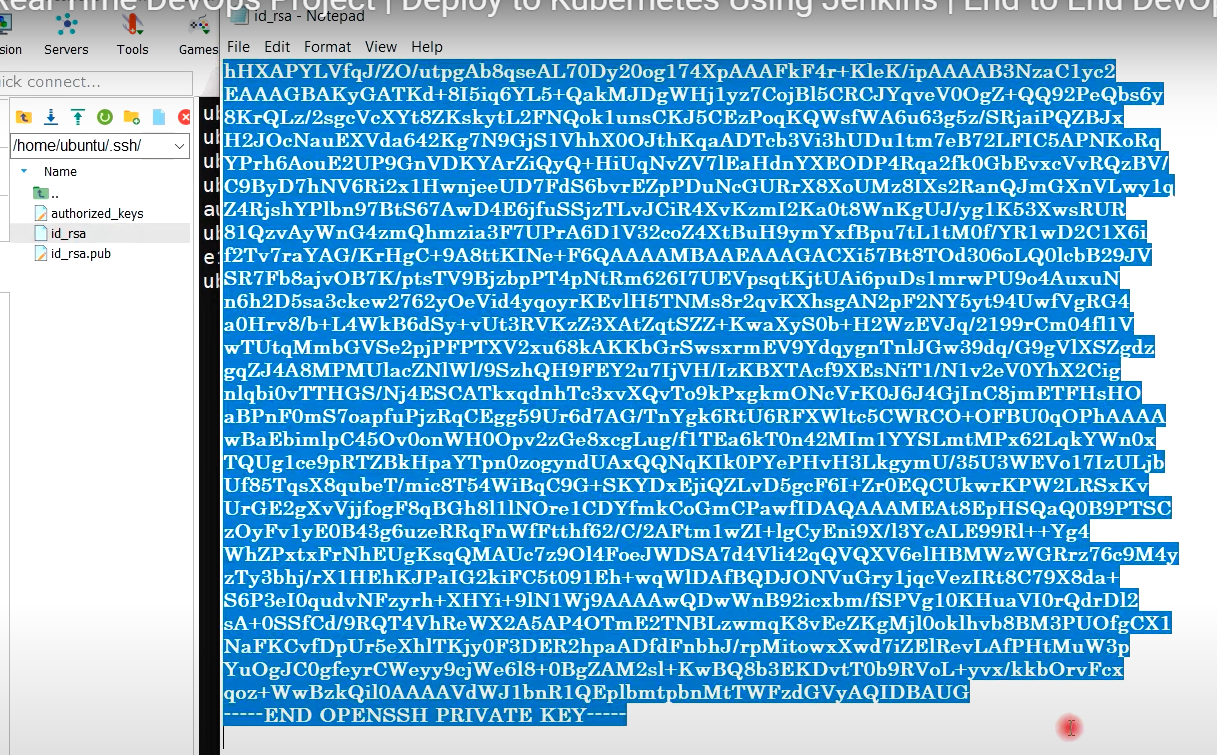
- 키생성 : ssh-keygen 실행 (id_rsa , id_rsa.pub 파일 생성)
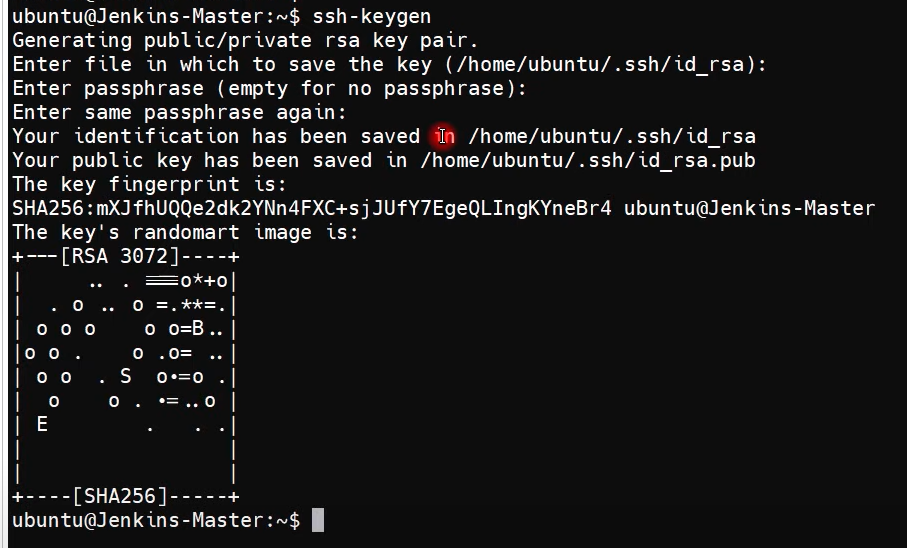
- vi id_rsa.pub 오픈 (전체 복사)

- 에이전트 서버로 이동 .ssh 폴더로 이동 --> authorized_keys 오픈해서 붙여넣기
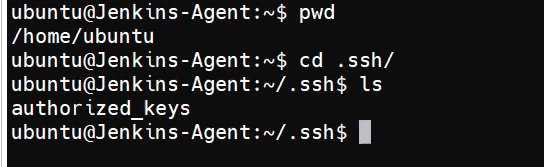

- 에이전트 서버에서 cat authorized_keys 확인하면, 마스터 노드의 공개키를 갖고 있음

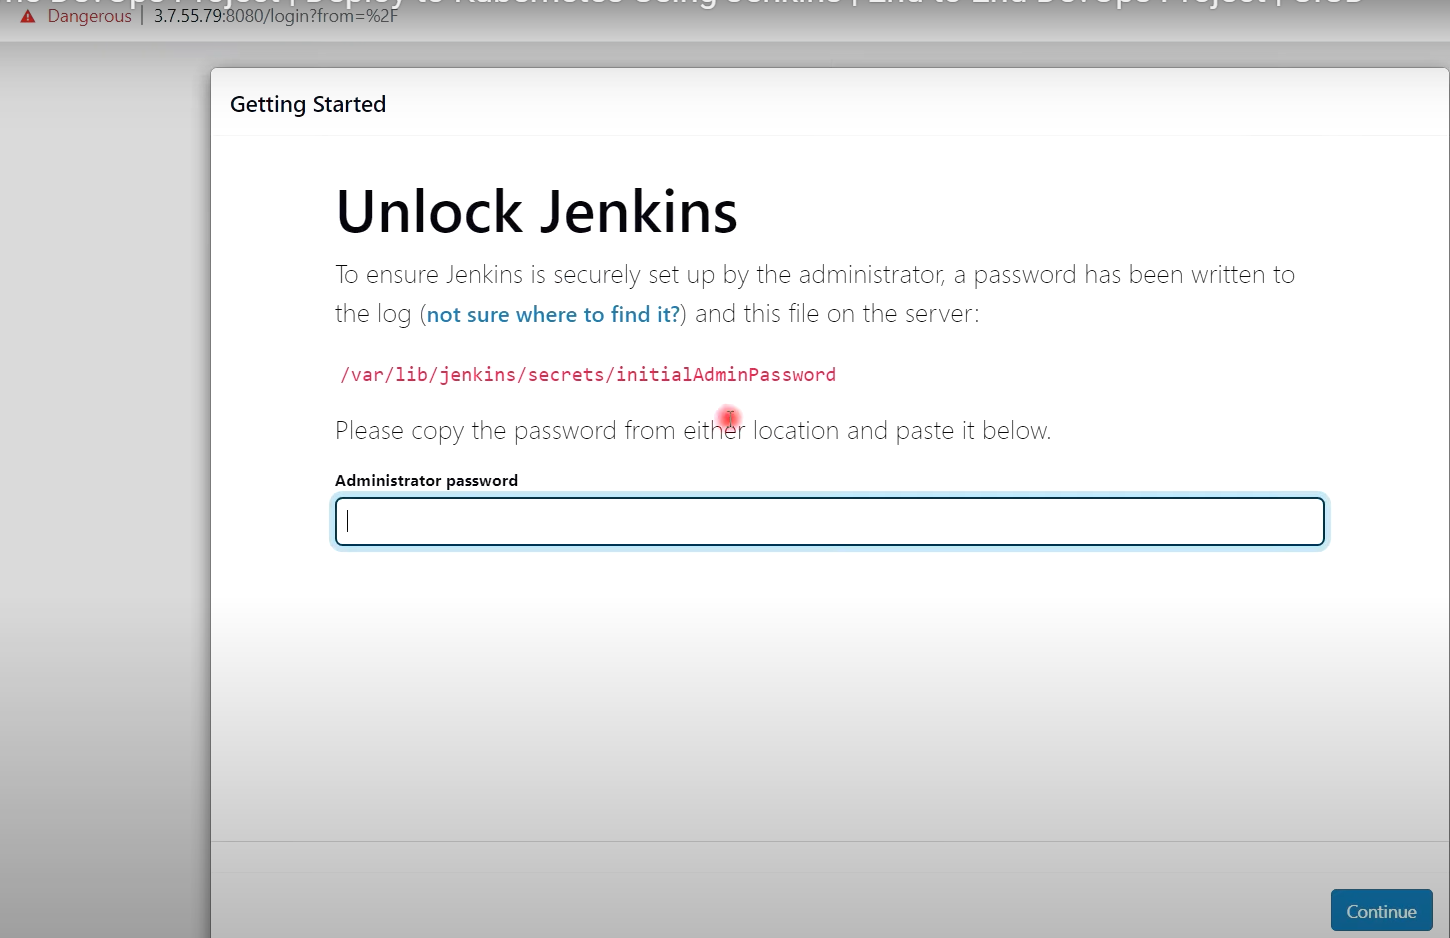
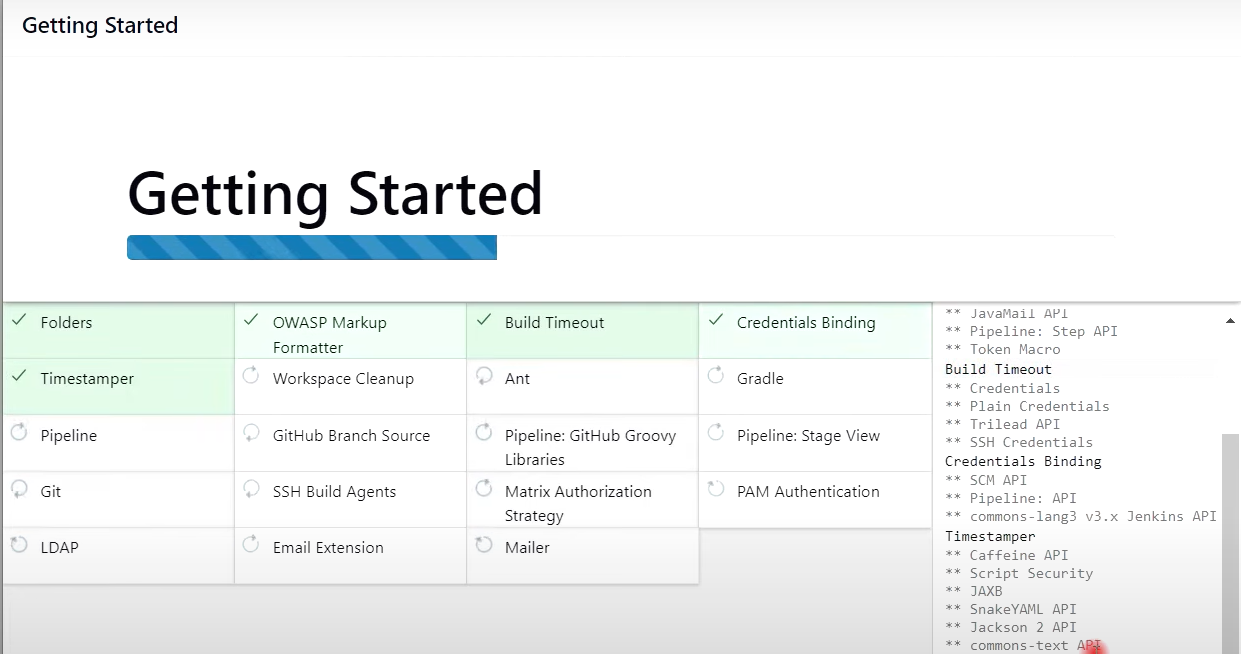
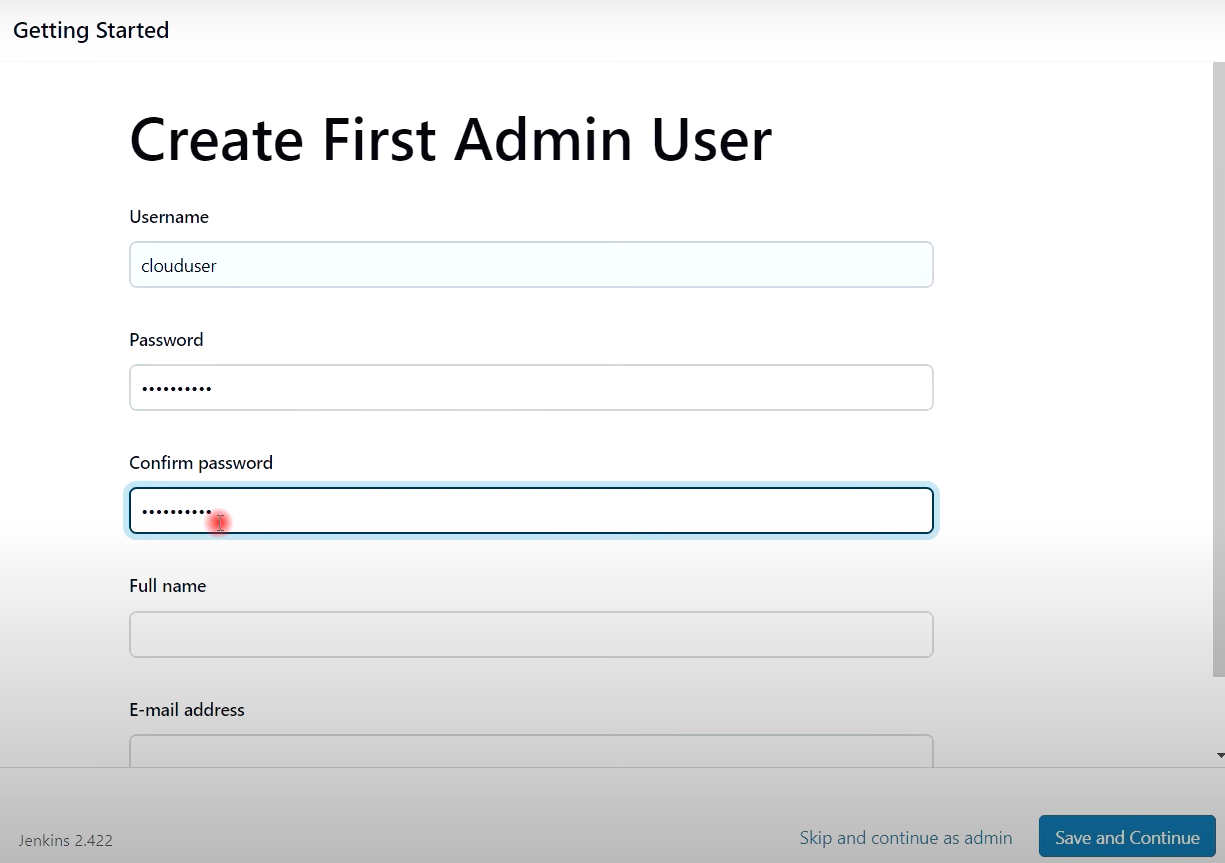
[1-3] 젠킨스 마스터 서버 웹 접속

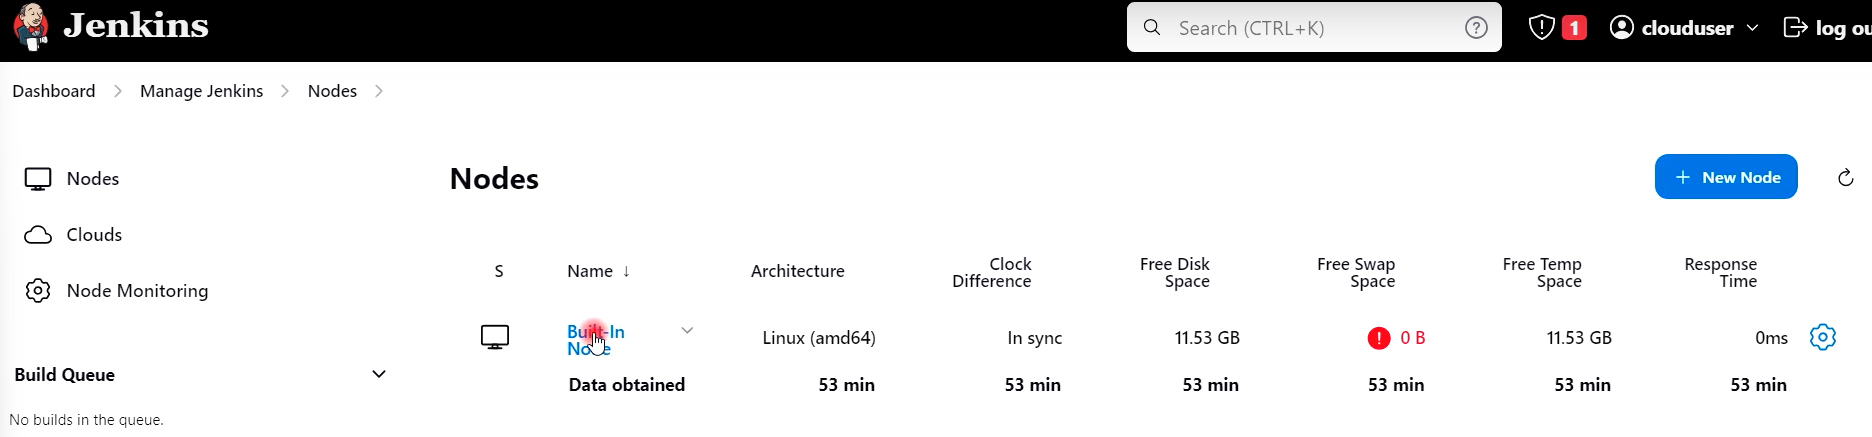
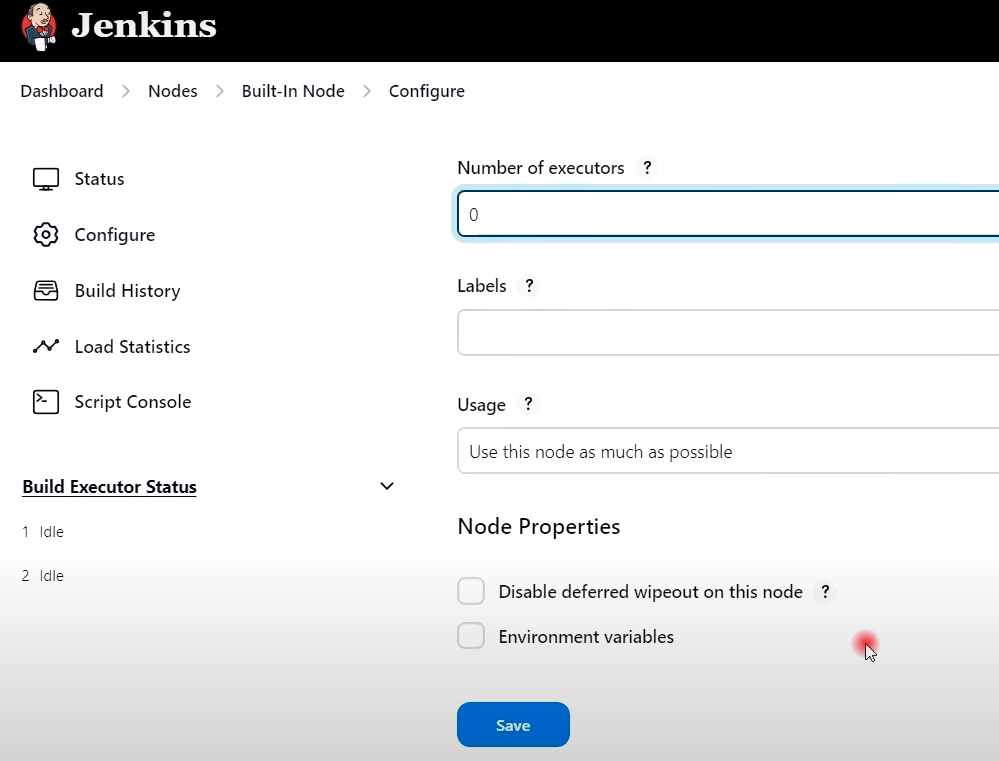
- 젠킨스 관리 --> 노드 --> Built-In Node 클릭 --> Configure 클릭 --> Number of executors '0' 선택 --> SAVE
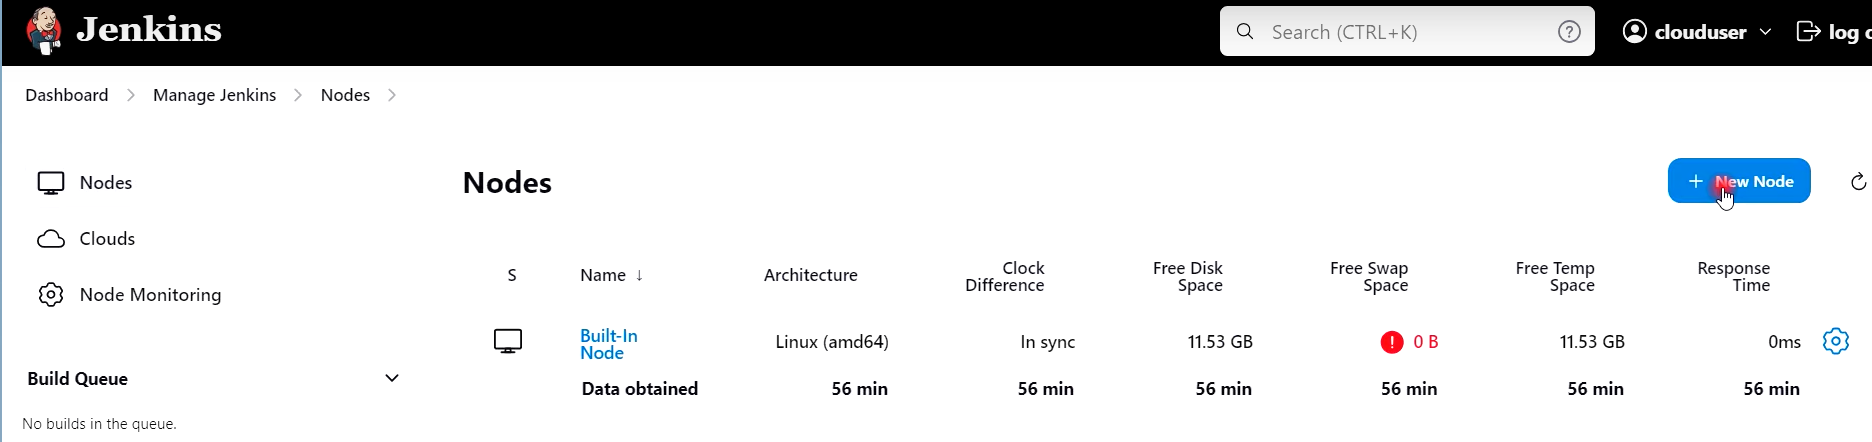
- 젠킨스 관리 --> 노드 --> New Node 클릭 --> Jenkins-Agent 생성


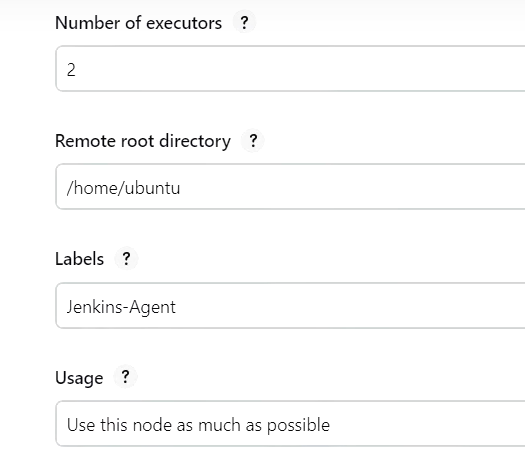
- 젠킨스 에이전트 서버의 내부 IP 등록
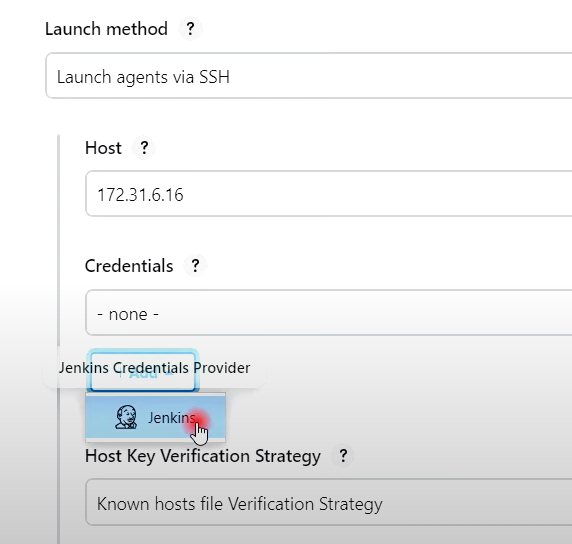
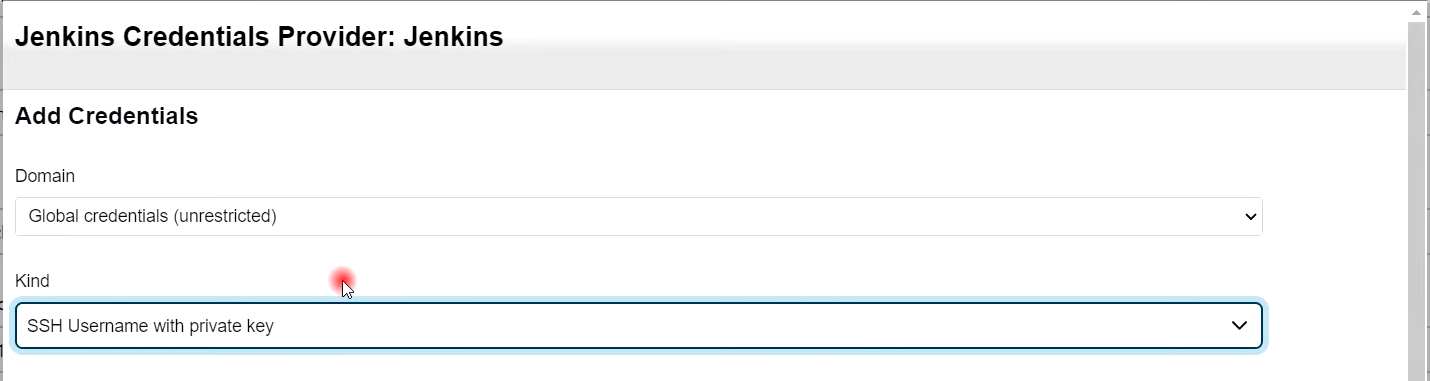

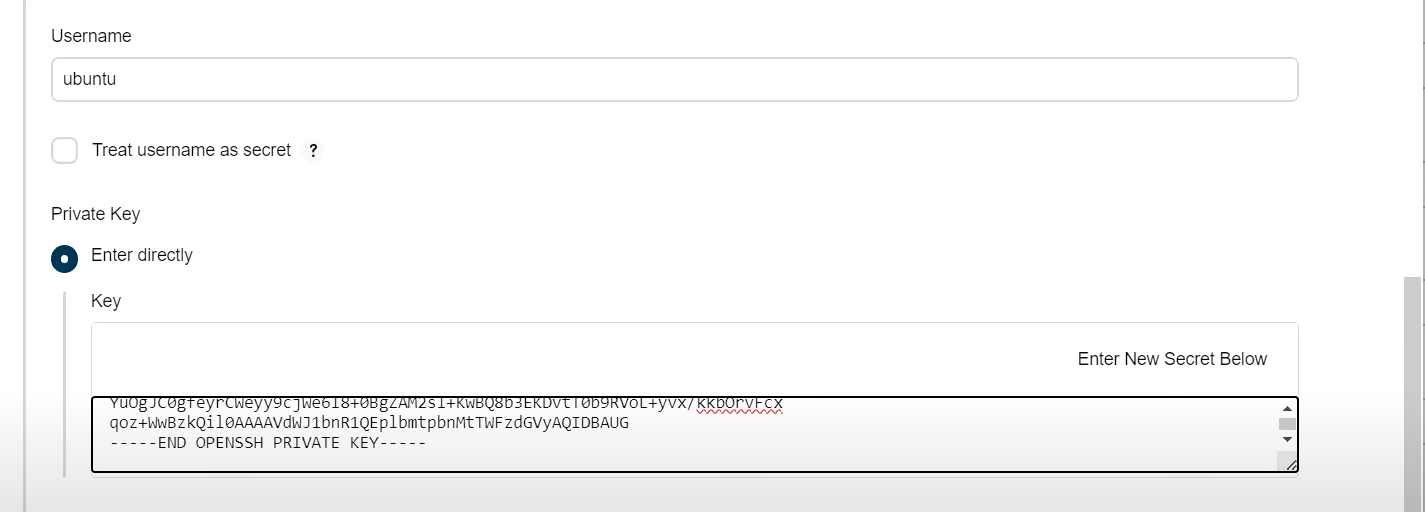
- 젠킨스 마스터 노드의 개인키 복사후, 등록

- Non verifying Verification Strategy 선택

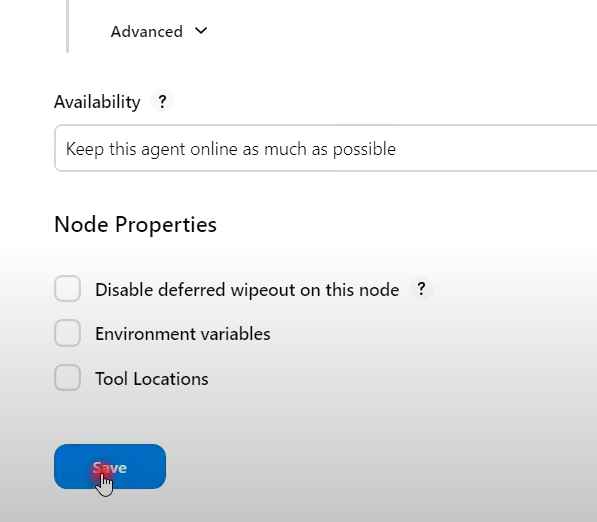
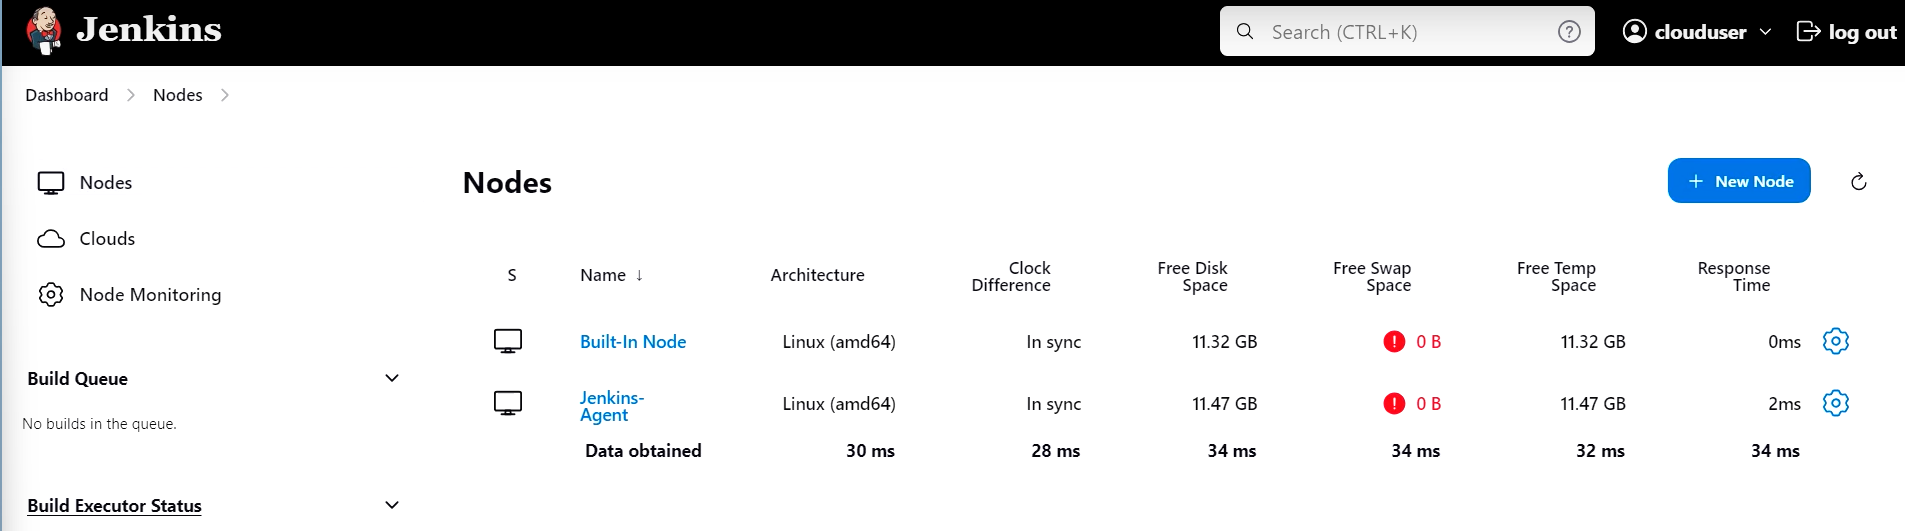
- 최종적으로 에이전트 서버가 젠킨스에 추가됨
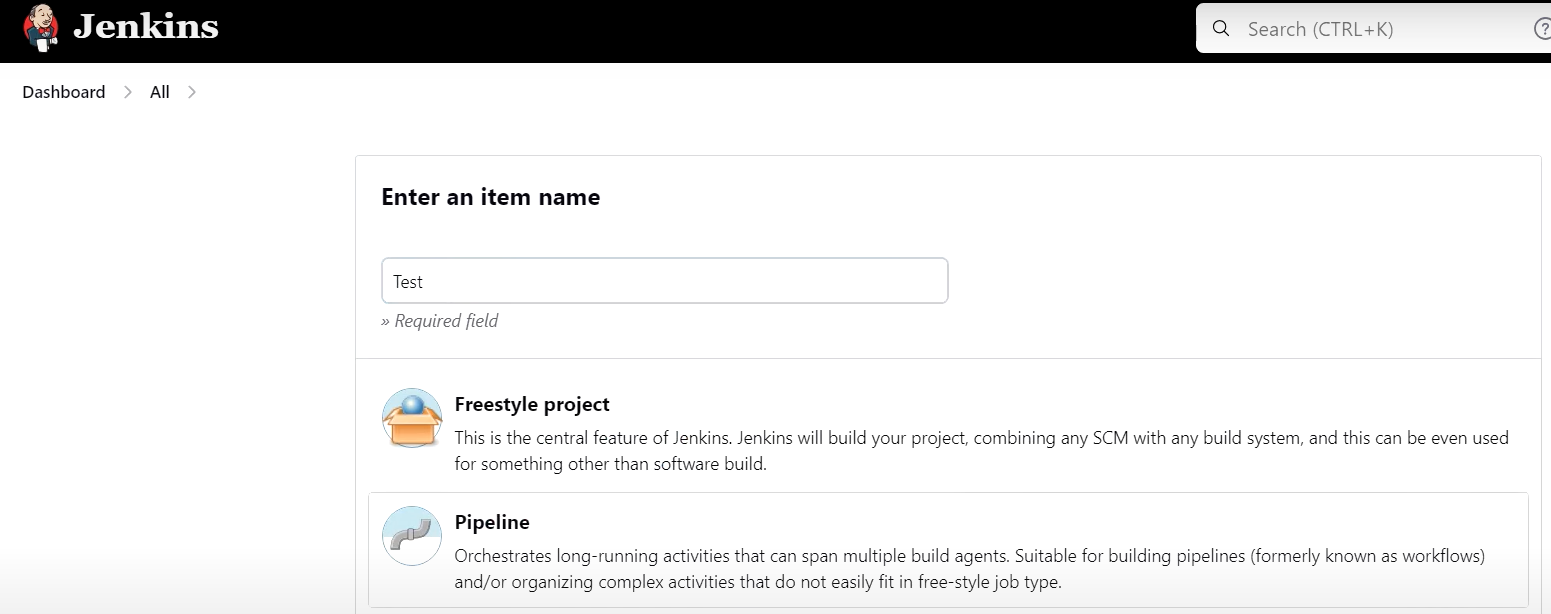
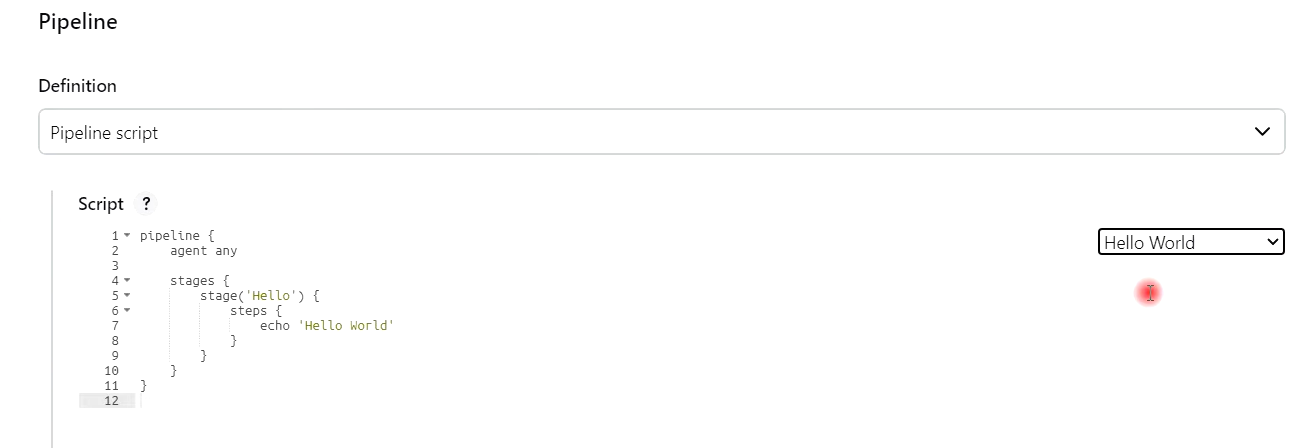
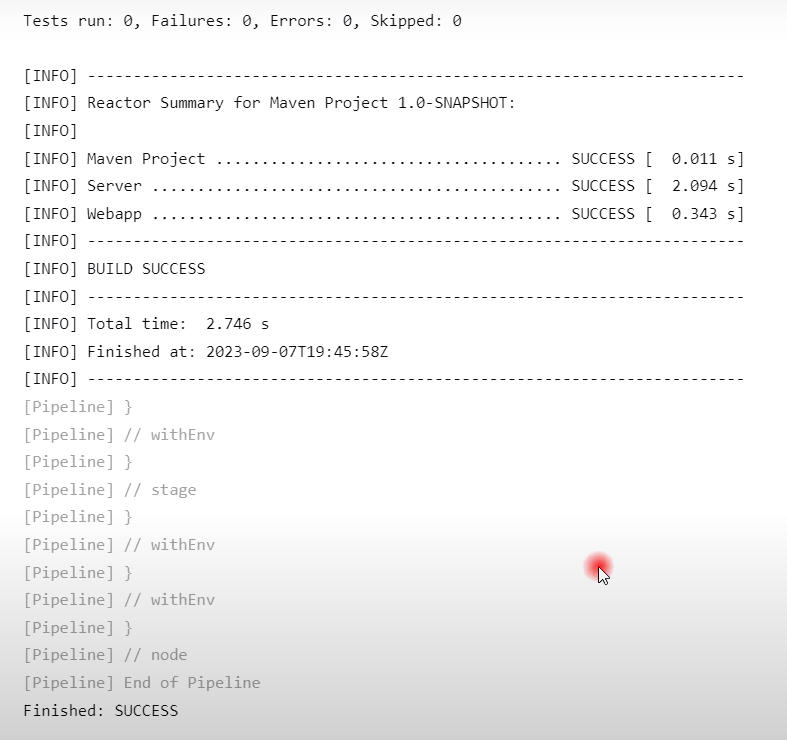
[1-4] 젠킨스 테스트용 빌드 수행 (24분)
- 파이프라인 생성 --> Test --> ok 클릭 --> Hello world 생성 --> Save

[2] 젠킨스 서버에 Maven 설정 및 Github 자격증명 등록 (25분)

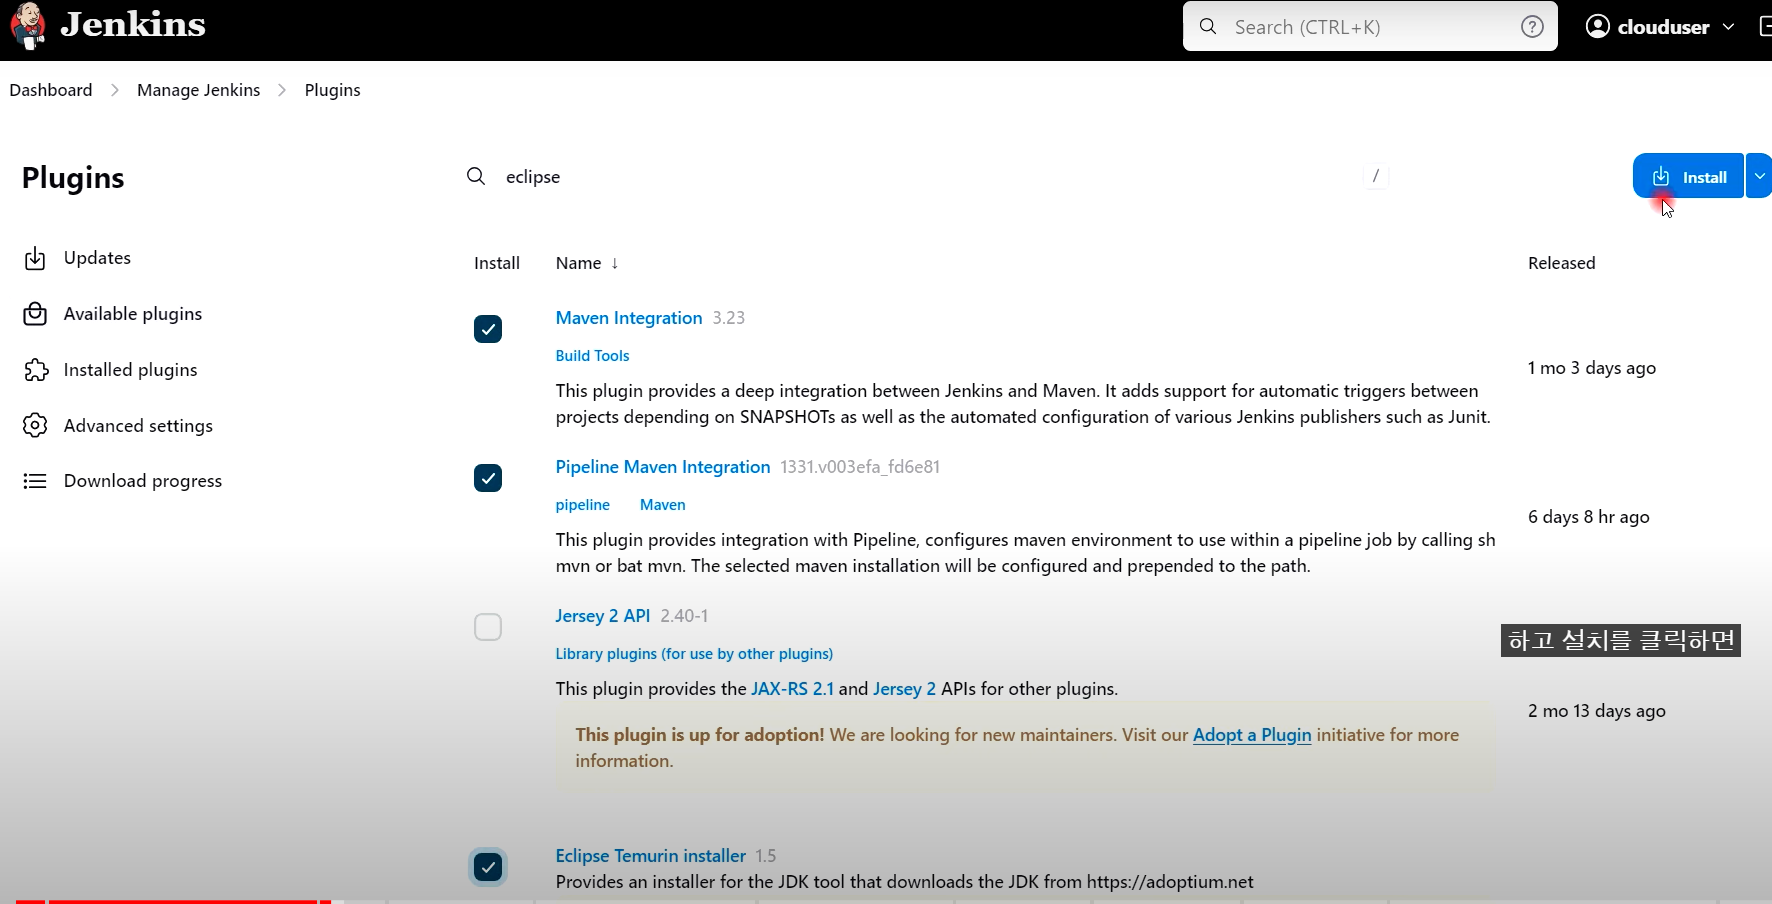
- 플러그인 설치 (젠킨스에 내장 설치 방법)
- Maven Integration 3.23
- Pipeline Maven Integration
- Eclipse Temurin installer
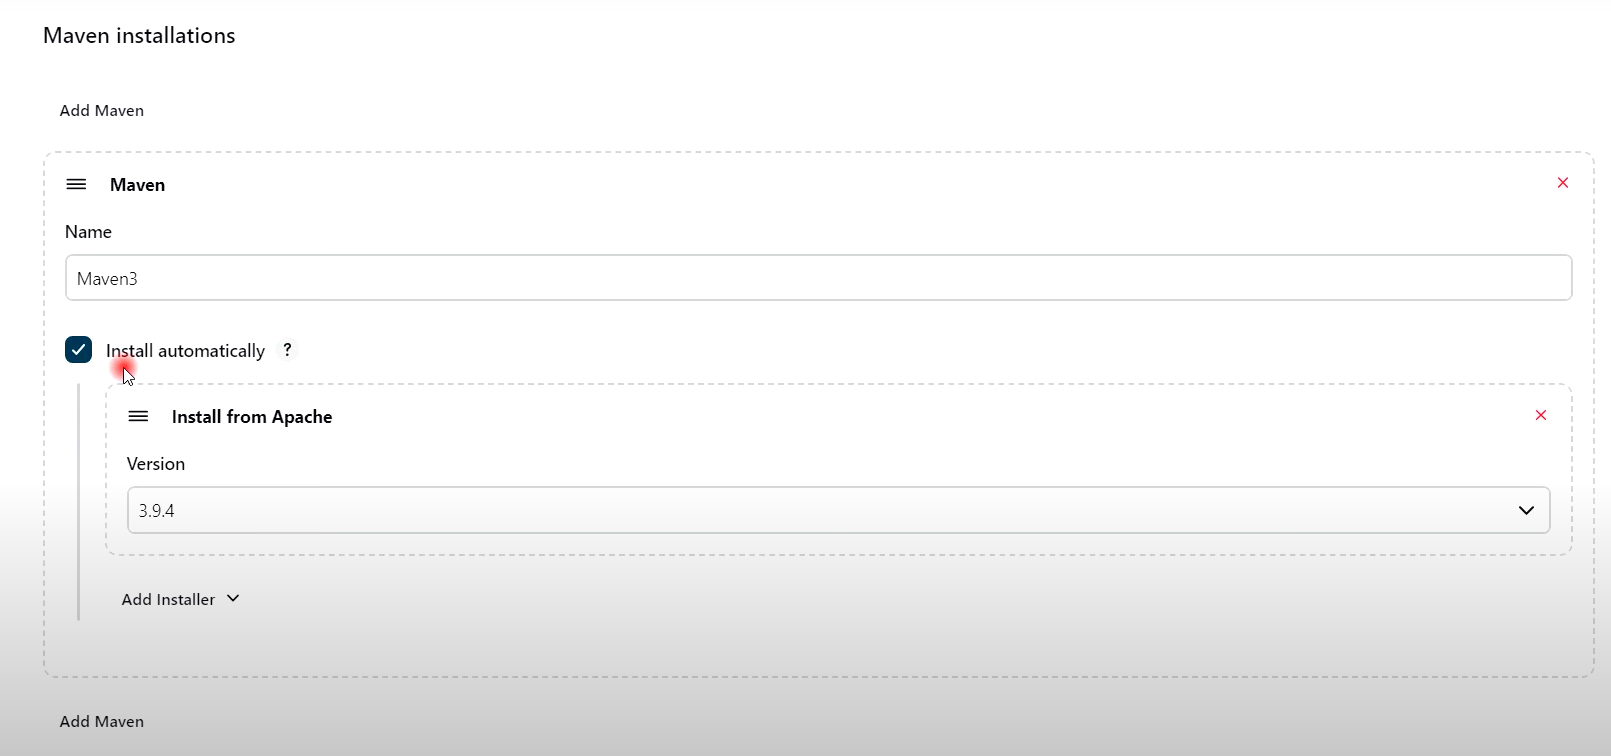
1) 젠킨스 관리 --> Tools --> Maven 설정 (기존 maven-3.9.5 , /opt/maven-3.9.5 했지만 추가 설정함)
2) 젠킨스 관리 --> Tools --> JDK installations 설정

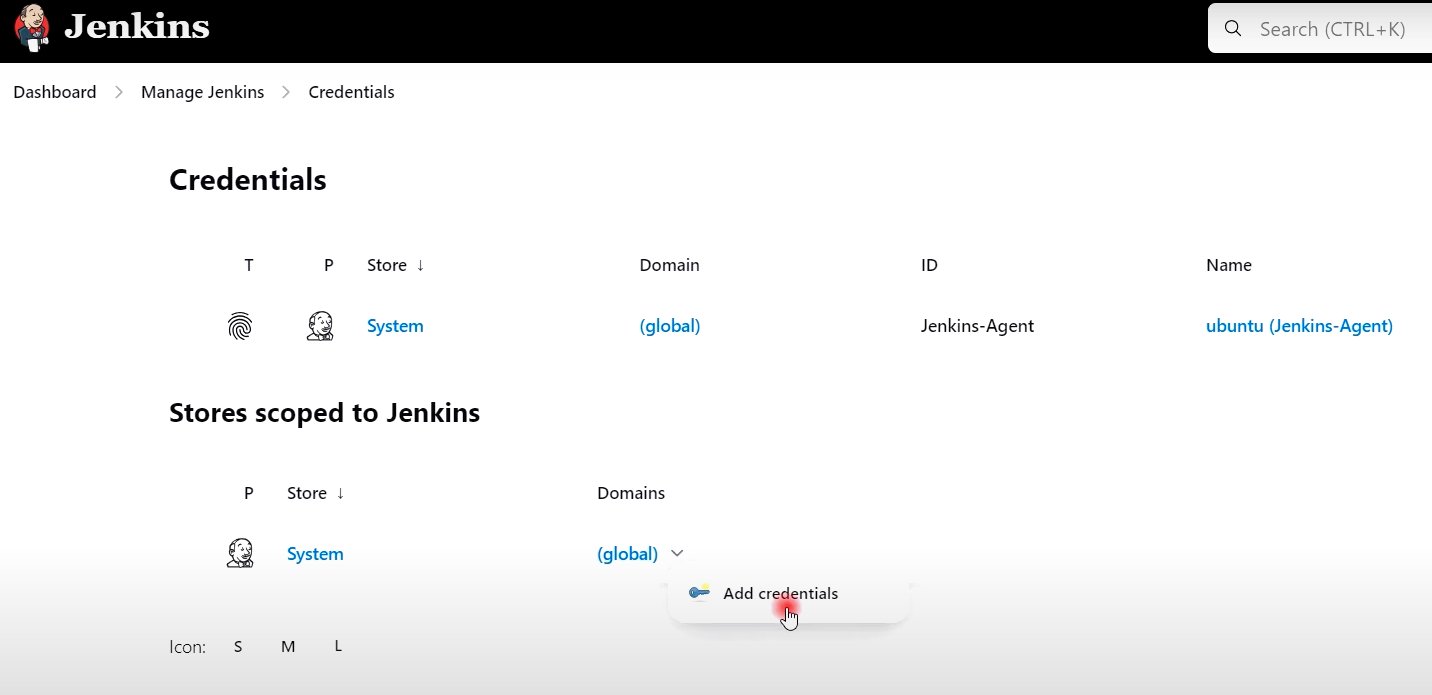
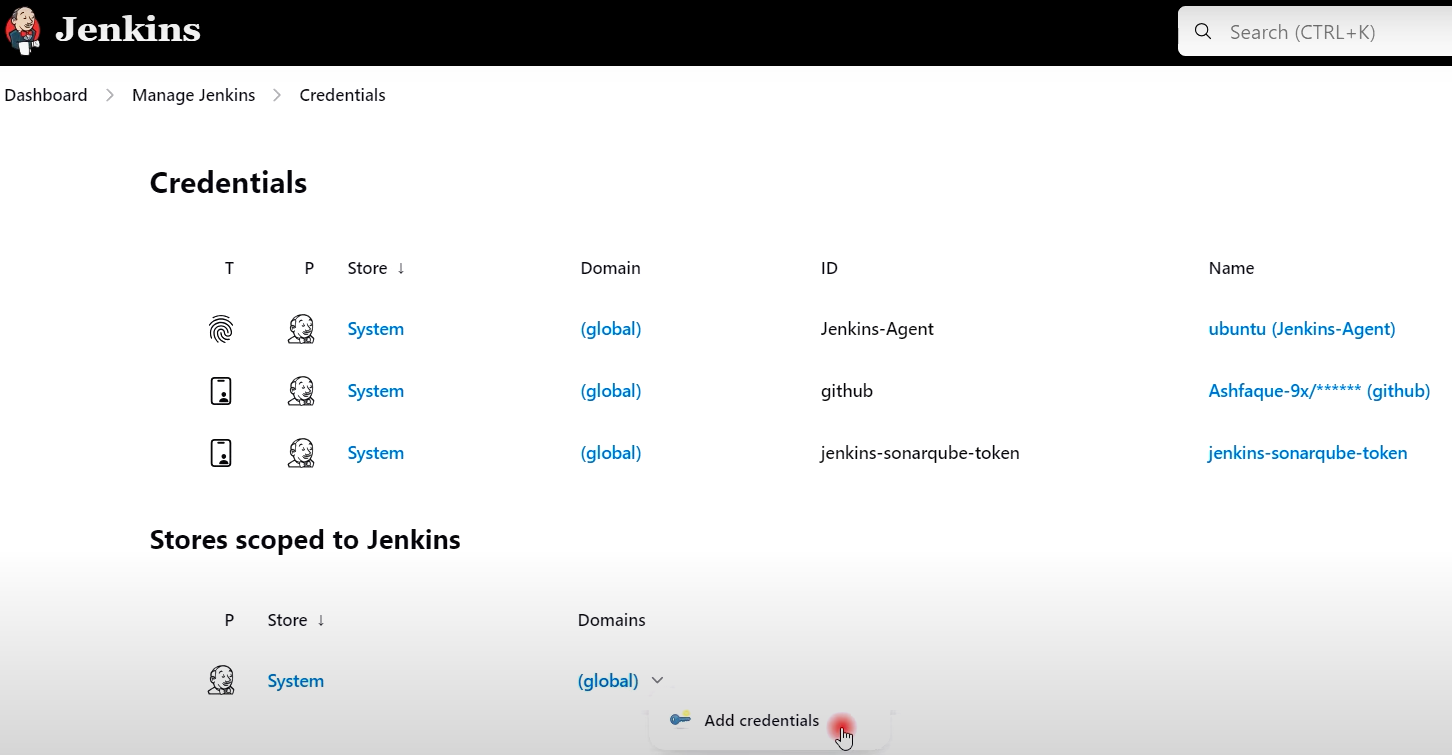
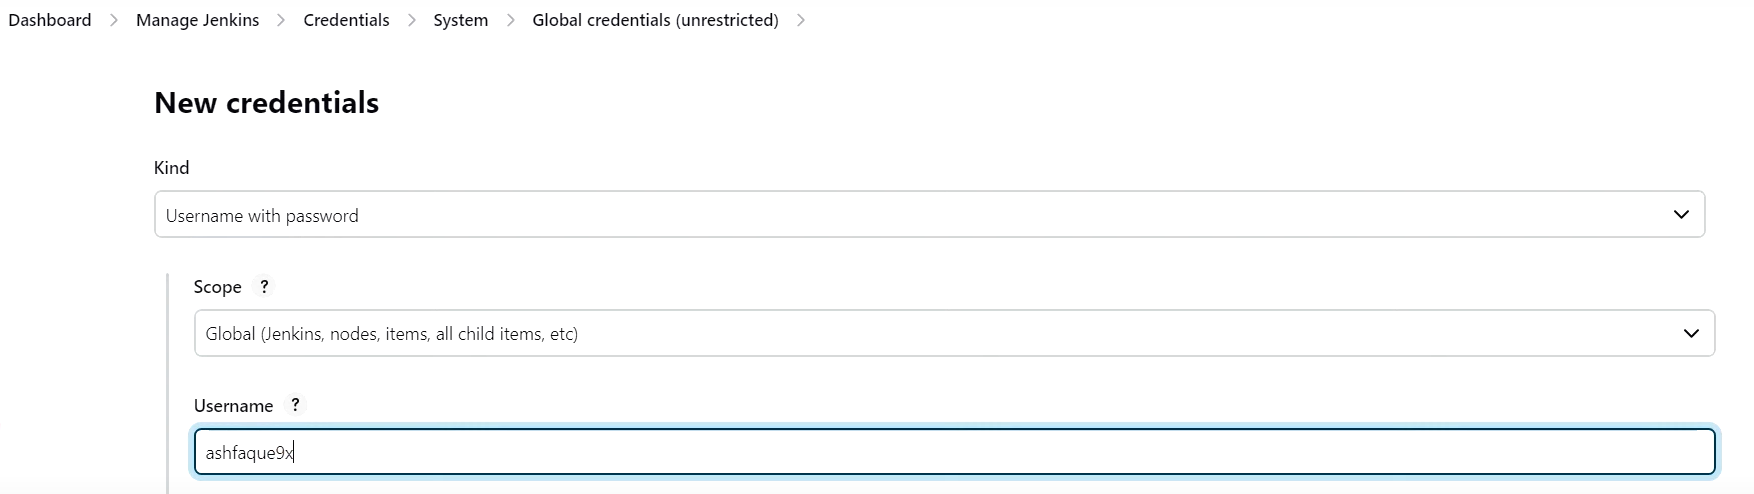
3) Github 자격증명 --> 젠킨스에 추가
- 젠킨스 관리 --> Credentials --> Add Credentials (Username 과 Password 동일해야 함)

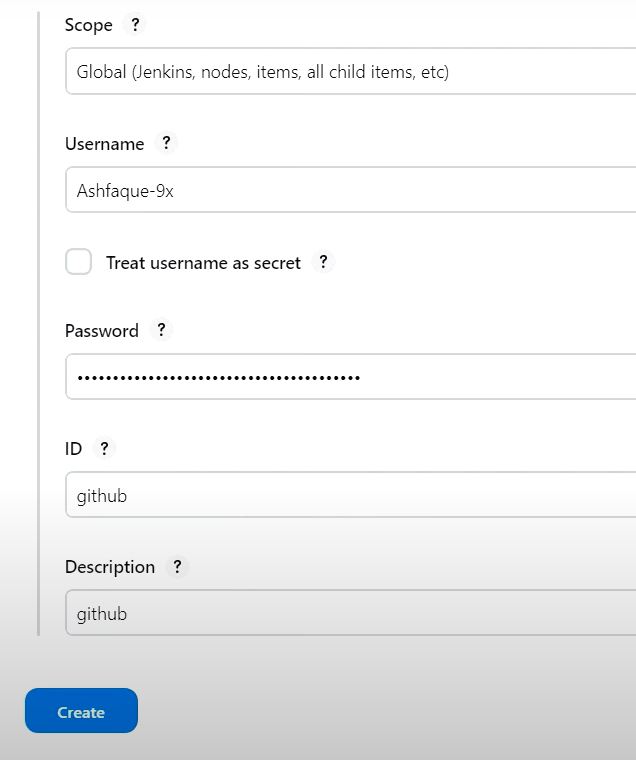
- (위의 password 에 깃허브 토큰 입력)
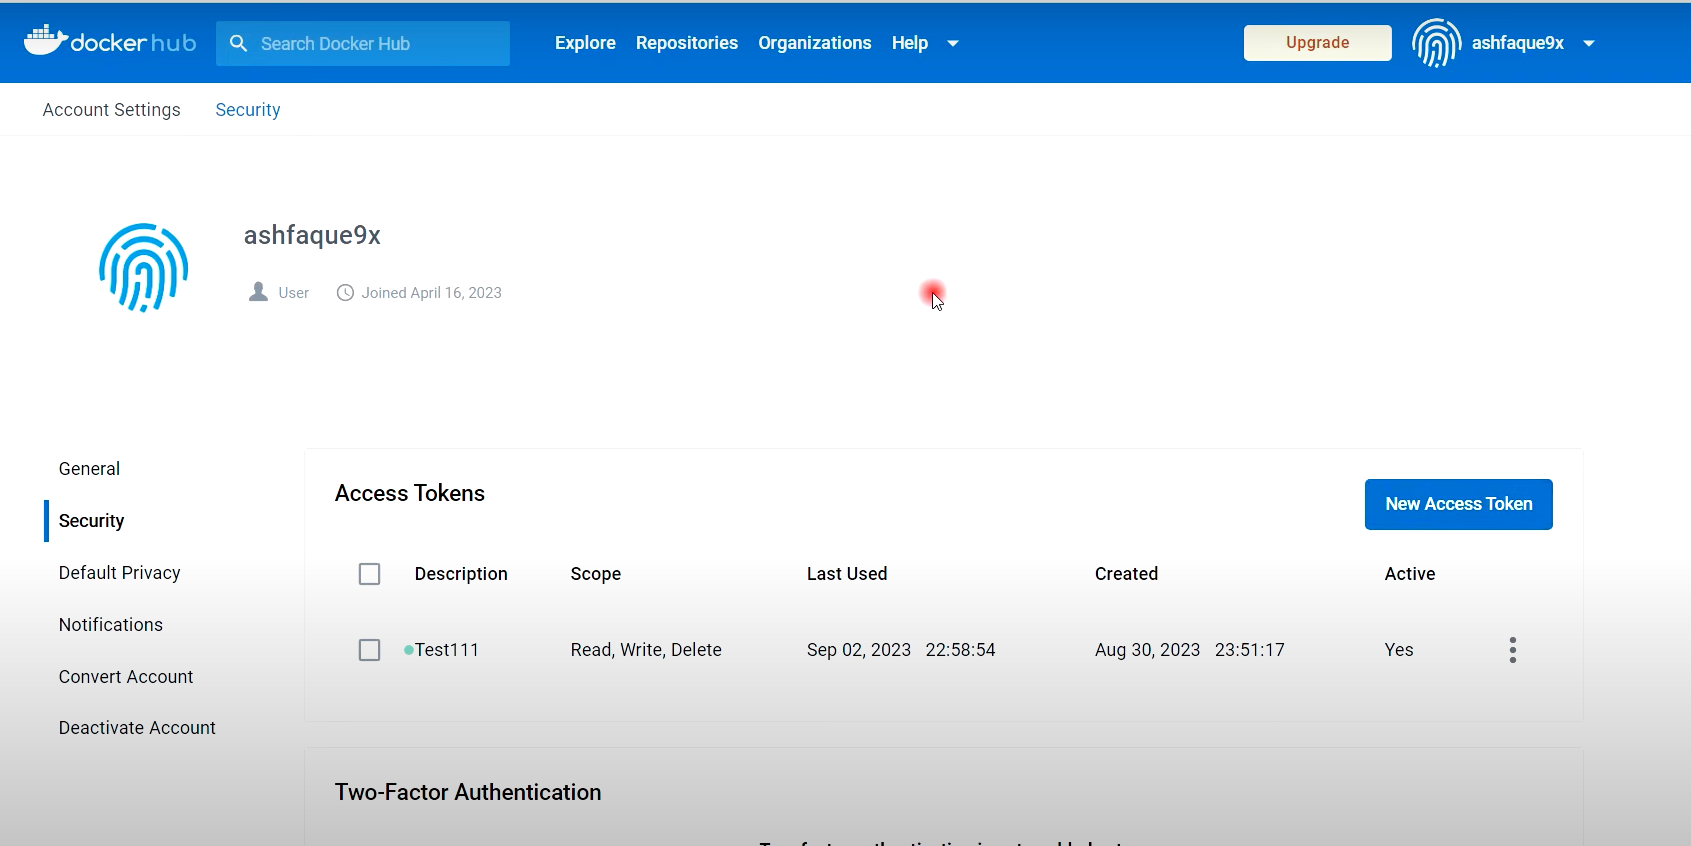
- 깃허브로 가서 토큰 확인 --> Settings --> Developer settings --> Tokens (classic)
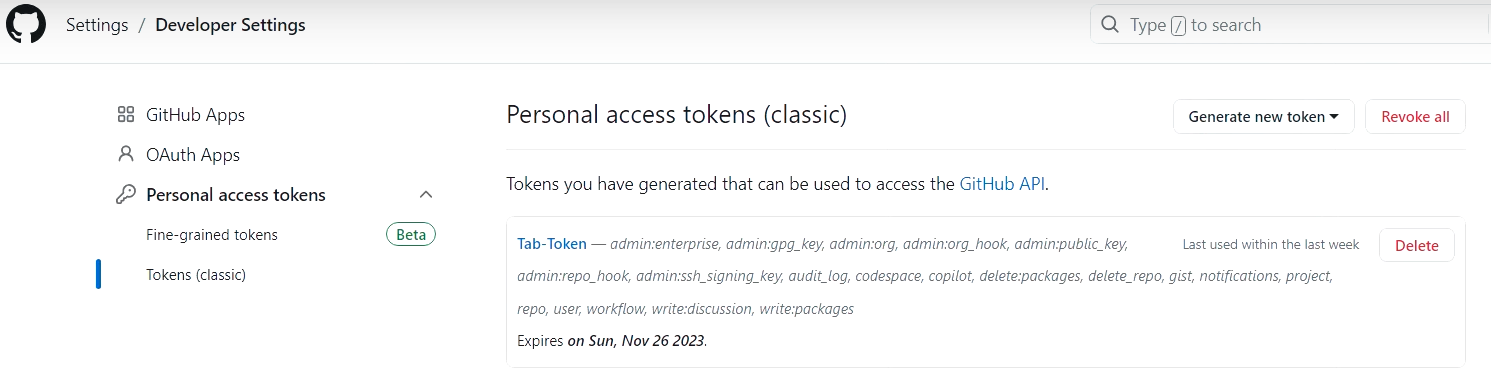

- Github 자격증명 생성 완료

[3] 빌드용 Jenkinsfile 생성 & 테스트 아티팩트, CI Job 생성 (30분)

https://github.com/Ashfaque-9x/register-app

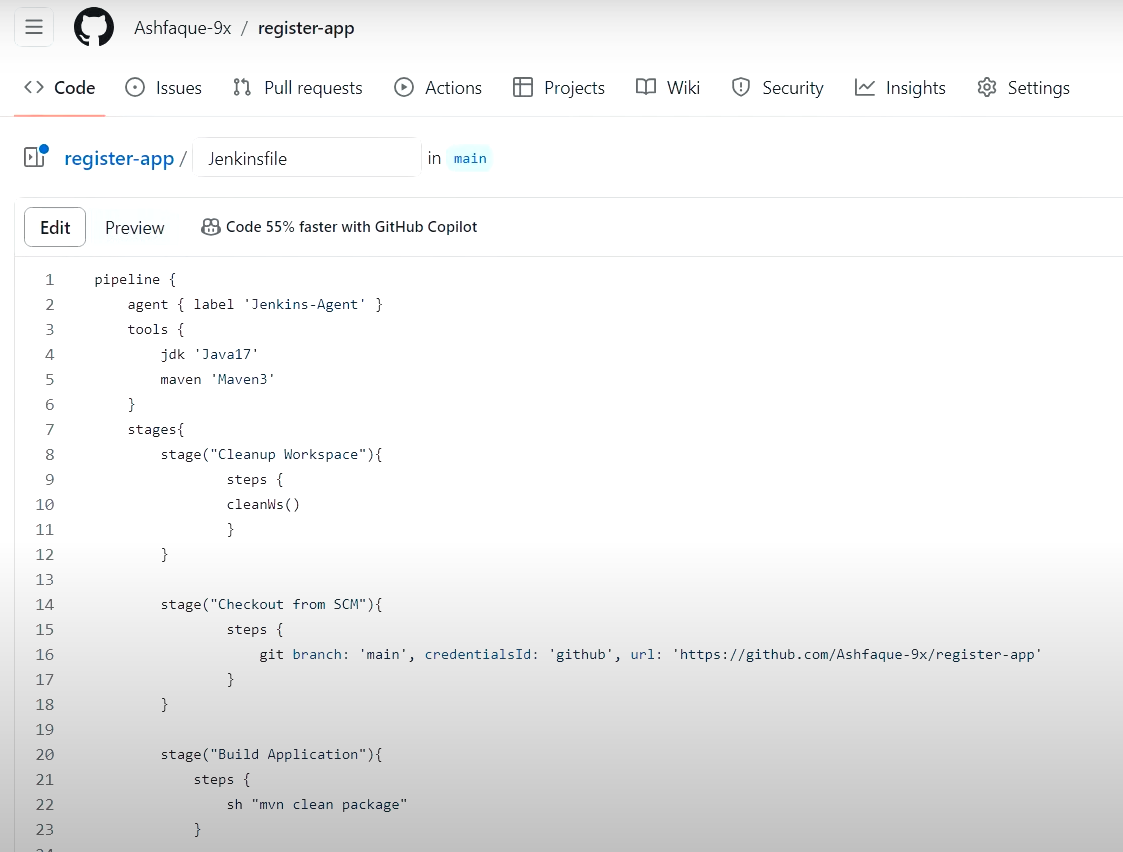
- 빌드용 Jenkinsfile 생성 (영상용)
pipeline {
agent { label 'Jenkins-Agent' }
tools {
jdk 'Java17'
maven 'Maven3'
}
stages{
stage("Cleanup Workspace"){
steps {
cleanWs()
}
}
stage("Checkout from SCM"){
steps {
git branch: 'main', credentialsId: 'github', url: 'https://github.com/dhrbduf/register-app'
}
}
stage("Build Application"){
steps {
sh "mvn clean package"
}
}
stage("Test Application"){
steps {
sh "mvn test"
}
}
}
}
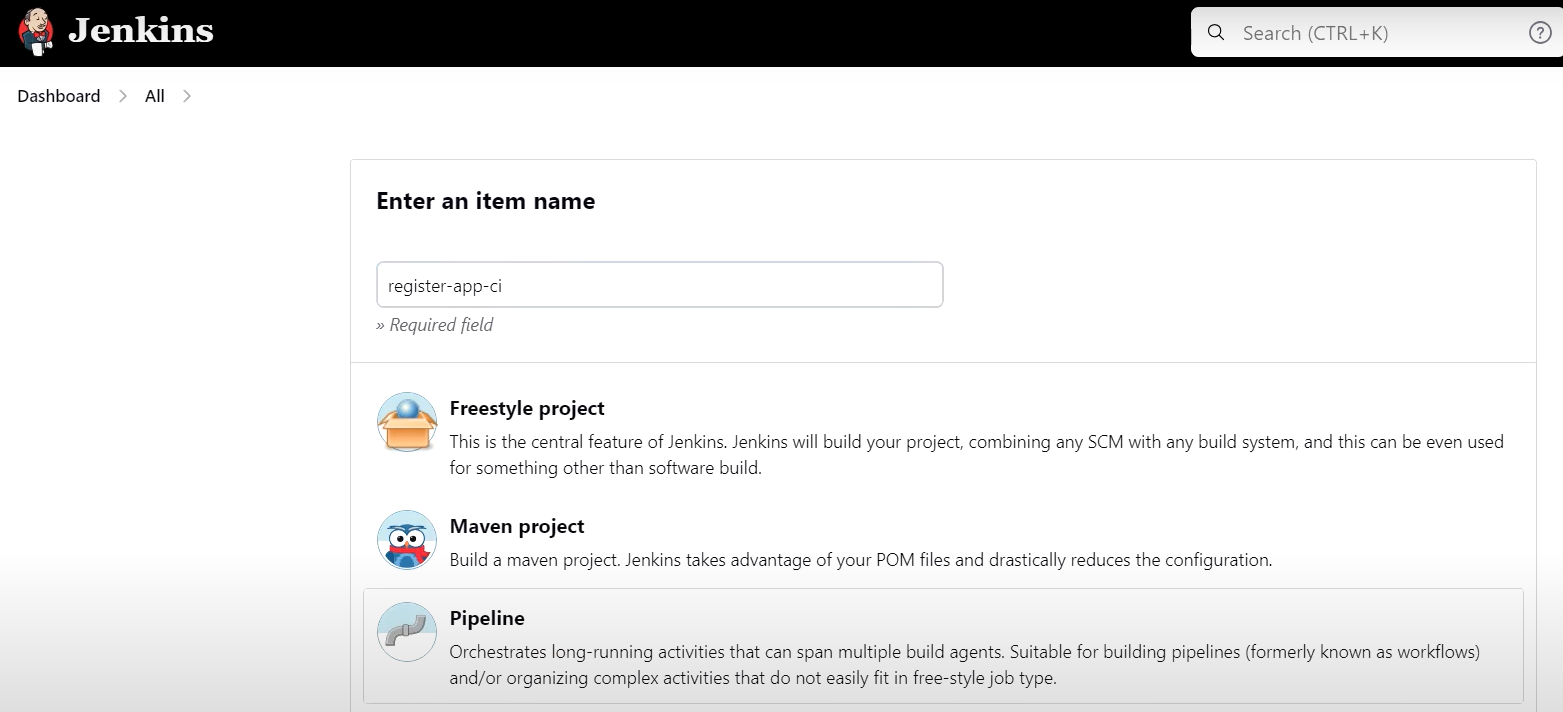
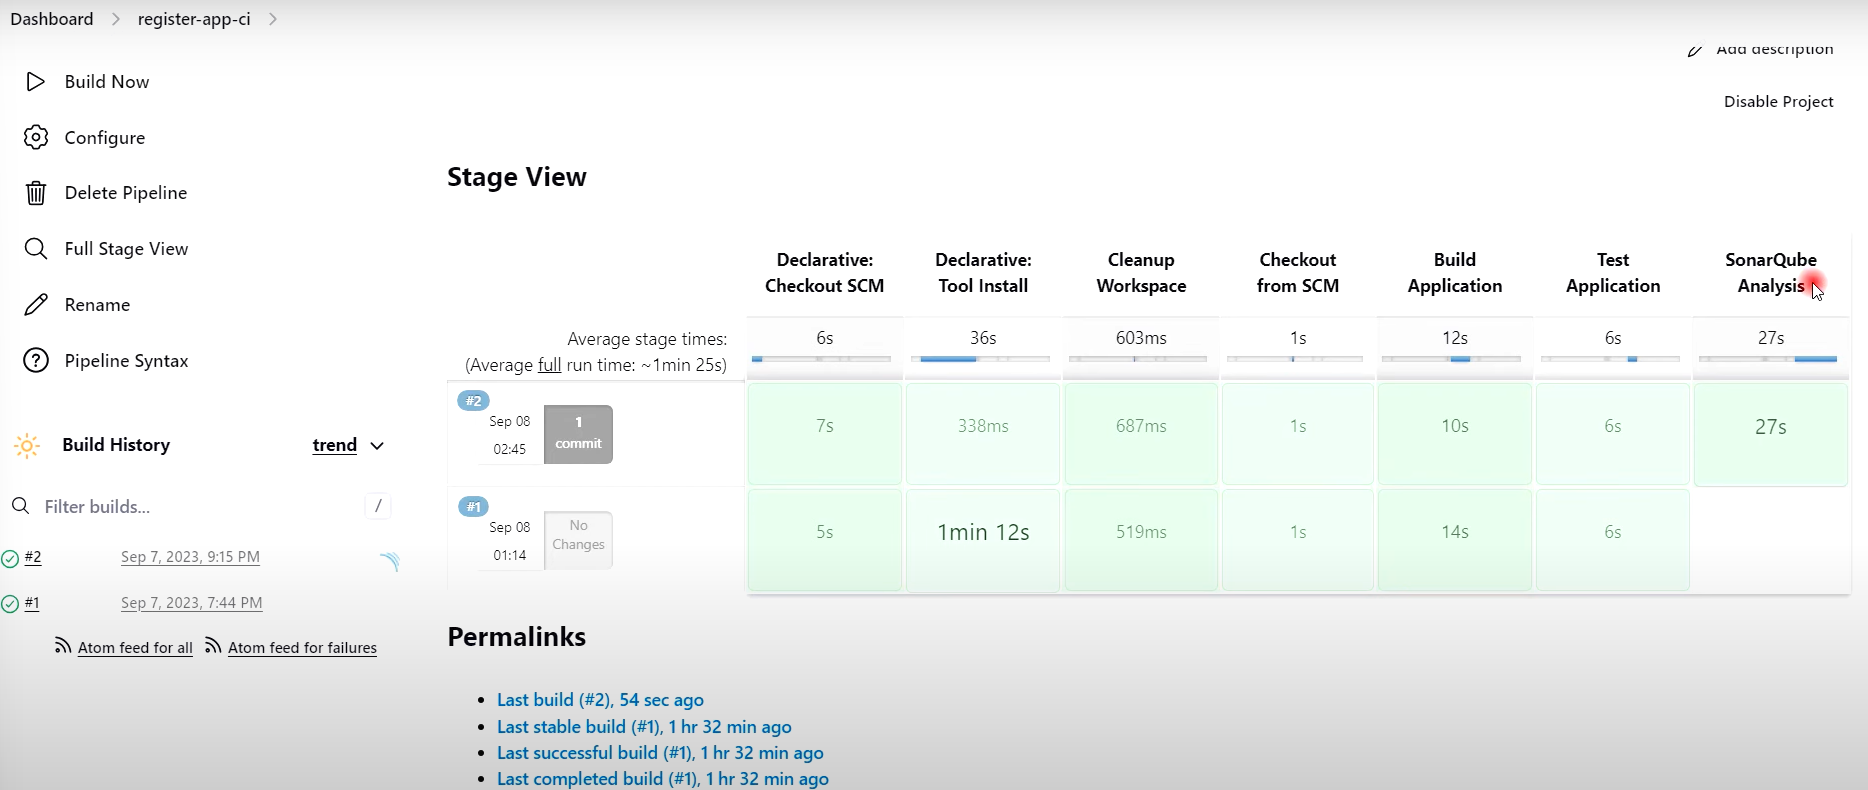
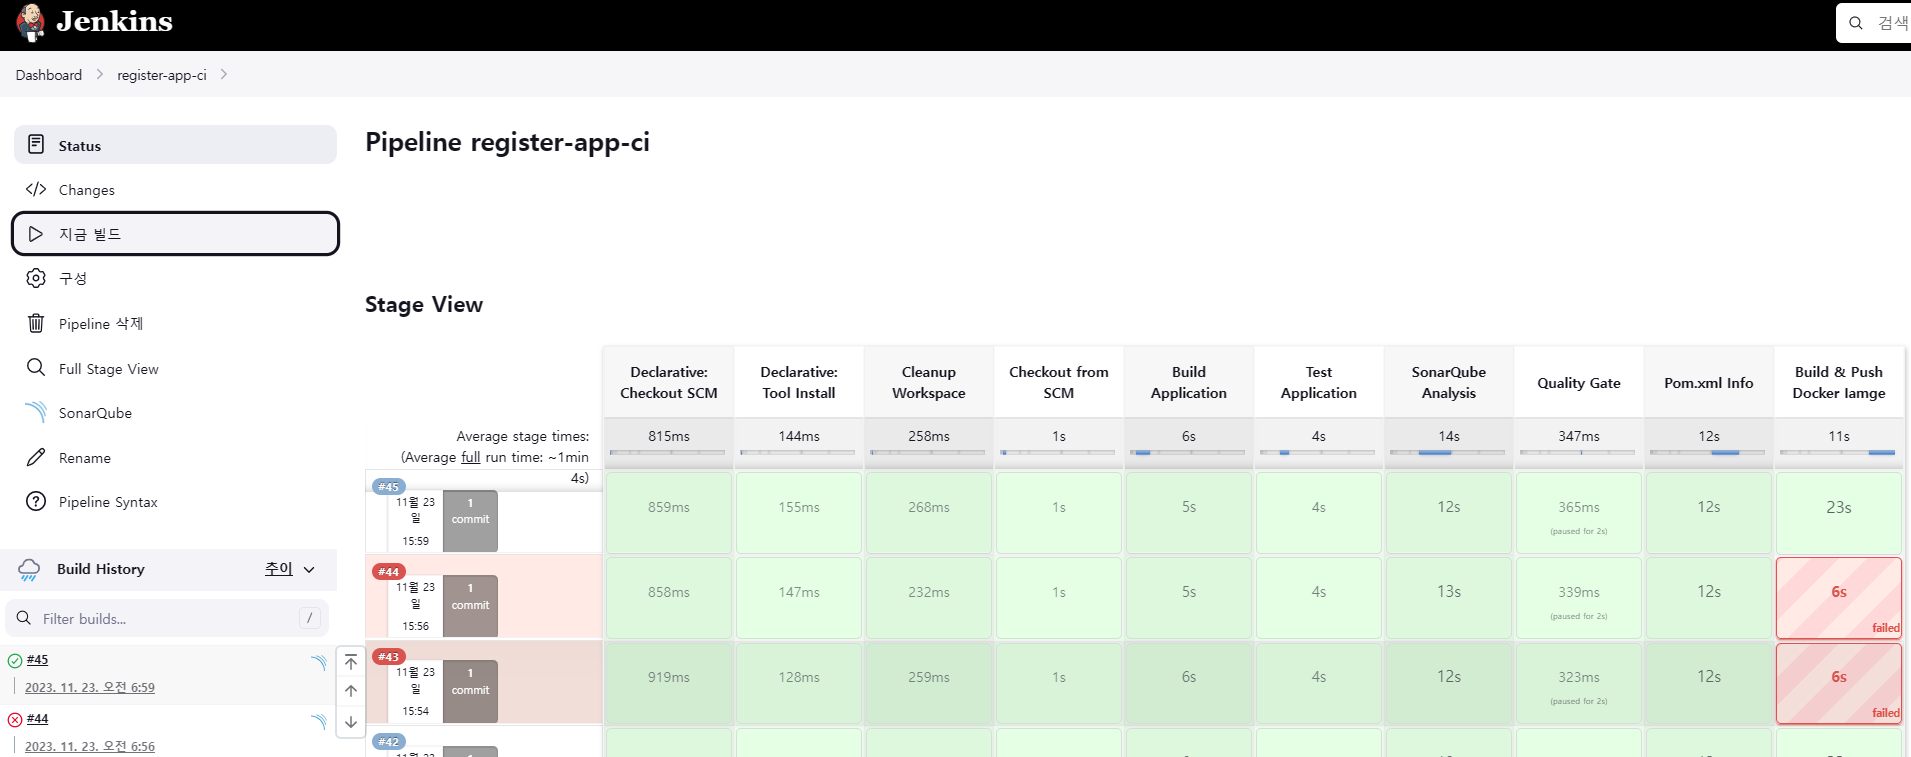
- 젠킨스 파이프라인 CI Job 생성 (42분)
: register-app-ci

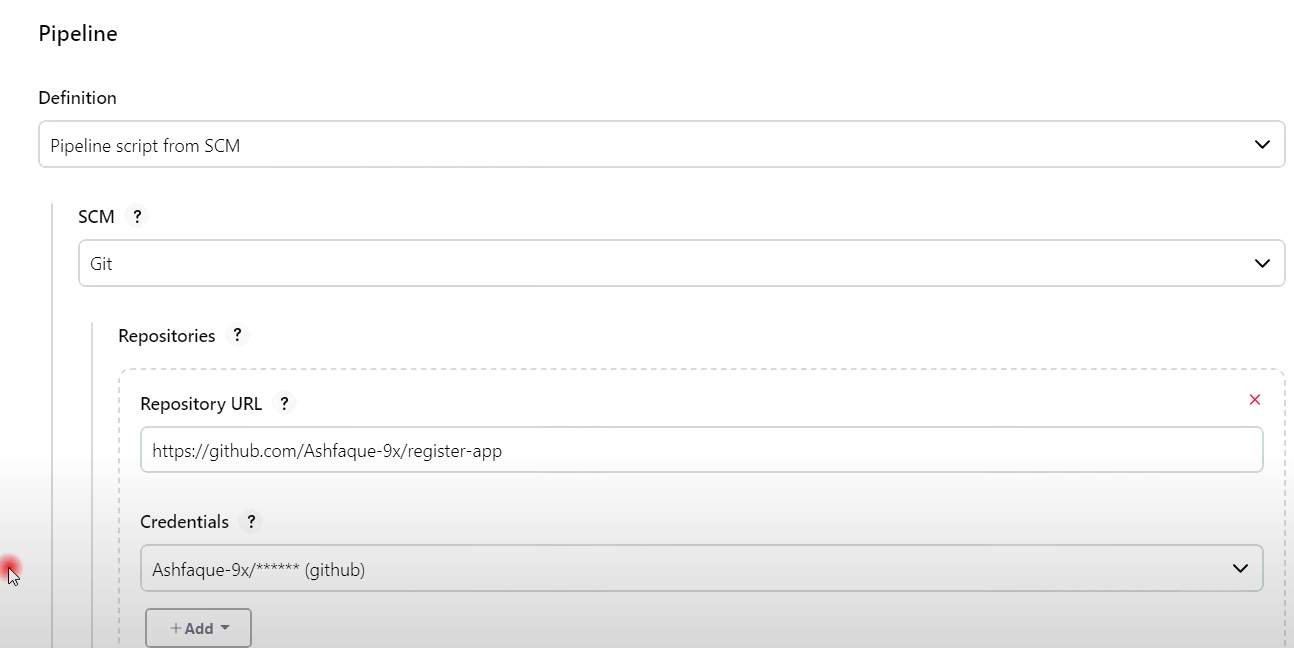
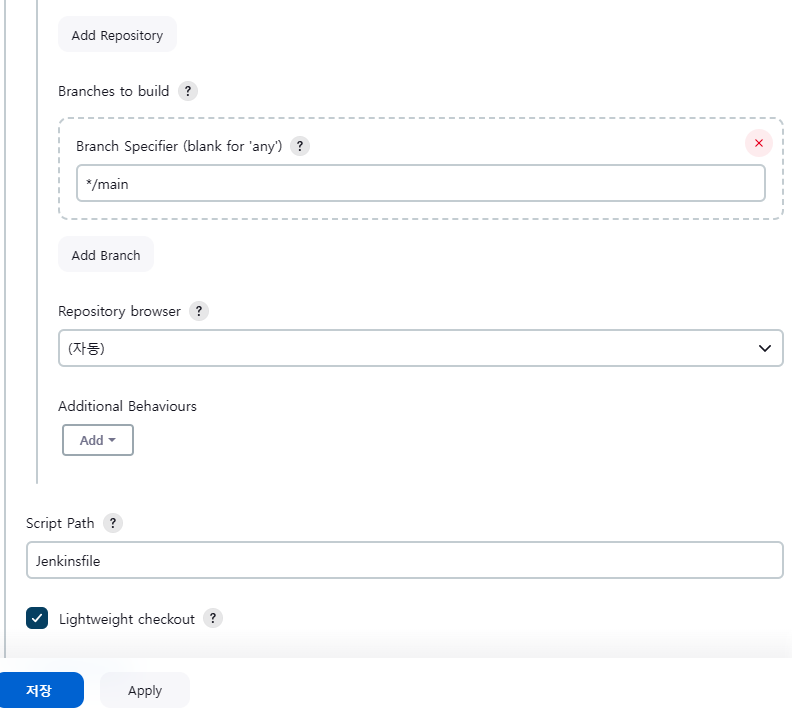
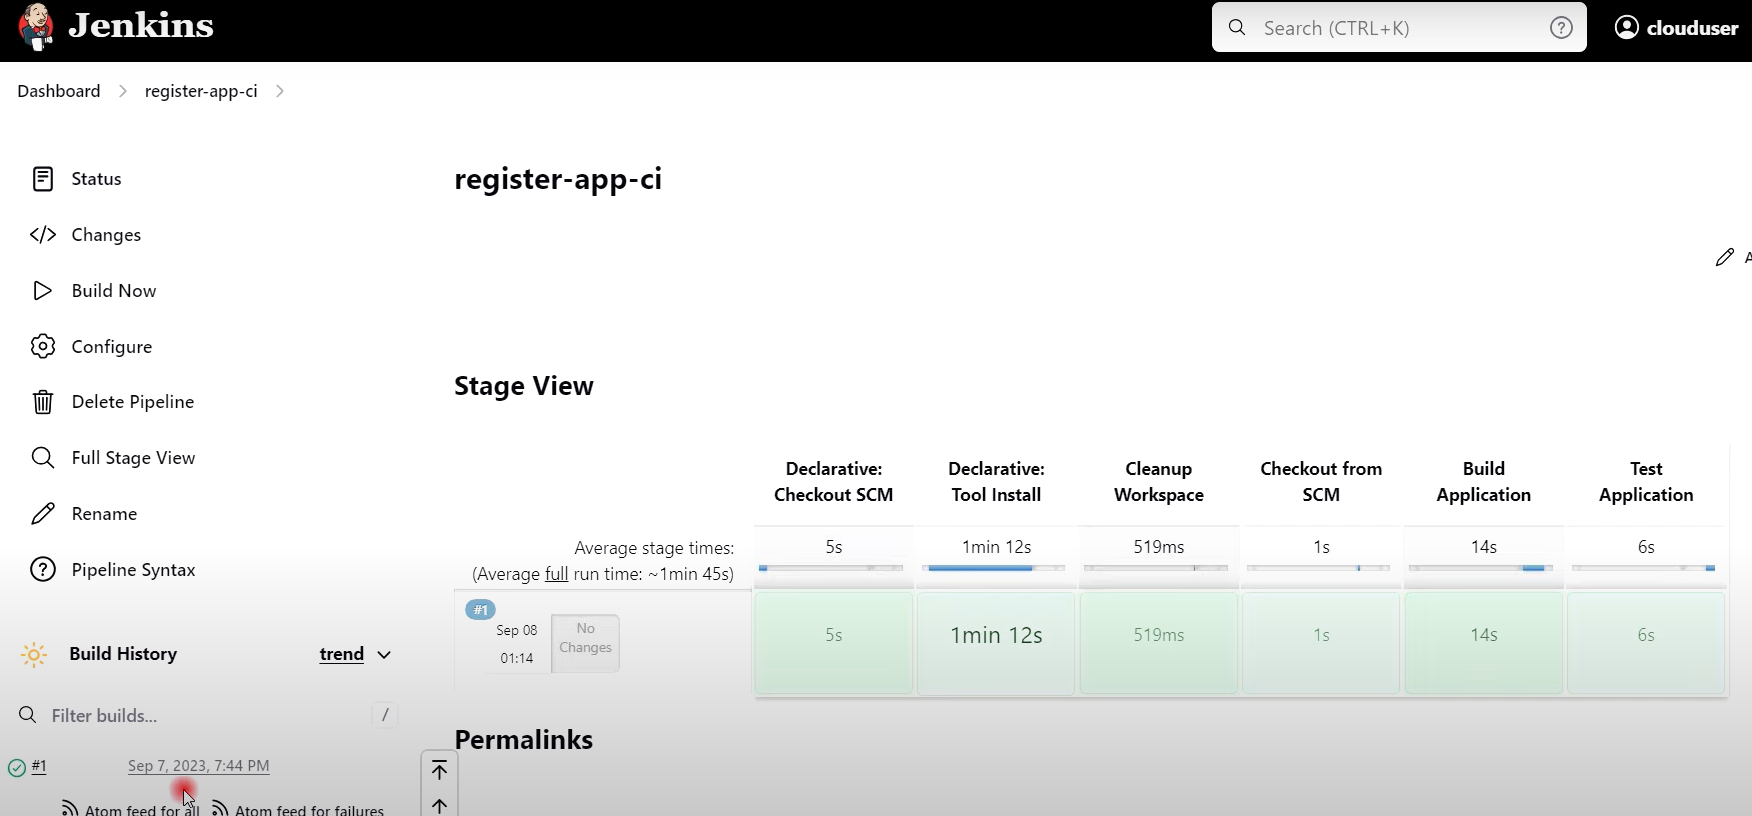
- 빌드용 Jenkinsfile 생성 (적용)
pipeline {
agent any
tools {
jdk 'Java17'
maven 'Maven3'
}
stages{
stage("Cleanup Workspace"){
steps {
cleanWs()
}
}
stage("Checkout from SCM"){
steps {
git branch: 'main', credentialsId: 'github', url: 'https://github.com/dhrbduf/register-app'
}
}
stage("Build Application"){
steps {
sh "mvn clean package"
}
}
stage("Test Application"){
steps {
sh "mvn test"
}
}
}
}
[4] 소나큐브 설치 및 설정 (42분)

## Update Package Repository and Upgrade Packages
$ sudo apt update
$ sudo apt upgrade
## Add PostgresSQL repository
$ sudo sh -c 'echo "deb http://apt.postgresql.org/pub/repos/apt $(lsb_release -cs)-pgdg main" > /etc/apt/sources.list.d/pgdg.list'
$ wget -qO- https://www.postgresql.org/media/keys/ACCC4CF8.asc | sudo tee /etc/apt/trusted.gpg.d/pgdg.asc &>/dev/null

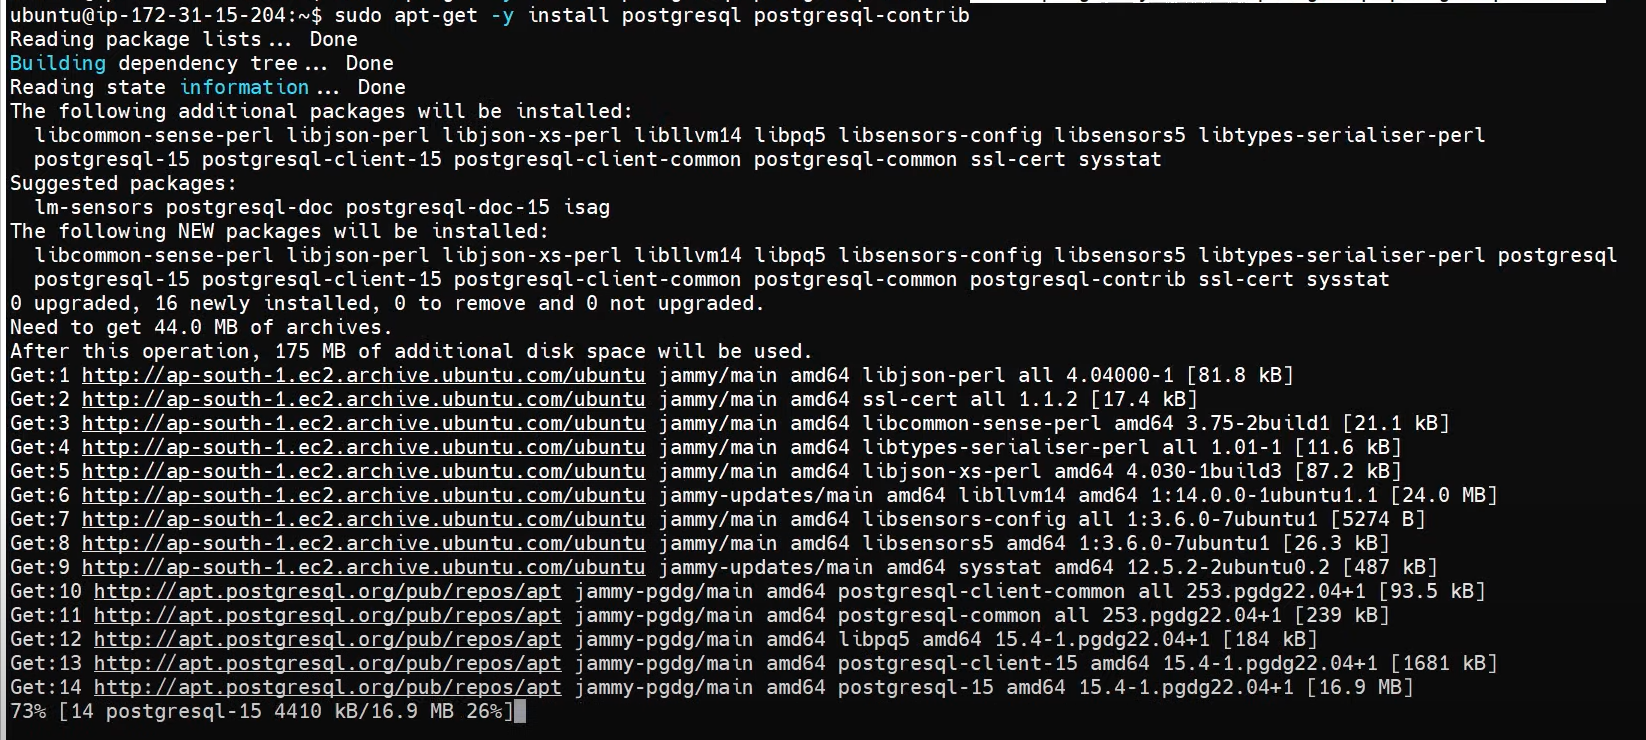
## Install PostgreSQL
$ sudo apt update
$ sudo apt-get -y install postgresql postgresql-contrib
$ sudo systemctl enable postgresql

## Create Database for Sonarqube
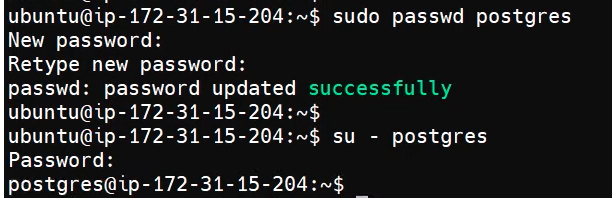
$ sudo passwd postgres
$ su - postgres
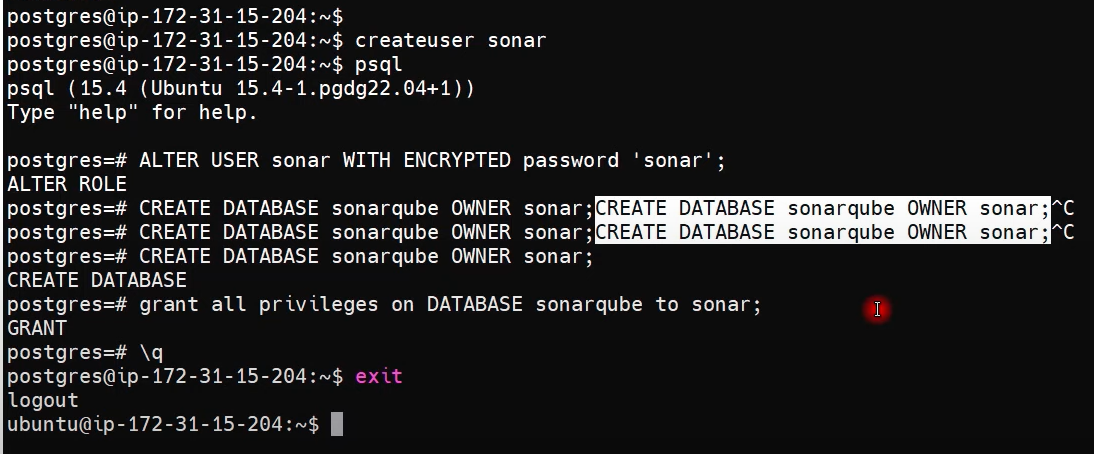
$ createuser sonar
$ psql
$ ALTER USER sonar WITH ENCRYPTED password 'sonar';
$ CREATE DATABASE sonarqube OWNER sonar;
$ grant all privileges on DATABASE sonarqube to sonar;
$ \q
$ exit
## Add Adoptium repository
$ sudo bash
$ wget -O - https://packages.adoptium.net/artifactory/api/gpg/key/public | tee /etc/apt/keyrings/adoptium.asc
$ echo "deb [signed-by=/etc/apt/keyrings/adoptium.asc] https://packages.adoptium.net/artifactory/deb $(awk -F= '/^VERSION_CODENAME/{print$2}' /etc/os-release) main" | tee /etc/apt/sources.list.d/adoptium.list


## Install Java 17
$ apt update
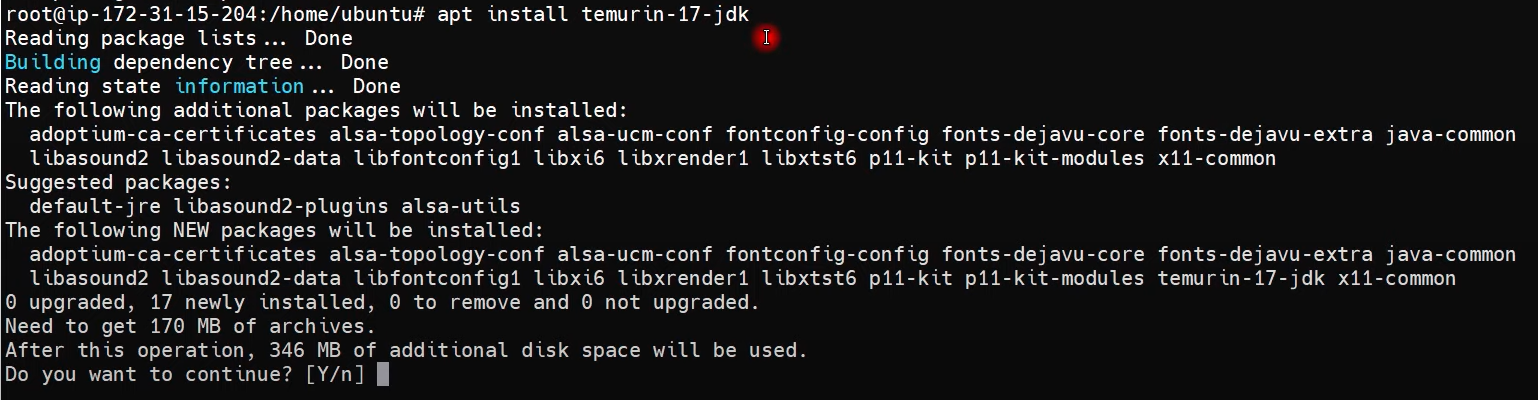
$ apt install temurin-17-jdk
$ update-alternatives --config java
$ /usr/bin/java --version
$ exit

## Linux Kernel Tuning
# Increase Limits
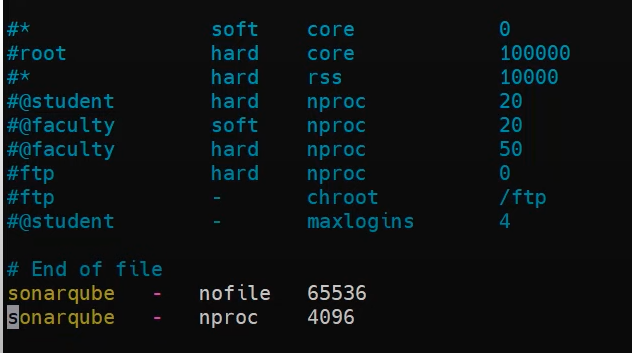
$ sudo vim /etc/security/limits.conf
//Paste the below values at the bottom of the file
sonarqube - nofile 65536
sonarqube - nproc 4096
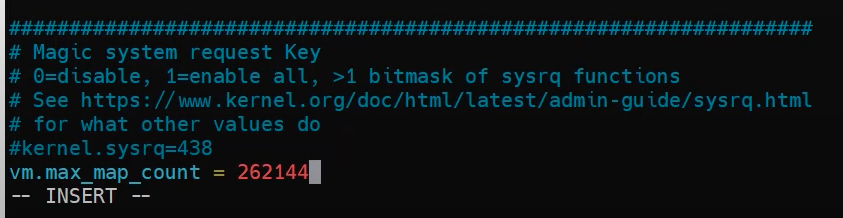
# Increase Mapped Memory Regions
sudo vim /etc/sysctl.conf
//Paste the below values at the bottom of the file
vm.max_map_count = 262144
# 리부팅

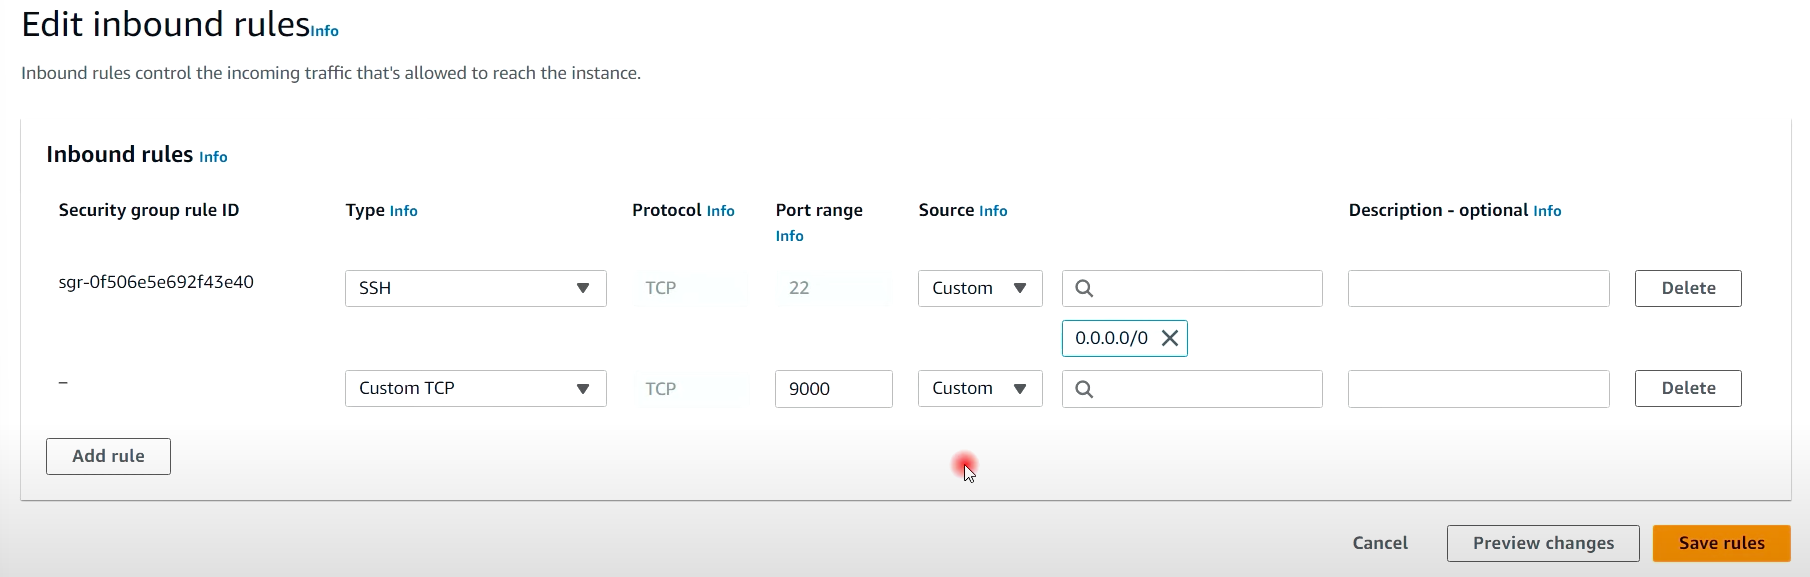
## 9000 포트 오픈
#### Sonarqube Installation ####
## Download and Extract
$ sudo wget https://binaries.sonarsource.com/Distribution/sonarqube/sonarqube-9.9.0.65466.zip
$ sudo apt install unzip
$ sudo unzip sonarqube-9.9.0.65466.zip -d /opt
$ sudo mv /opt/sonarqube-9.9.0.65466 /opt/sonarqube

## Create user and set permissions (55분)
$ sudo groupadd sonar
$ sudo useradd -c "user to run SonarQube" -d /opt/sonarqube -g sonar sonar
$ sudo chown sonar:sonar /opt/sonarqube -R

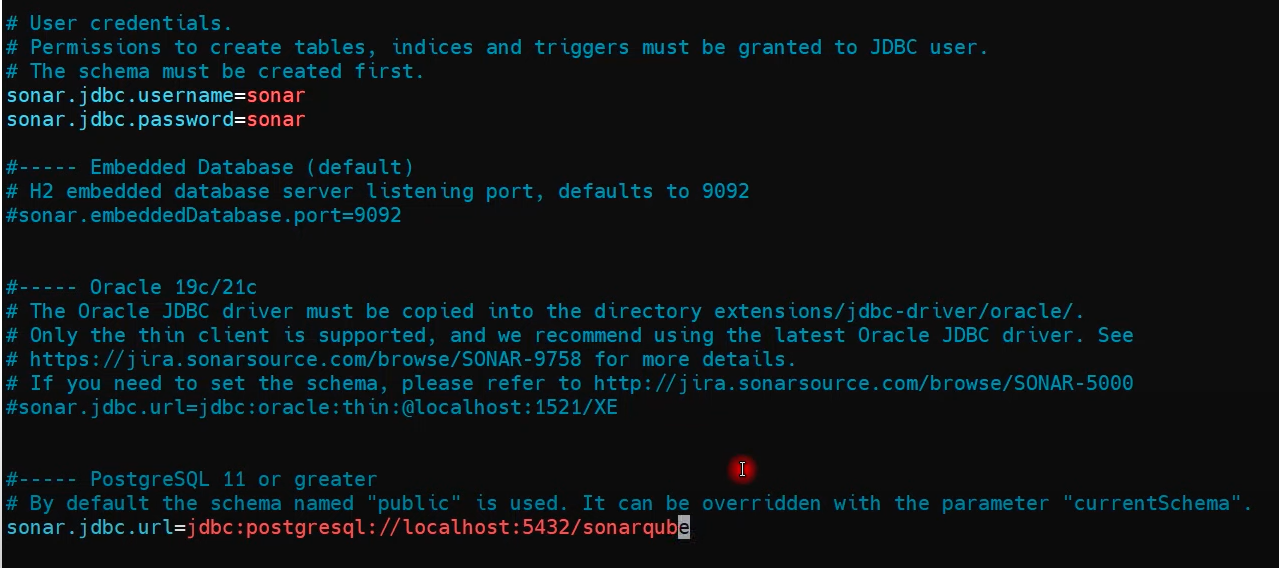
## Update Sonarqube properties with DB credentials
$ sudo vim /opt/sonarqube/conf/sonar.properties
//Find and replace the below values, you might need to add the sonar.jdbc.url
sonar.jdbc.username=sonar
sonar.jdbc.password=sonar
sonar.jdbc.url=jdbc:postgresql://localhost:5432/sonarqube
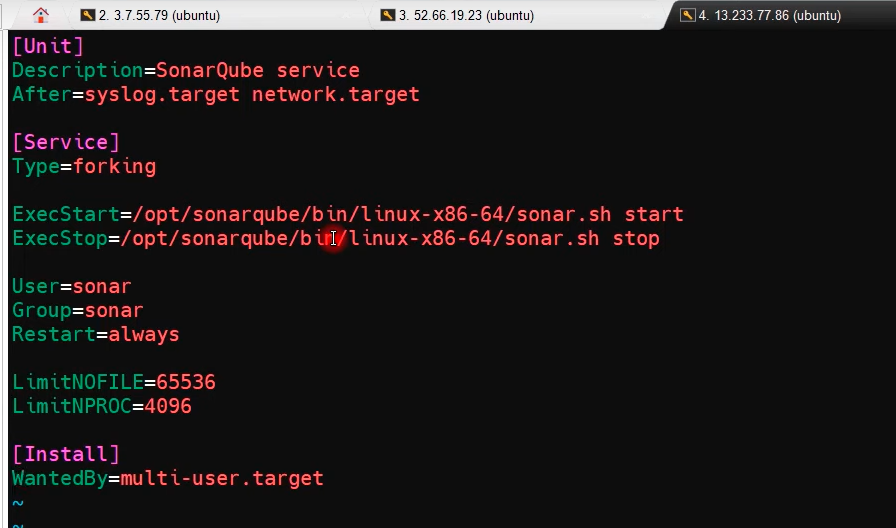
## Create service for Sonarqube
$ sudo vim /etc/systemd/system/sonar.service
//Paste the below into the file
[Unit]
Description=SonarQube service
After=syslog.target network.target
[Service]
Type=forking
ExecStart=/opt/sonarqube/bin/linux-x86-64/sonar.sh start
ExecStop=/opt/sonarqube/bin/linux-x86-64/sonar.sh stop
User=sonar
Group=sonar
Restart=always
LimitNOFILE=65536
LimitNPROC=4096
[Install]
WantedBy=multi-user.target
- 실제 테스트 서버 스크립트
[Unit]
Description=SonarQube service
After=network.target
[Service]
Type=forking
User=sonar
ExecStart=/opt/sonarqube-9/bin/linux-x86-64/sonar.sh start
ExecStop=/opt/sonarqube-9/bin/linux-x86-64/sonar.sh stop
Restart=always
LimitNOFILE=65536
[Install]
WantedBy=multi-user.target
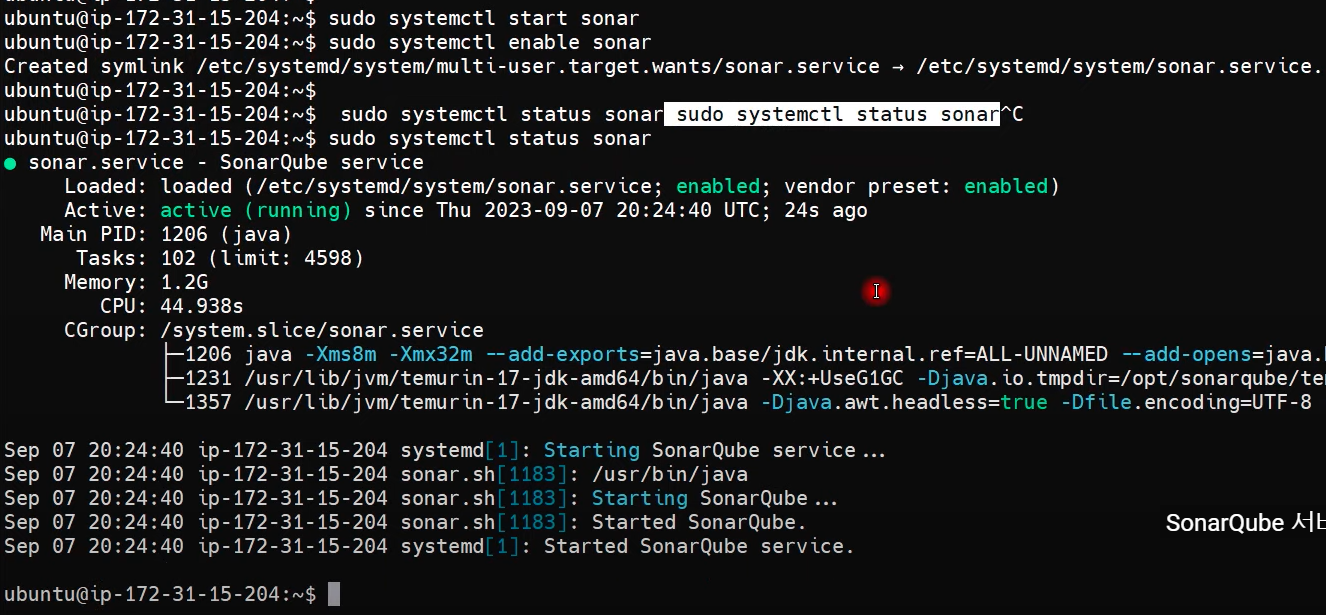
## Start Sonarqube and Enable service
$ sudo systemctl start sonar
$ sudo systemctl enable sonar
$ sudo systemctl status sonar
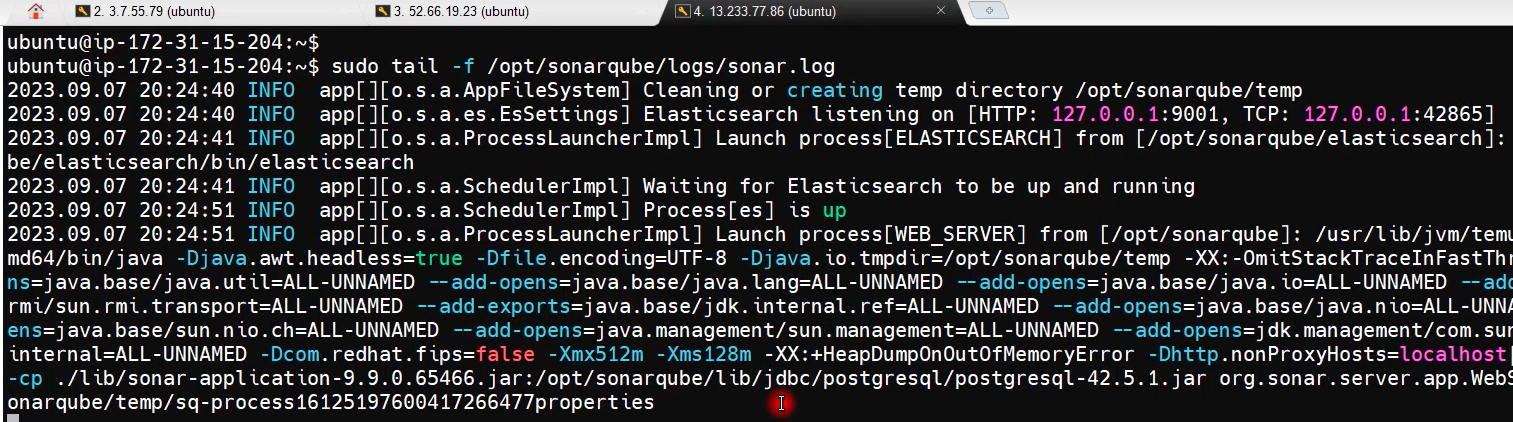
## Watch log files and monitor for startup
$ sudo tail -f /opt/sonarqube/logs/sonar.log
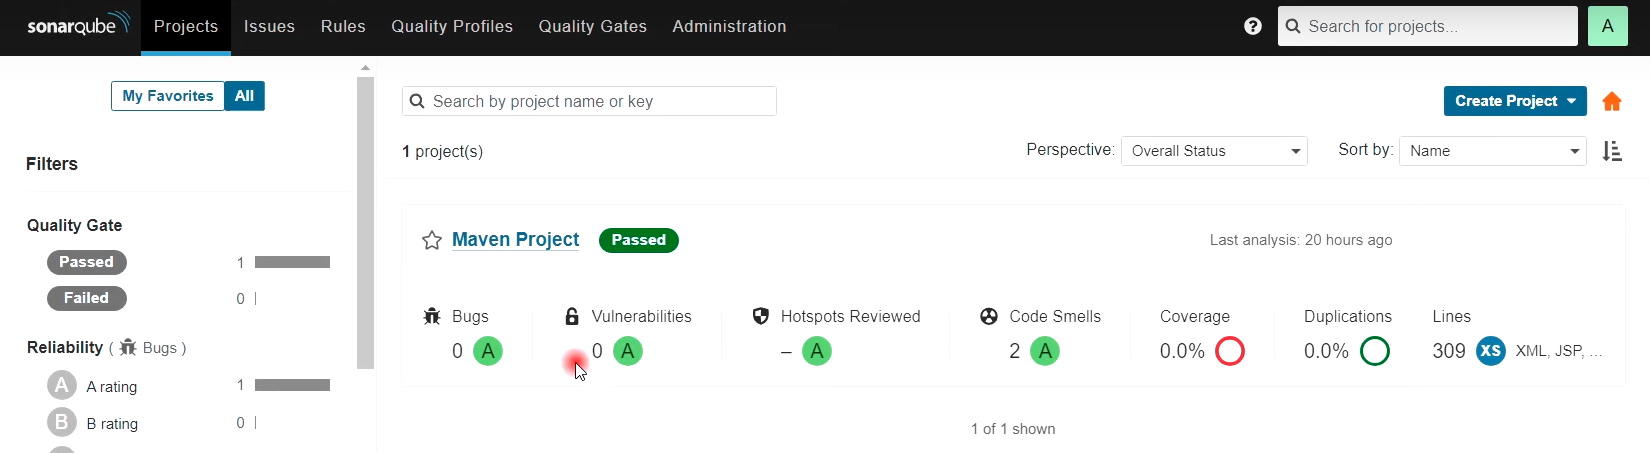
## 소나큐브 웹 접속 (admin)
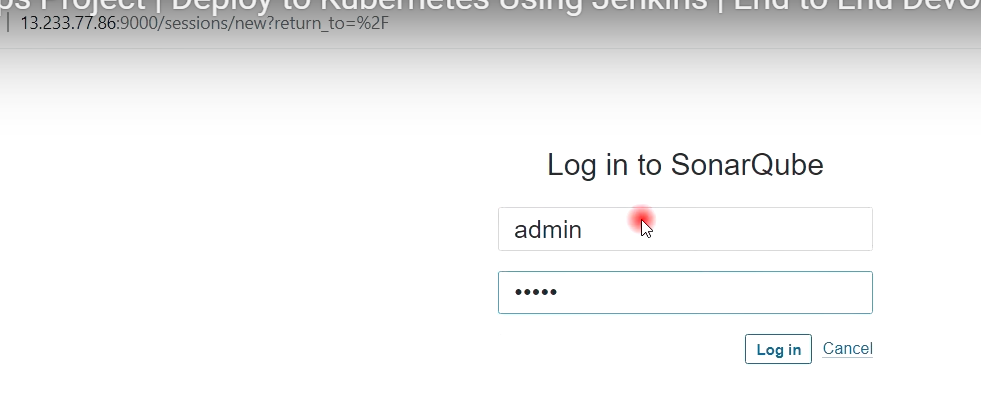
[5] 소나큐브 & 젠킨스 연동 (1:01분)

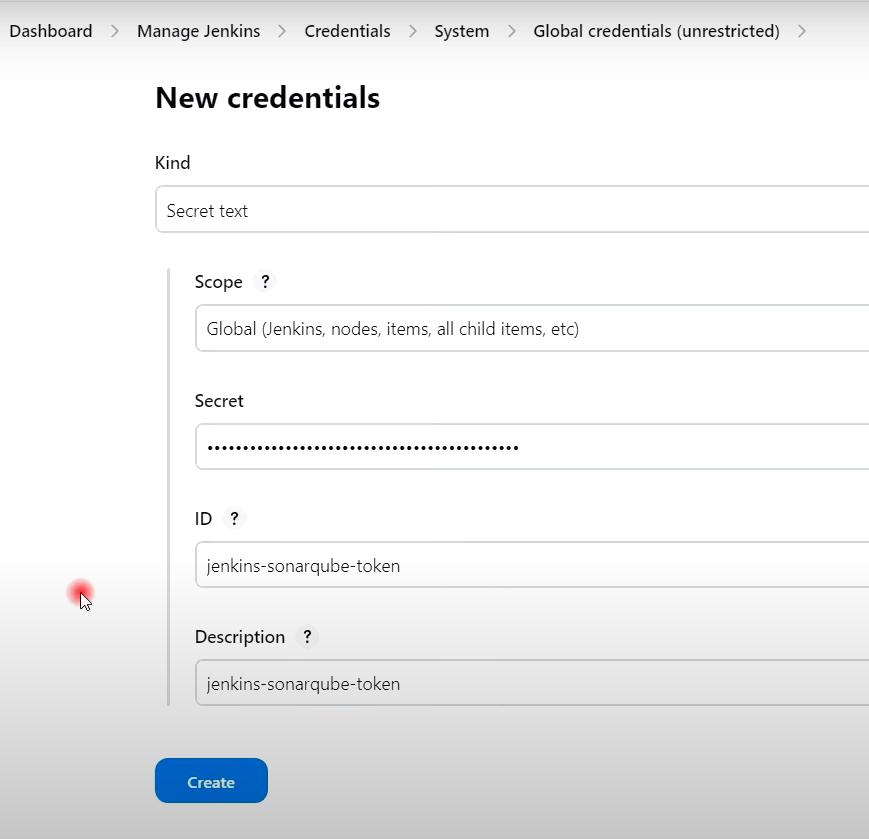
## 소나큐브 토큰 생성 --> 젠킨스 연동용

## 젠킨스에서 플러그인 설치
- SonarQube Scanner
- Sonar Quality Gates
- Quality Gates
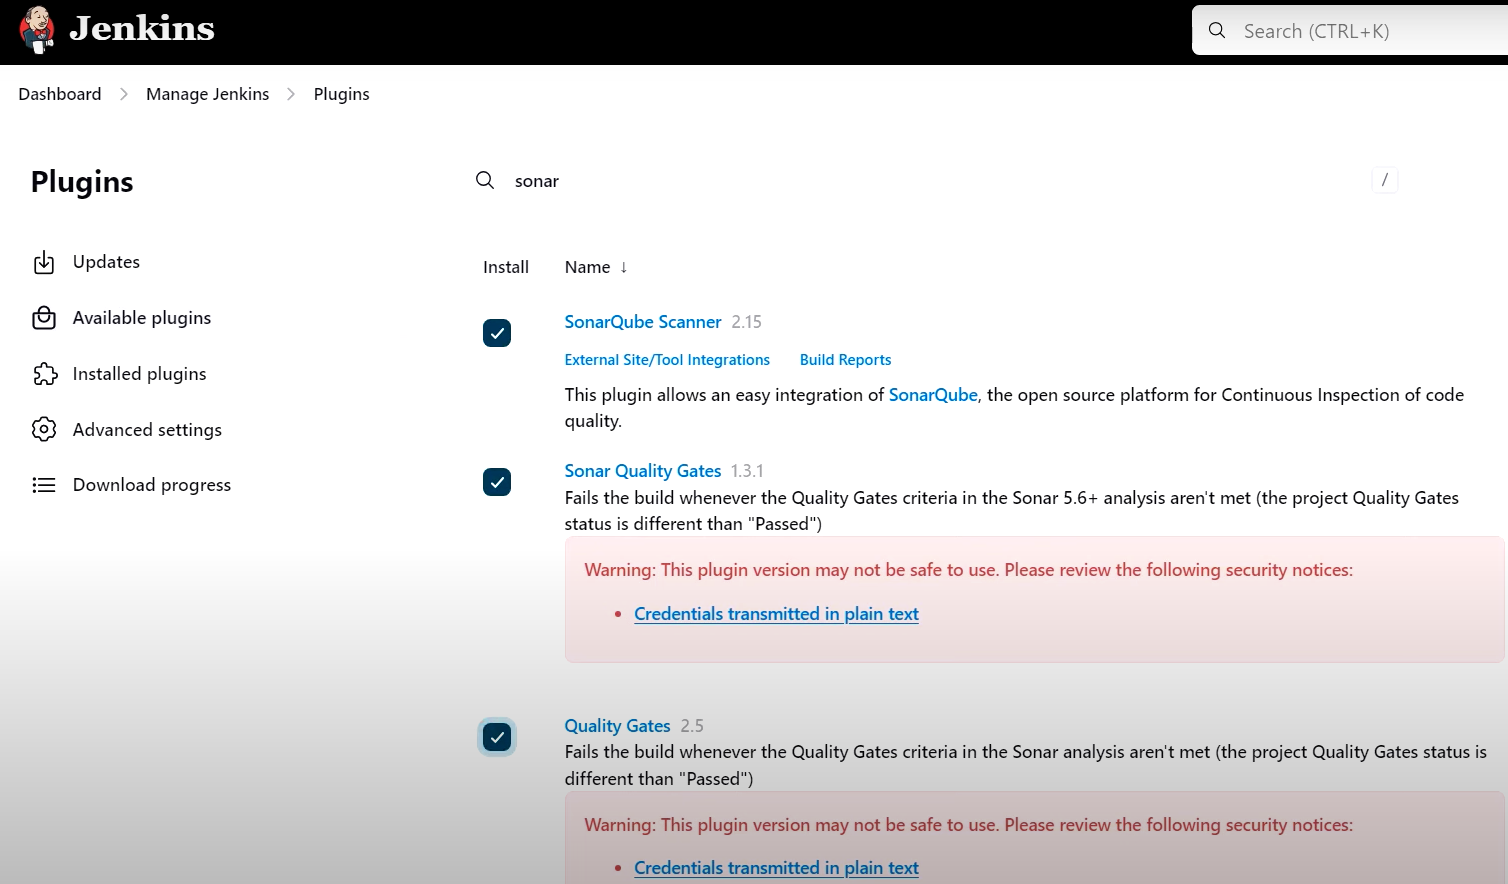
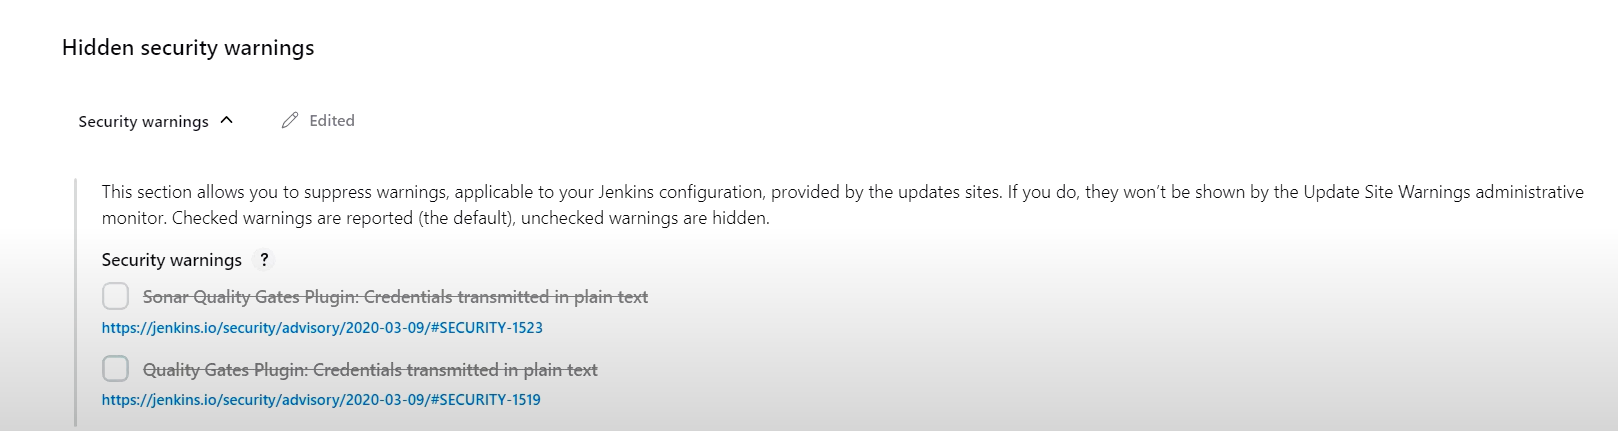
- 경고 해제 방법
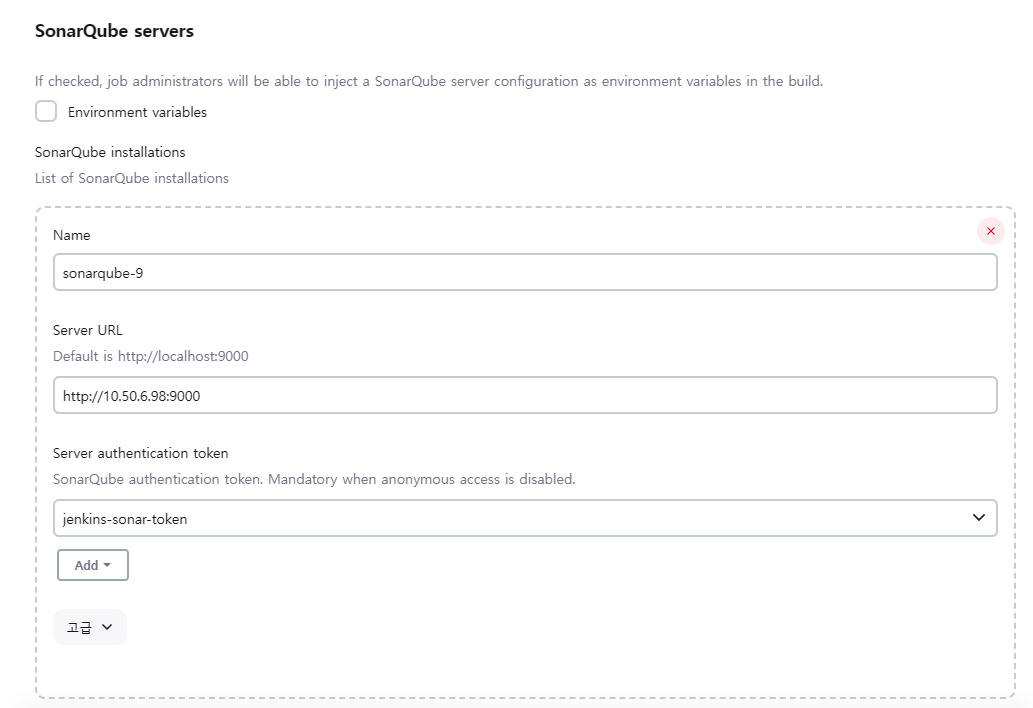
## 젠킨스 관리 --> 시스템 --> 소나큐브 서버 연동 설정
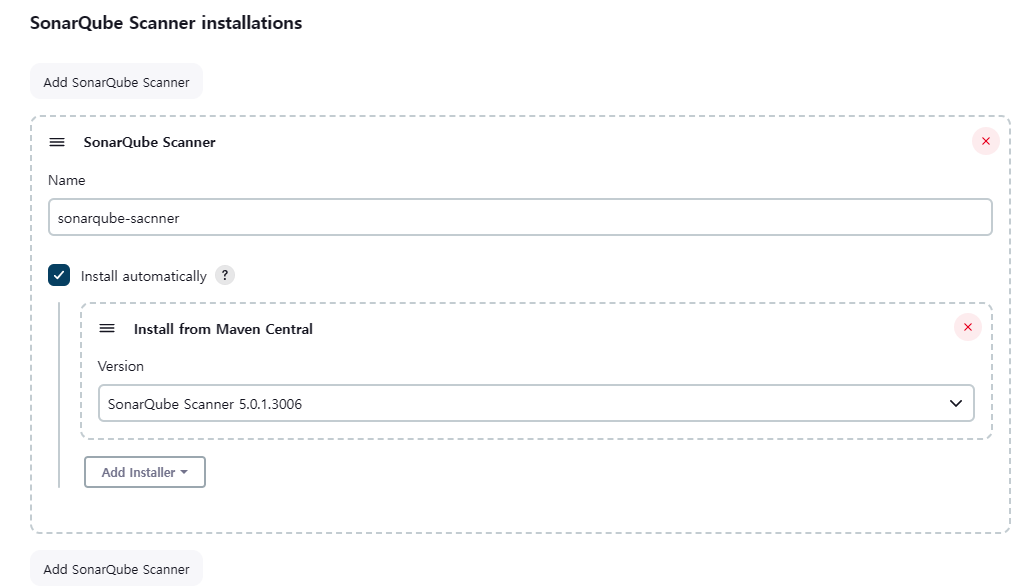
## 젠킨스 관리 --> Tools --> 소나큐브 스캐너 설치
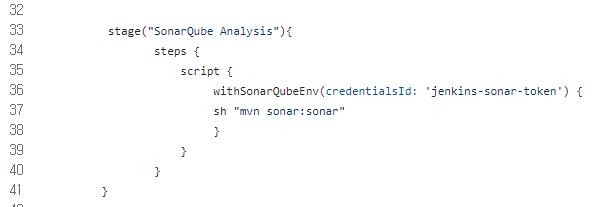
## 젠킨스 파이프라인 스크립트에 소나큐브 분석을 위한 단계 추가
pipeline {
agent any
tools {
jdk 'Java17'
maven 'Maven3'
}
stages{
stage("Cleanup Workspace"){
steps {
cleanWs()
}
}
stage("Checkout from SCM"){
steps {
git branch: 'main', credentialsId: 'github', url: 'https://github.com/dhrbduf/register-app'
}
}
stage("Build Application"){
steps {
sh "mvn clean package"
}
}
stage("Test Application"){
steps {
sh "mvn test"
}
}
stage("SonarQube Analysis"){
steps {
script {
withSonarQubeEnv(credentialsId: 'jenkins-sonar-token') {
sh "mvn sonar:sonar"
}
}
}
}
}
}
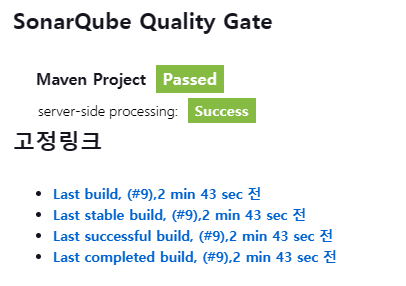
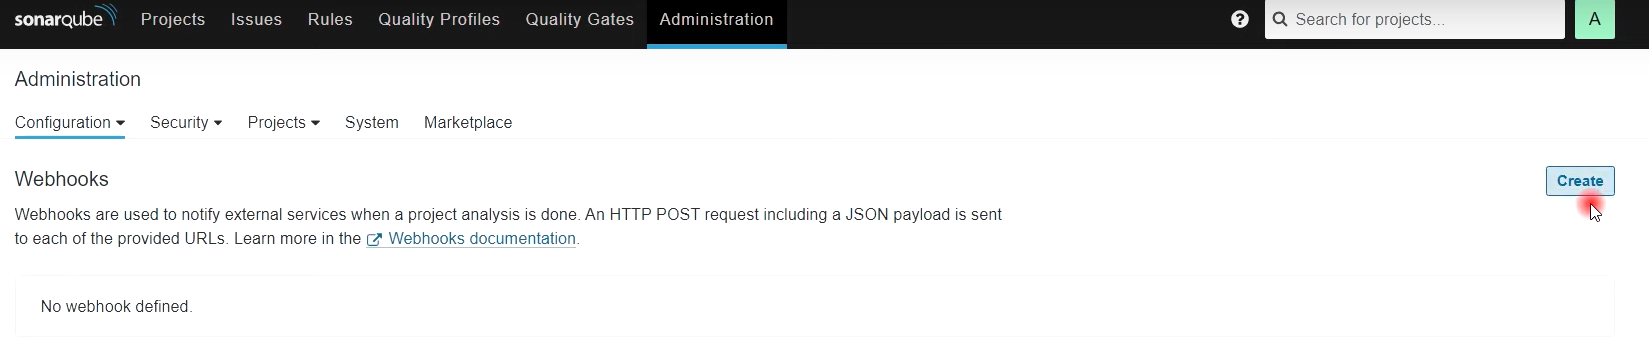
## 소나큐브 웹훅 설정 (1:13분)
- Administration --> Configuration --> Webhooks --> Create 클릭
- 미설정시 --> 소나큐브 품질 게이트 단계 에러 발생
- 젠킨스 서버의 내부IP 입력
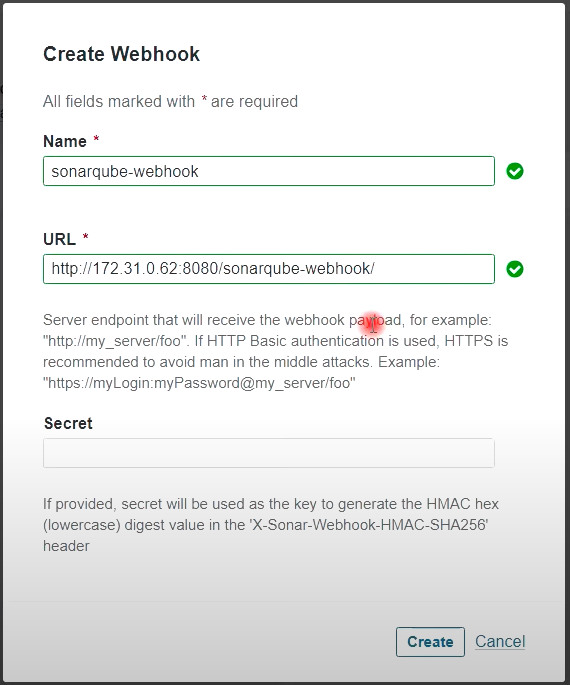
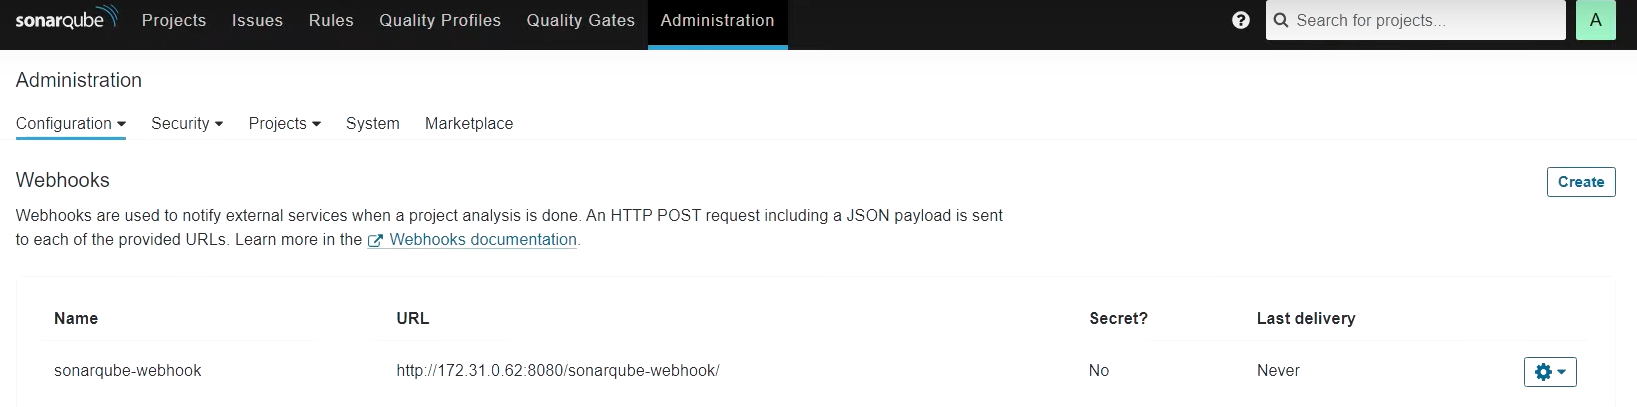
- 테스트시 젠킨스 서버 내부IP 입력시 에러 발생 (퍼블릭 IP 등록시 성공 - 보안그룹 오픈 필요)


## 젠킨스 파이프라인 스크립트에 소나큐브 품질 게이트 단계 추가

pipeline {
agent any
tools {
jdk 'Java17'
maven 'Maven3'
}
stages{
stage("Cleanup Workspace"){
steps {
cleanWs()
}
}
stage("Checkout from SCM"){
steps {
git branch: 'main', credentialsId: 'github', url: 'https://github.com/dhrbduf/register-app'
}
}
stage("Build Application"){
steps {
sh "mvn clean package"
}
}
stage("Test Application"){
steps {
sh "mvn test"
}
}
stage("SonarQube Analysis"){
steps {
script {
withSonarQubeEnv(credentialsId: 'jenkins-sonar-token') {
sh "mvn sonar:sonar"
}
}
}
}
stage("Quality Gate"){
steps {
script {
waitForQualityGate abortPipeline: false, credentialsId: 'jenkins-sonar-token'
}
}
}
}
}


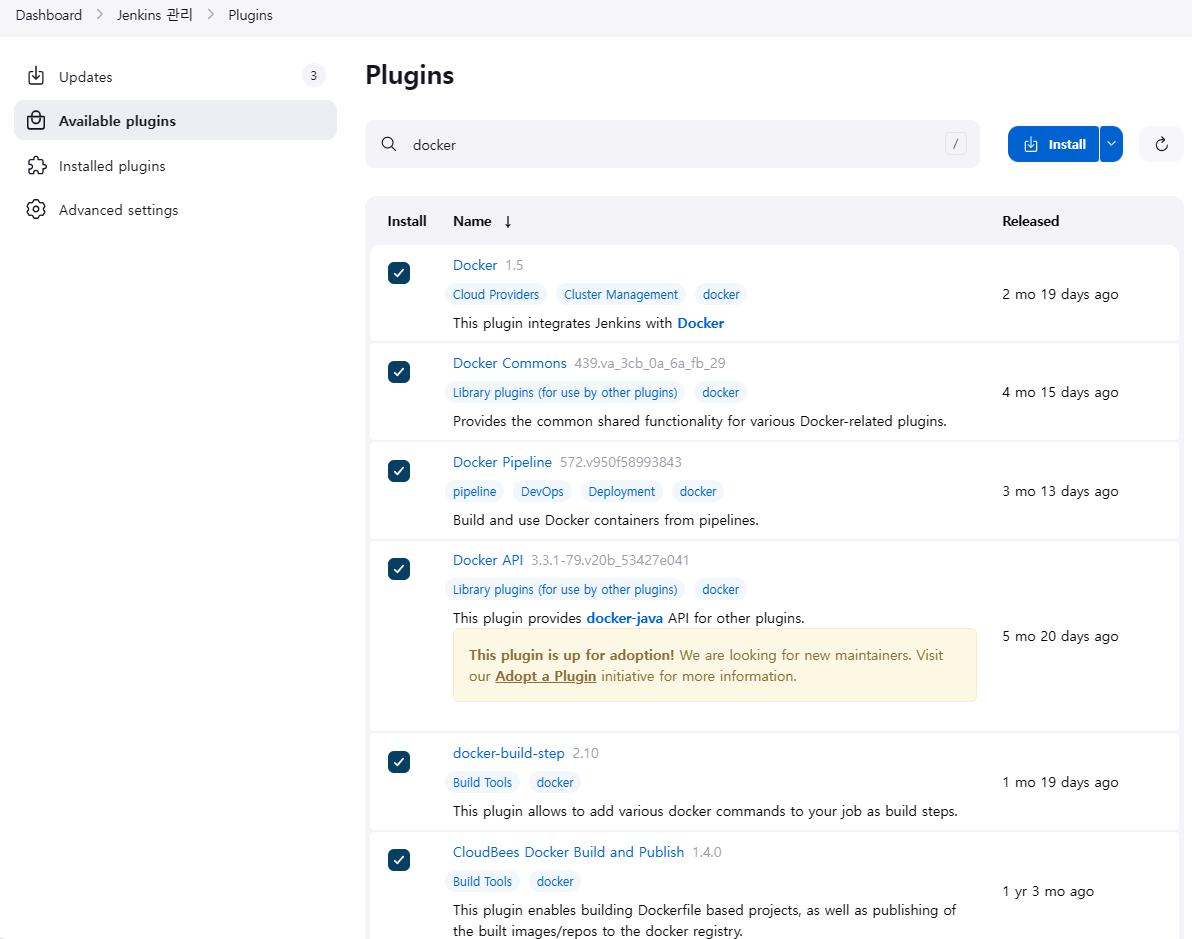
[6] 파이프라인 스크립트로 도커이미지 빌드 및 푸쉬 (1:17분)

## 젠킨스에 도커관련 플러그인 설치 (6개)
- Docker
- Docker Commons
- Docker Pipeline
- Docker API
- docker-build-step
- CloudBees Docker Build and Publish
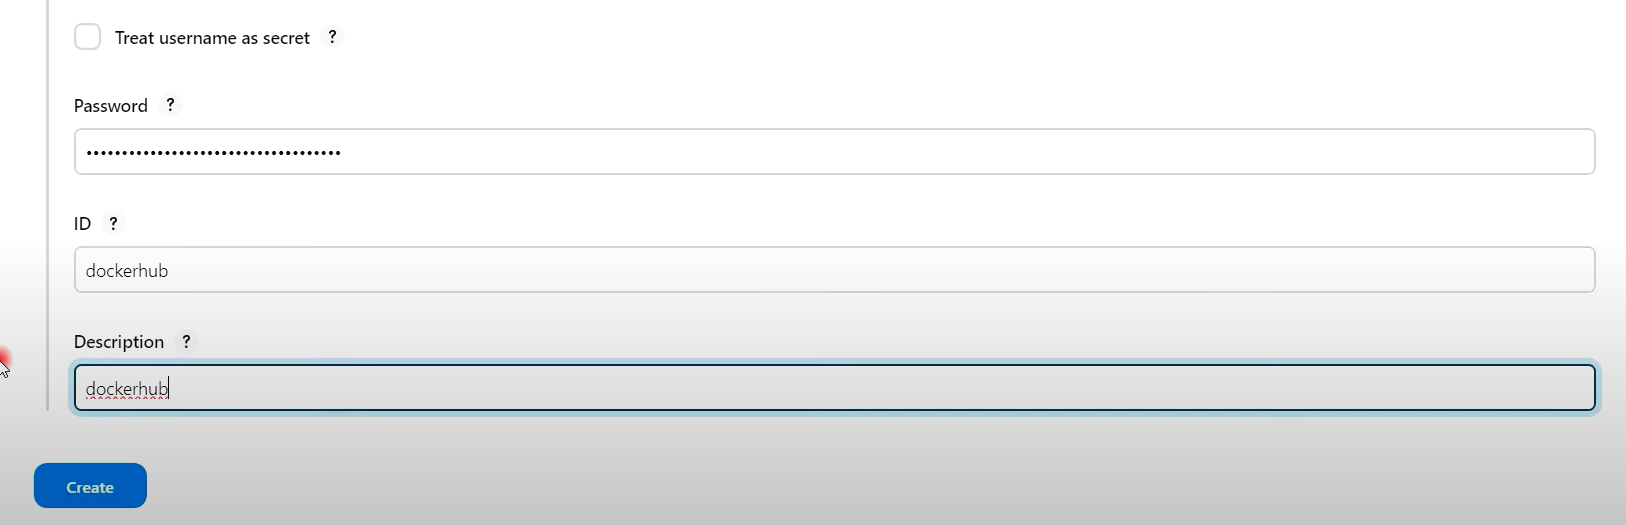
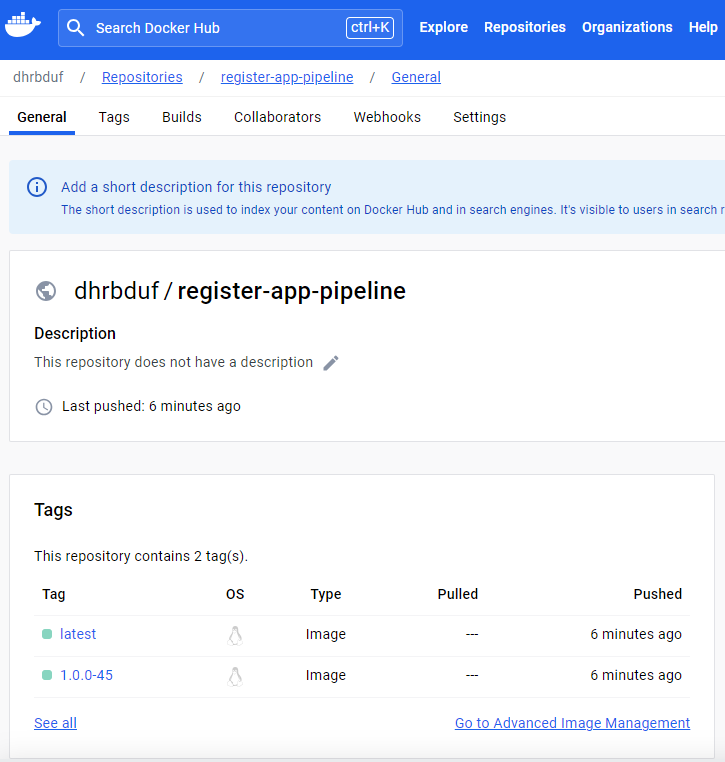
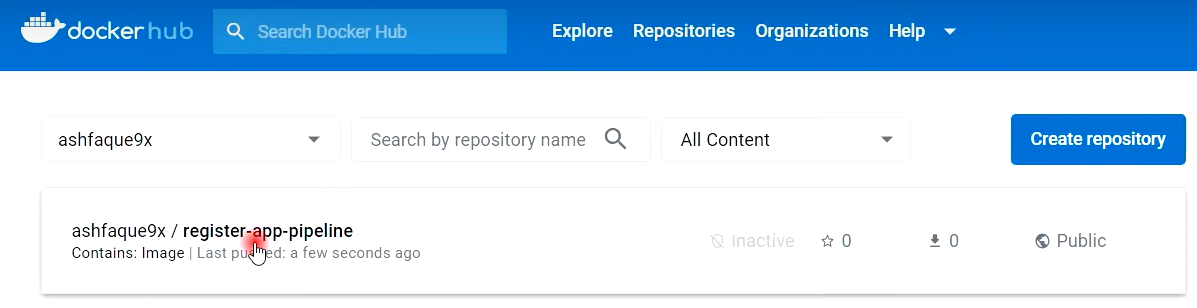
## 젠킨스에 도커허브 자격증명 추가
- Username : 도커허브의 계정 ID
- Password : 도커허브의 계정 토큰 (하기 도커허브 그림 참고)
- ID : 임의의 ID 생성

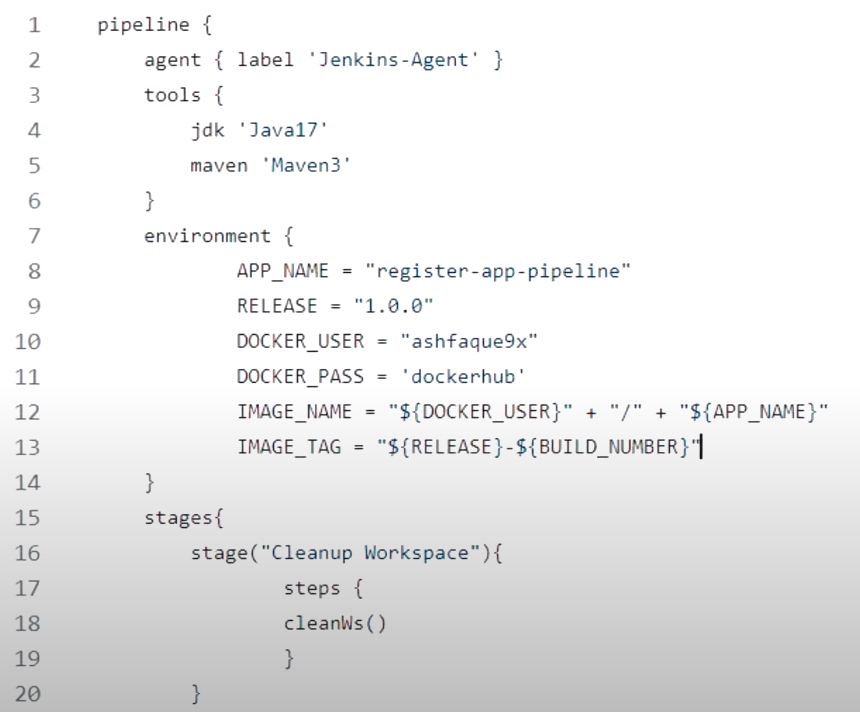
## 깃허브에서 Jenkinsfile 내용 추가
pipeline {
agent any
tools {
jdk 'Java17'
maven 'Maven3'
}
environment {
APP_NAME = "register-app-pipeline"
RELEASE = "1.0.0"
DOCKER_USER = "dhrbduf"
DOCKER_PASS = 'dockerhub'
IMAGE_NAME = "${DOCKER_USER}"+"/"+"${APP_NAME}"
IMAGE_TAG = "${RELEASE}-${BUILD_NUMBER}"
}
stages{
stage("Cleanup Workspace"){
steps {
cleanWs()
}
}
stage("Checkout from SCM"){
steps {
git branch: 'main', credentialsId: 'github', url: 'https://github.com/dhrbduf/register-app'
}
}
stage("Build Application"){
steps {
sh "mvn clean package"
}
}
stage("Test Application"){
steps {
sh "mvn test"
}
}
stage("SonarQube Analysis"){
steps {
script {
withSonarQubeEnv(credentialsId: 'jenkins-sonar-token') {
sh "mvn sonar:sonar"
}
}
}
}
stage("Quality Gate"){
steps {
script {
waitForQualityGate abortPipeline: false, credentialsId: 'jenkins-sonar-token'
}
}
}
stage("Pom.xml Info"){
steps {
script {
sh "env"
sh "echo ${env.BUILD_ID}"
sh "echo $currentBuild.number"
// def VERSION = readMavenPom().getVersion()
def VERSION = sh(script: 'mvn help:evaluate -Dexpression=project.version -q -DforceStdout', returnStdout: true)
sh "echo $VERSION"
def ARTIFACTID = sh(script: 'mvn help:evaluate -Dexpression=project.artifactId -q -DforceStdout', returnStdout: true)
sh "echo $ARTIFACTID"
def GROUPID = sh(script: 'mvn help:evaluate -Dexpression=project.groupId -q -DforceStdout', returnStdout: true)
sh "echo $GROUPID"
}
}
}
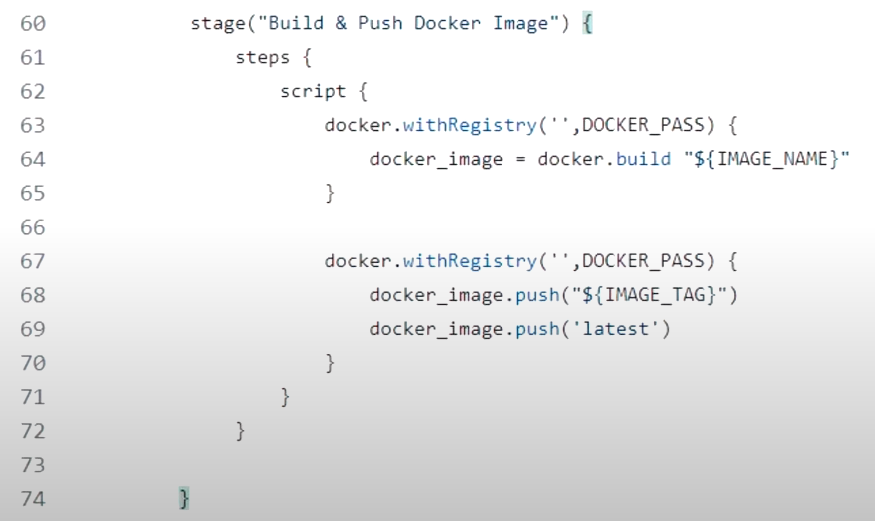
stage("Build & Push Docker Iamge"){
steps {
script {
docker.withRegistry('',DOCKER_PASS) {
docker_image = docker.build "${IMAGE_NAME}"
}
docker.withRegistry('',DOCKER_PASS) {
docker_image.push("${IMAGE_TAG}")
docker_image.push('latest')
}
}
}
}
}
}
- 환경변수 추가
- 빌드 및 푸쉬 내용 추가
- 빌드 에러 발생시 (docker.sock 권한 변경 후 해결 - 서버 리부팅 후 초기화됨)
permission denied while trying to connect to the Docker daemon socket at unix:///var/run/docker.sock: Post "http://%2Fvar%2Frun%2Fdocker.sock/v1.24/auth": dial unix /var/run/docker.sock: connect: permission denied
sudo chmod 666 /var/run/docker.sock

- (향후 서버 리부팅시 적용해 볼것 !!)

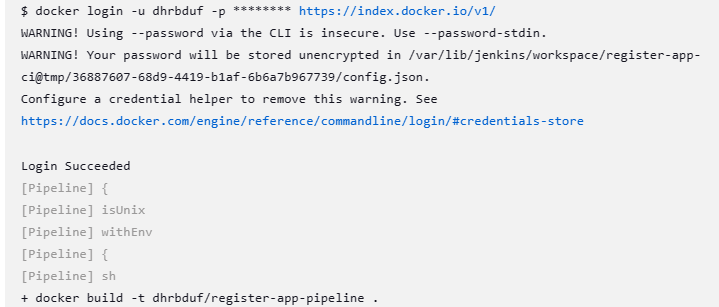

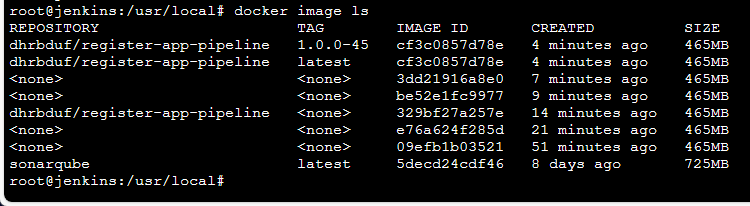
## 도커이미지 빌드 및 푸쉬 성공 (1:25분)
[7] 파이프라인 스크립트에 --> 트리비 (Trivy) & 아티팩트 정리 추가 (1:26분)
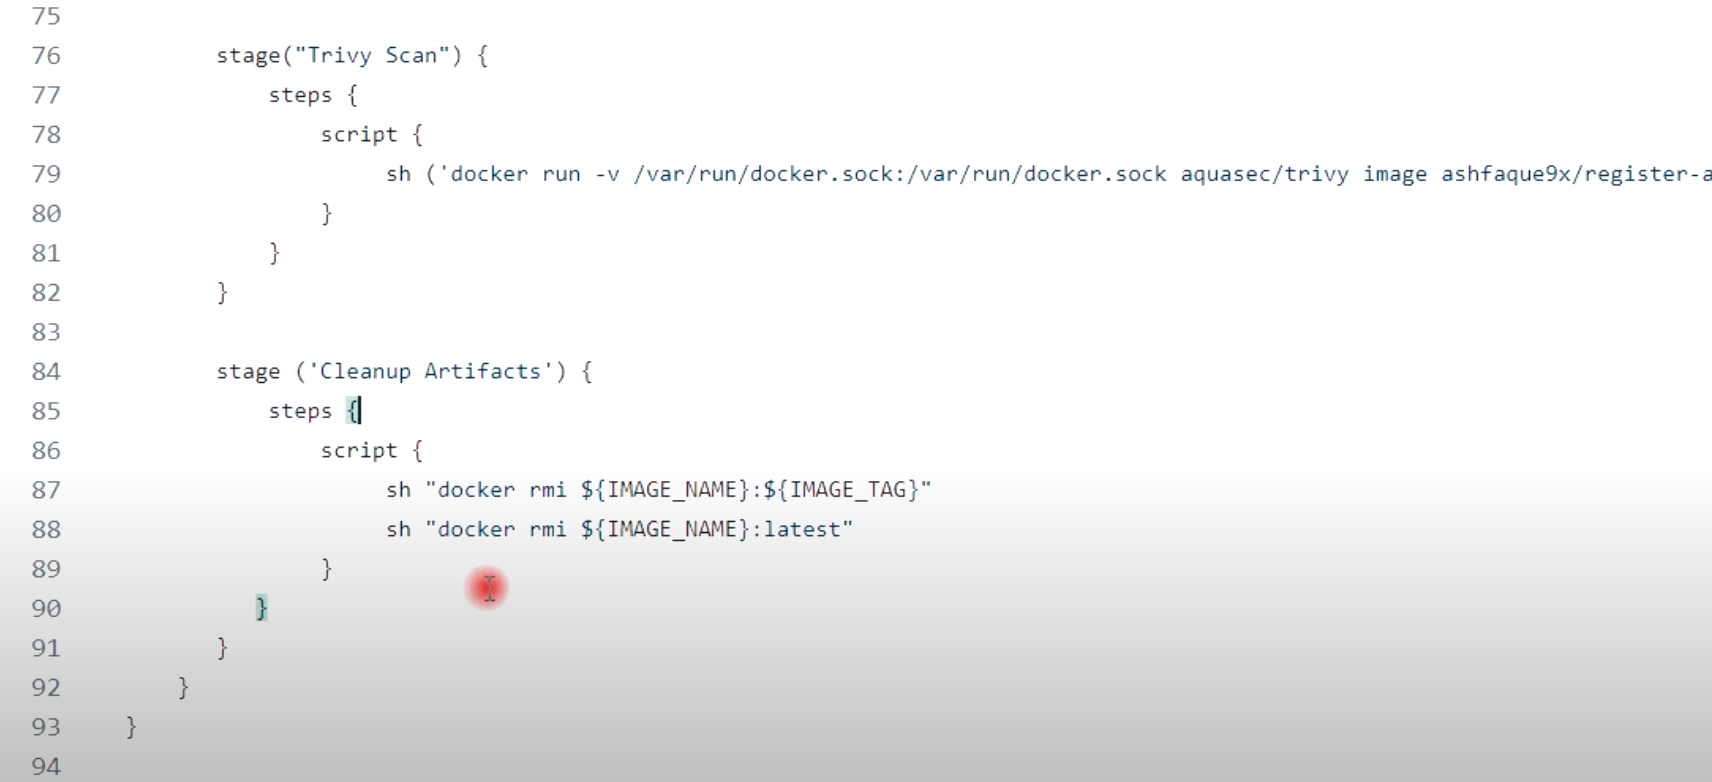
stage("Trivy Scan") {
steps {
script {
sh ('docker run -v /var/run/docker.sock:/var/run/docker.sock aquasec/trivy image ashfaque9x/register-app-pipeline:latest --no-progress --scanners vuln --exit-code 0 --severity HIGH,CRITICAL --format table')
}
}
}
stage ('Cleanup Artifacts') {
steps {
script {
sh "docker rmi ${IMAGE_NAME}:${IMAGE_TAG}"
sh "docker rmi ${IMAGE_NAME}:latest"
}
}
}
[8] eksctl 로 쿠버네티스 구성 (1:29분)

## 부트스트랩 서버 생성
$ sudo apt update
$ sudo apt upgrade
## Install AWS Cli on the above EC2
Refer--https://docs.aws.amazon.com/cli/latest/userguide/getting-started-install.html
$ sudo su
$ curl "https://awscli.amazonaws.com/awscli-exe-linux-x86_64.zip" -o "awscliv2.zip"
$ apt install unzip, $ unzip awscliv2.zip
$ sudo ./aws/install
OR
$ sudo yum remove -y aws-cli
$ pip3 install --user awscli
$ sudo ln -s $HOME/.local/bin/aws /usr/bin/aws
$ aws --version

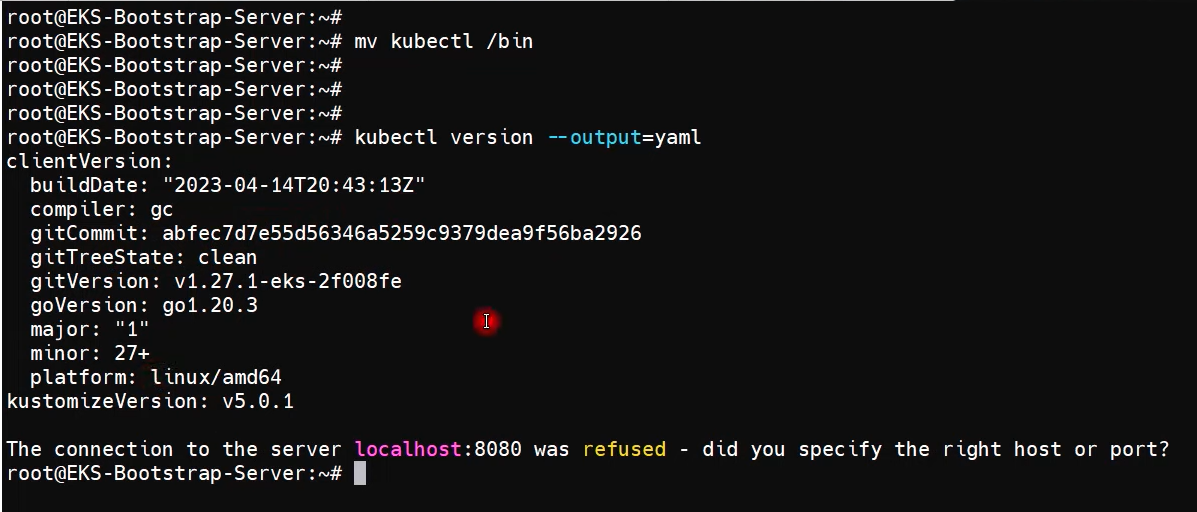
## Installing kubectl
Refer--https://docs.aws.amazon.com/eks/latest/userguide/install-kubectl.html
$ sudo su
$ curl -O https://s3.us-west-2.amazonaws.com/amazon-eks/1.27.1/2023-04-19/bin/linux/amd64/kubectl
$ ll , $ chmod +x ./kubectl //Gave executable permisions
$ mv kubectl /bin //Because all our executable files are in /bin
$ kubectl version --output=yaml
## Installing eksctl
Refer---https://github.com/eksctl-io/eksctl/blob/main/README.md#installation
$ curl --silent --location "https://github.com/weaveworks/eksctl/releases/latest/download/eksctl_$(uname -s)_amd64.tar.gz" | tar xz -C /tmp
$ cd /tmp
$ ll
$ sudo mv /tmp/eksctl /bin
$ eksctl version

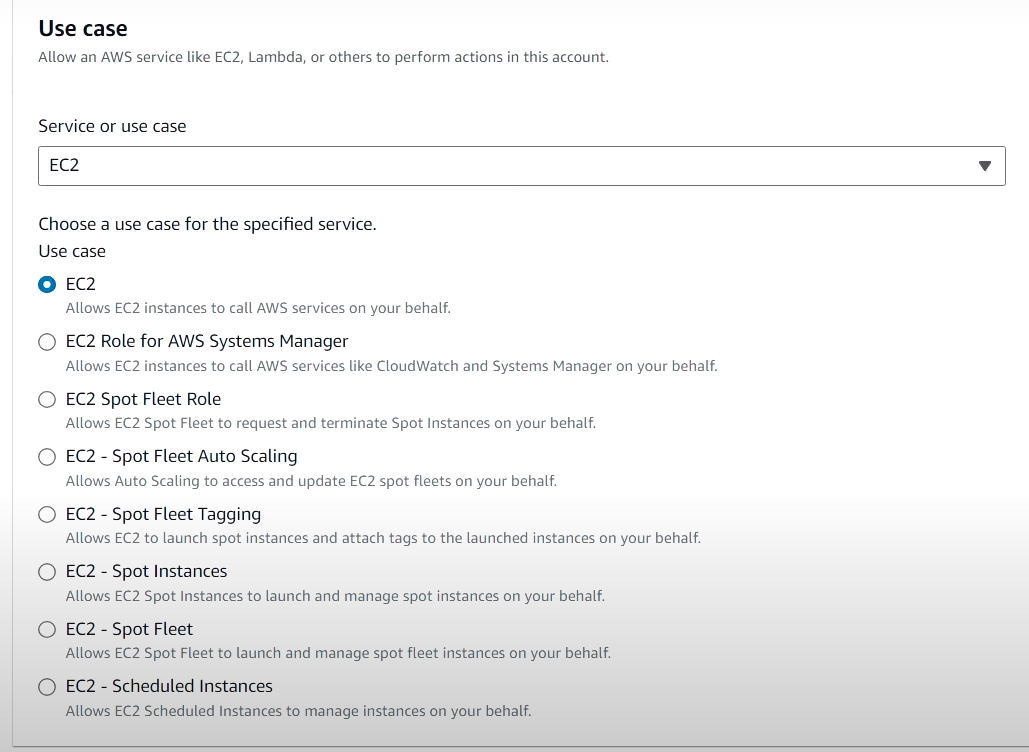
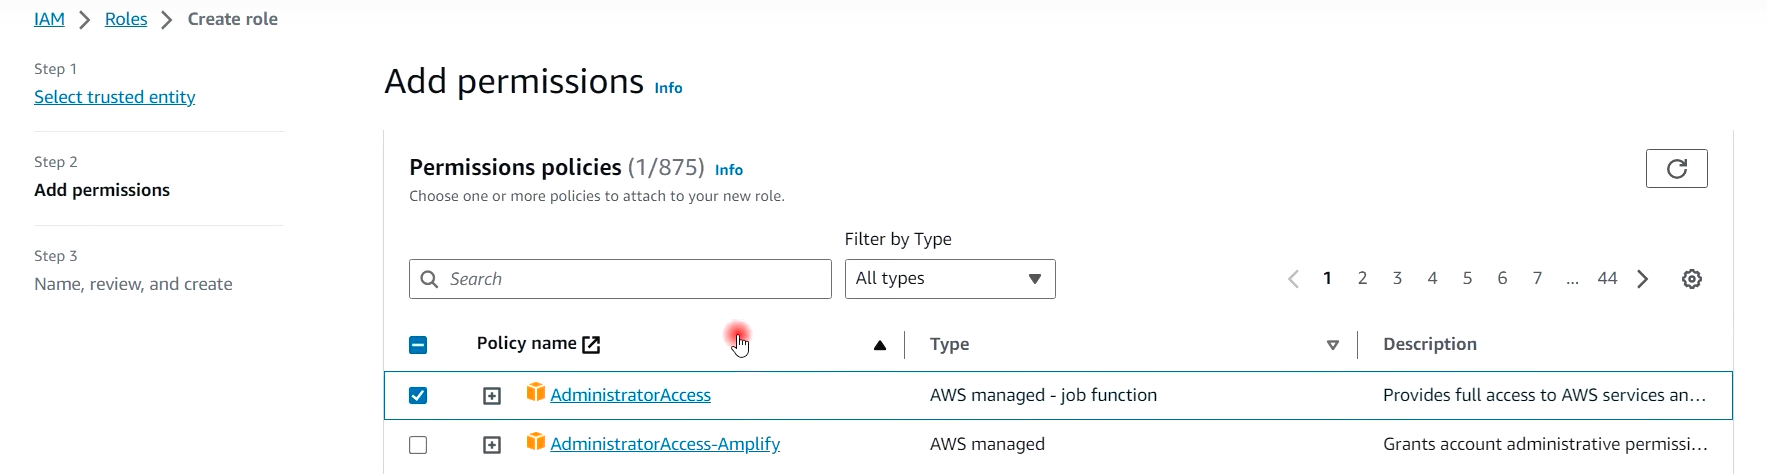
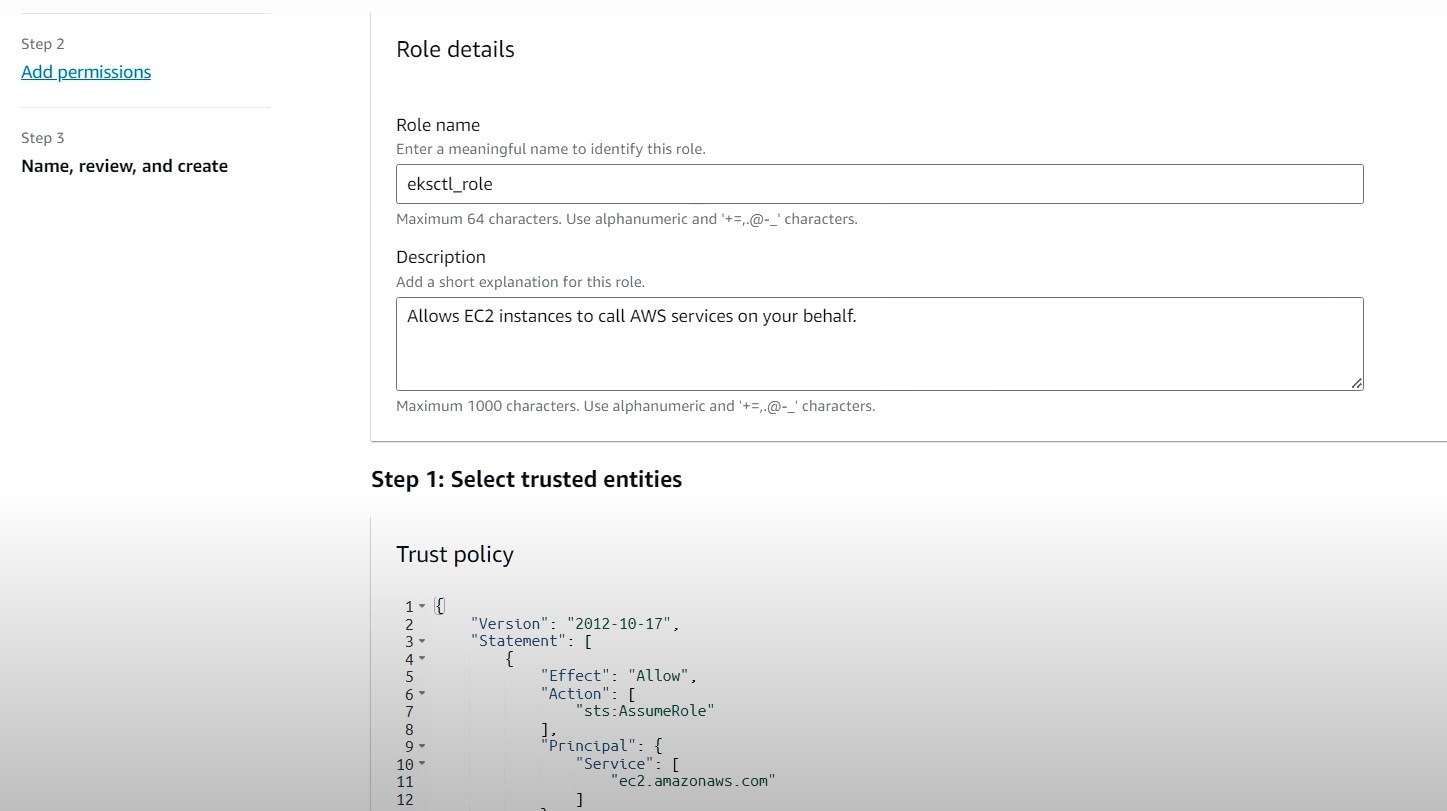
## IAM 역할 생성 (부트스트랩 서버에 할당)
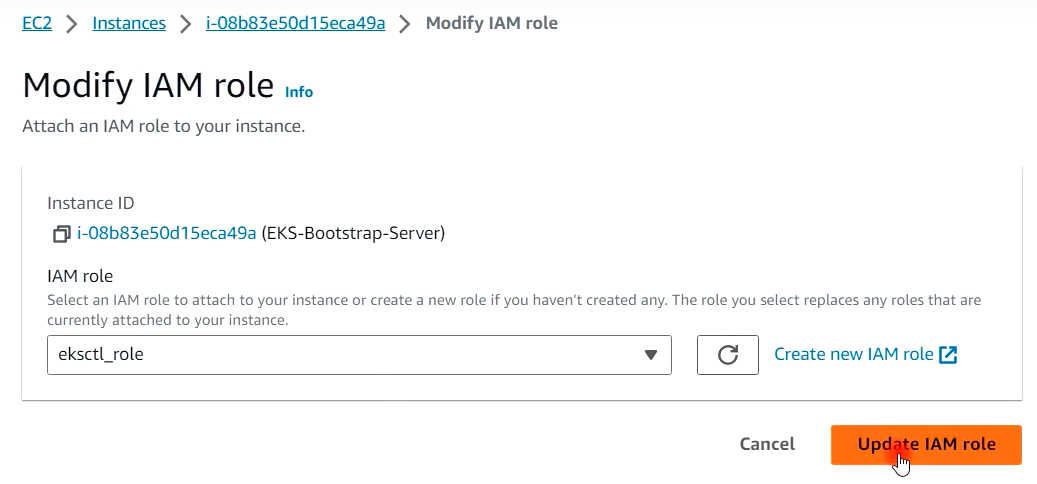
- Create Role --> AWS Service --> EC2 --> AdministratorAccess 권한 할당 --> Role이름 (eksctl_role) --> Role생성

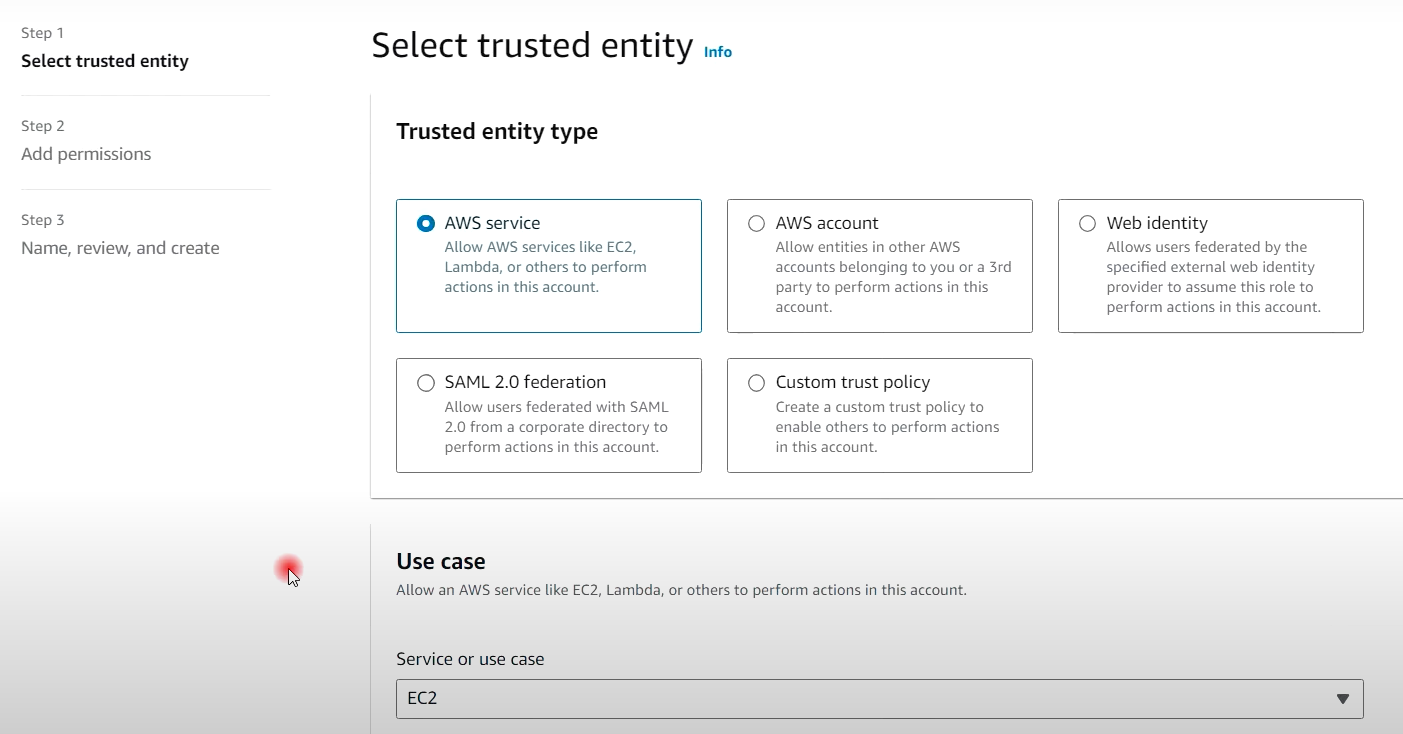
- 부트스트랩 서버에 역할 연동
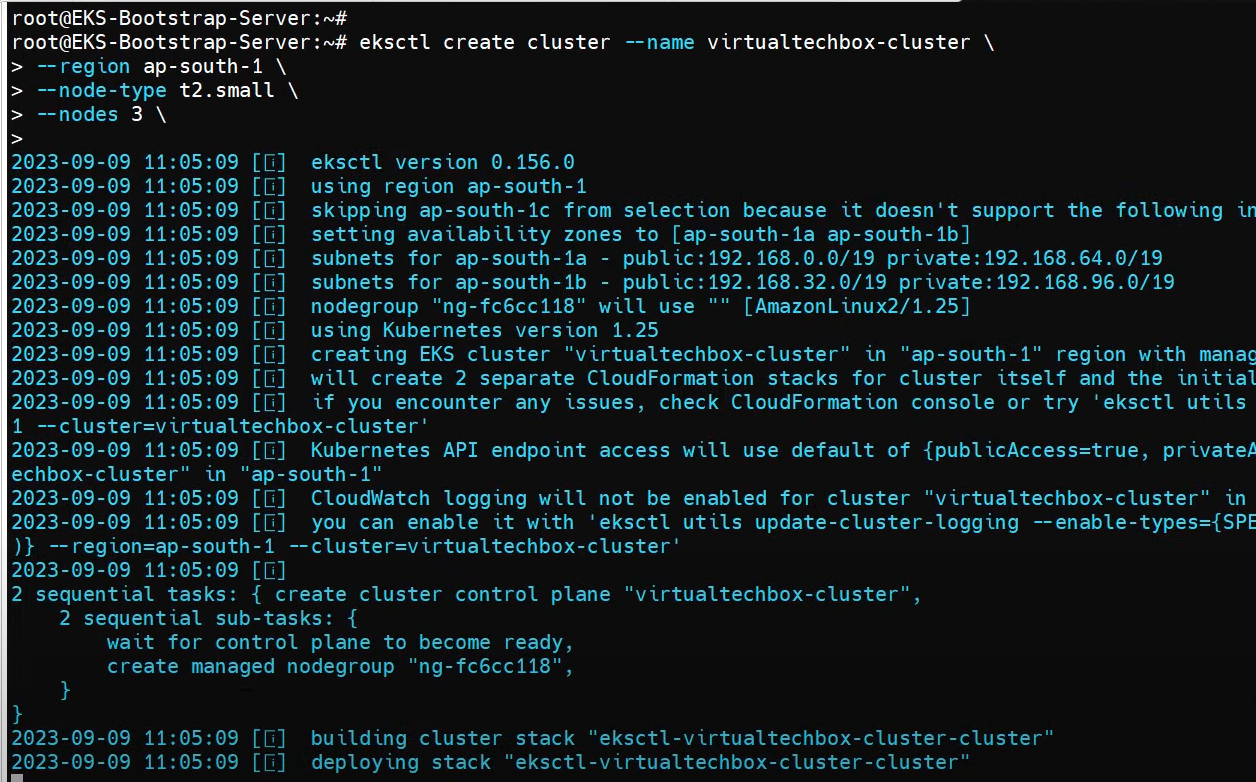
## Setup Kubernetes using eksctl
Refer--https://github.com/aws-samples/eks-workshop/issues/734
$ eksctl create cluster --name virtualtechbox-cluster \
--region ap-south-1 \
--node-type t2.small \
--nodes 3 \
$ kubectl get nodes

[9] ArgoCD 설치 및 EKS 클러스터 연동 (1:41분)

1 ) First, create a namespace
$ kubectl create namespace argocd
2 ) Next, let's apply the yaml configuration files for ArgoCd
$ kubectl apply -n argocd -f https://raw.githubusercontent.com/argoproj/argo-cd/stable/manifests/install.yaml

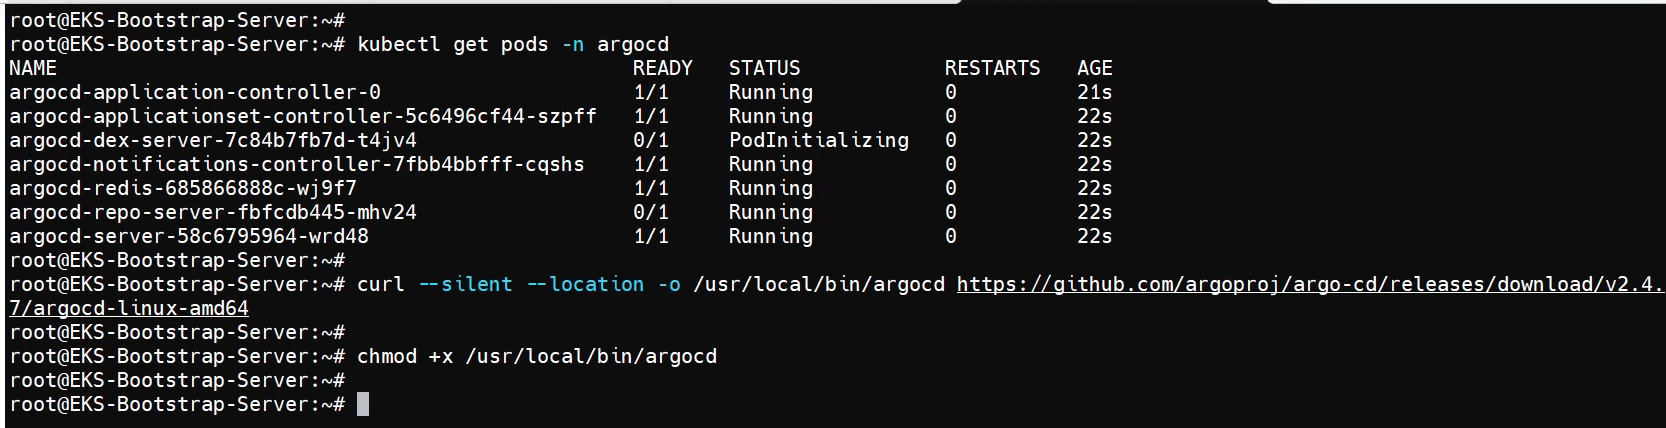
3 ) Now we can view the pods created in the ArgoCD namespace.
$ kubectl get pods -n argocd
4 ) To interact with the API Server we need to deploy the CLI:
$ sudo curl --silent --location -o /usr/local/bin/argocd https://github.com/argoproj/argo-cd/releases/download/v2.4.7/argocd-linux-amd64
$ sudo chmod +x /usr/local/bin/argocd
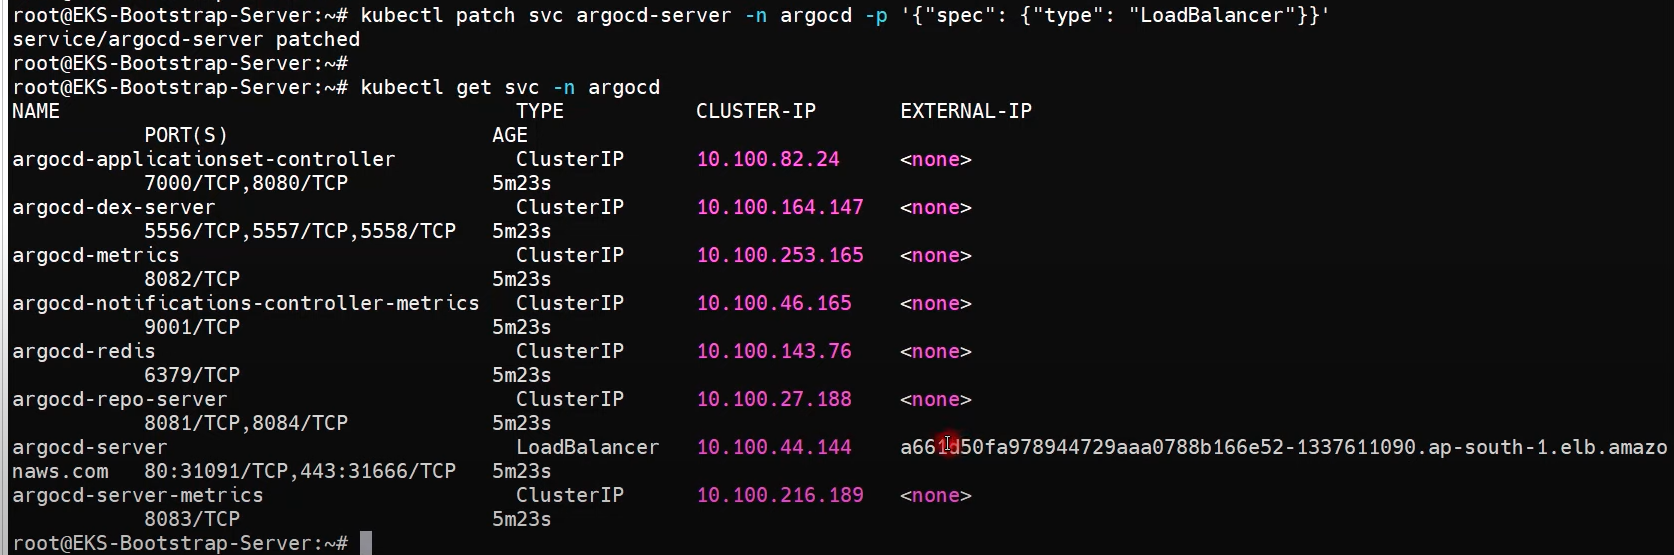
5 ) Expose argocd-server
$ kubectl patch svc argocd-server -n argocd -p '{"spec": {"type": "LoadBalancer"}}'
6 ) Wait about 2 minutes for the LoadBalancer creation
$ kubectl get svc -n argocd
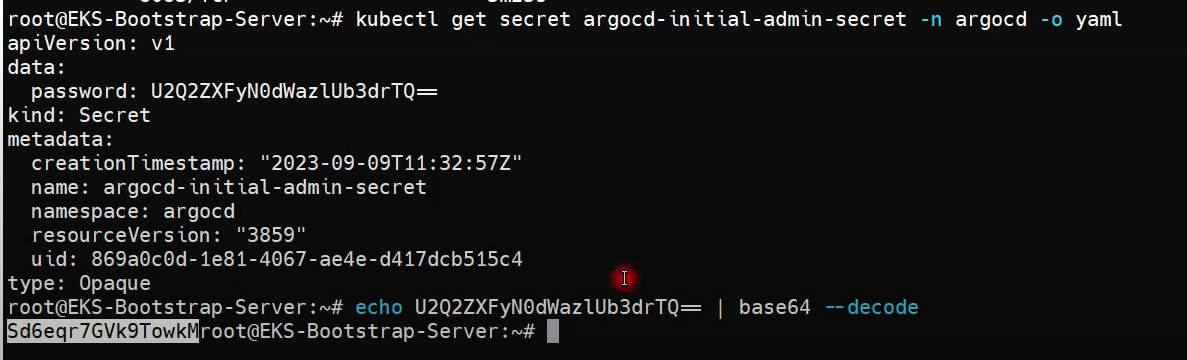
7 ) Get pasword and decode it. (비밀번호 변경 할것!!)
$ kubectl get secret argocd-initial-admin-secret -n argocd -o yaml
$ echo WXVpLUg2LWxoWjRkSHFmSA== | base64 --decode
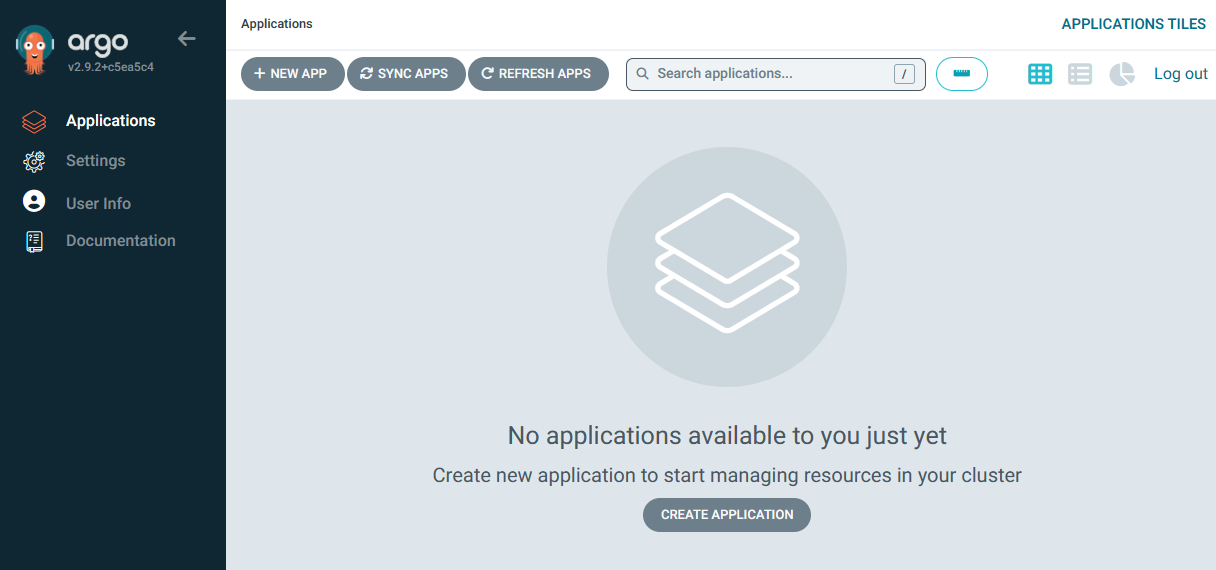
8) ArgoCD 웹화면 확인
## Add EKS Cluster to ArgoCD
9 ) login to ArgoCD from CLI
$ argocd login a2255bb2bb33f438d9addf8840d294c5-785887595.ap-south-1.elb.amazonaws.com --username admin

10 ) ArgoCD 클러스터 정보 확인
$ argocd cluster list

11 ) Below command will show the EKS cluster
$ kubectl config get-contexts
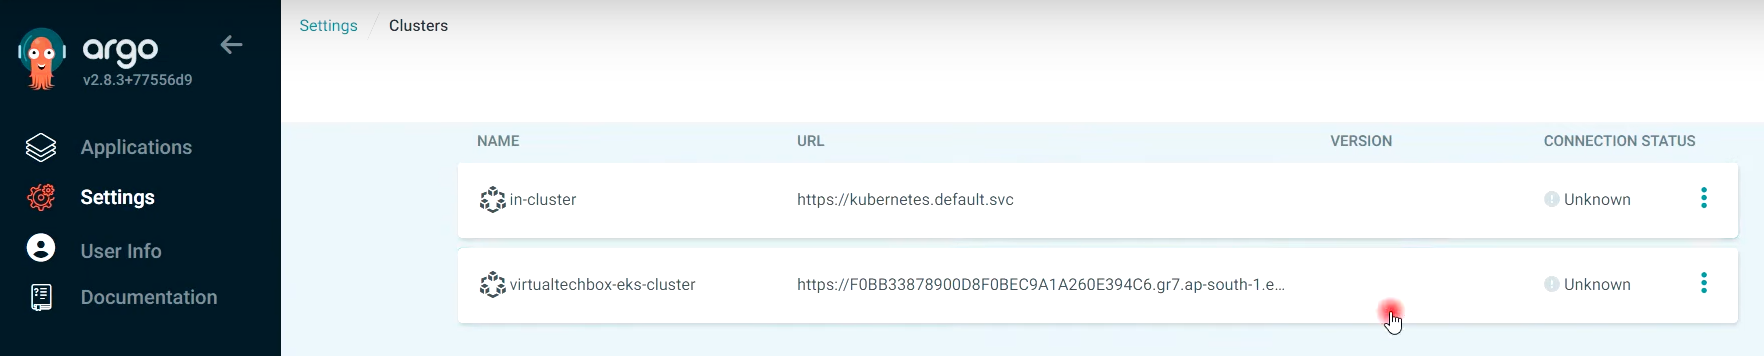
12 ) Add above EKS cluster to ArgoCD with below command (NAME 부분을 Add 할것!!)
$ argocd cluster add i-08b9d0ff0409f48e7@virtualtechbox-cluster.ap-south-1.eksctl.io --name virtualtechbox-eks-cluster

$ argocd cluster list

13 ) $ kubectl get svc
[10] 자동화 ArgoCD 설정 & EKS 배포 & 깃허브 (1:53분)

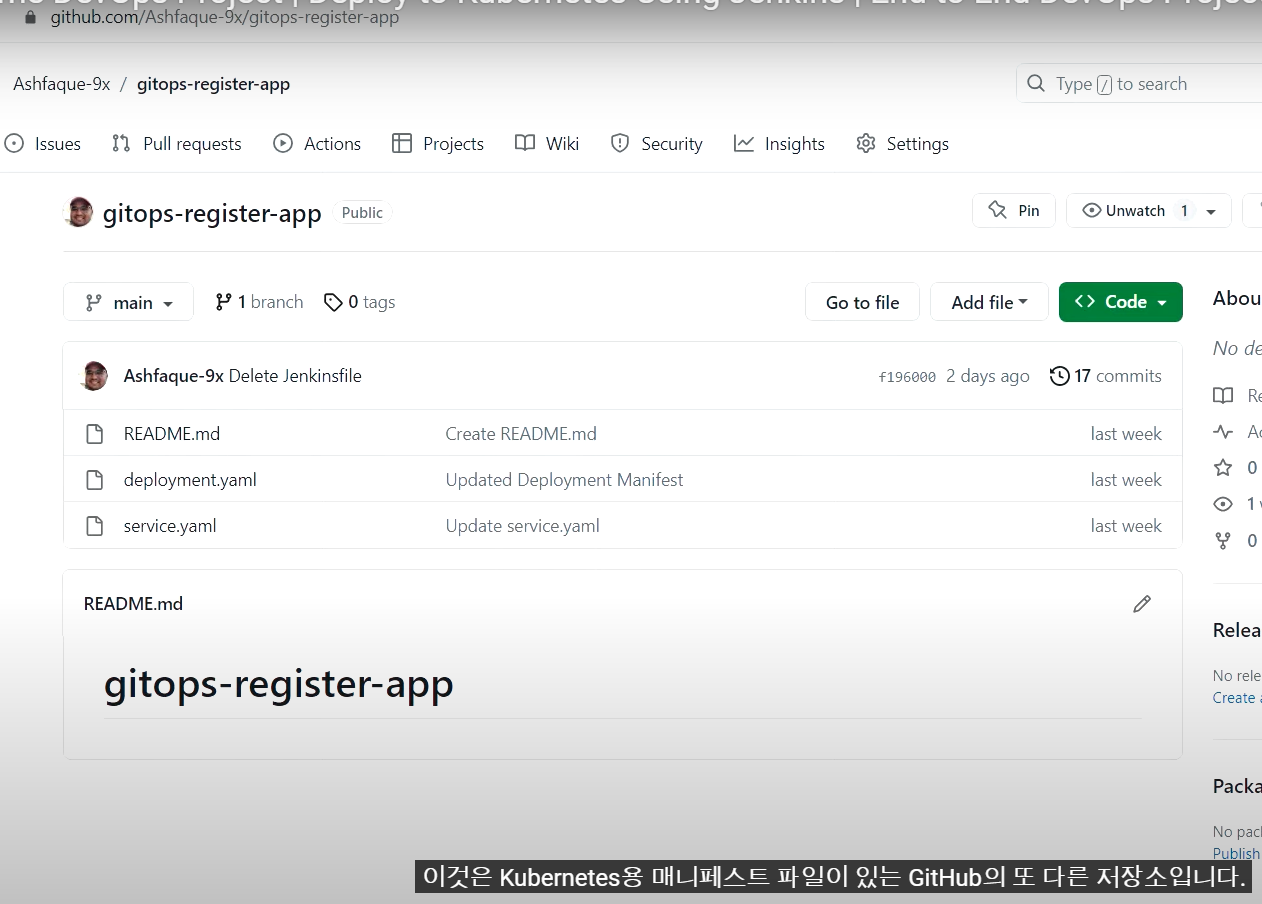
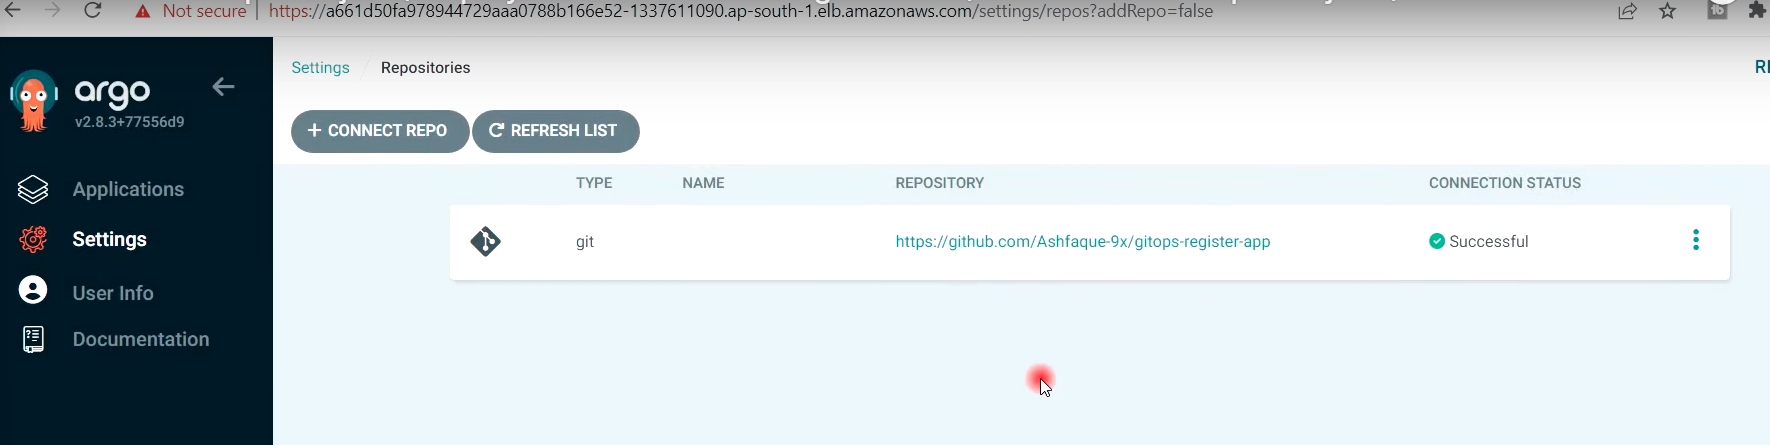
## EKS용 매니페스트 파일 (별도 Github 저장소)
- 이 저장소를 ArgoCD 클러스터에 연결해야 함.
- Argocd --> Settings --> Repositories --> CONNECT REPO --> 깃허브 설정 (비번은 토큰 넣을것!!) --> CONNECT클릭

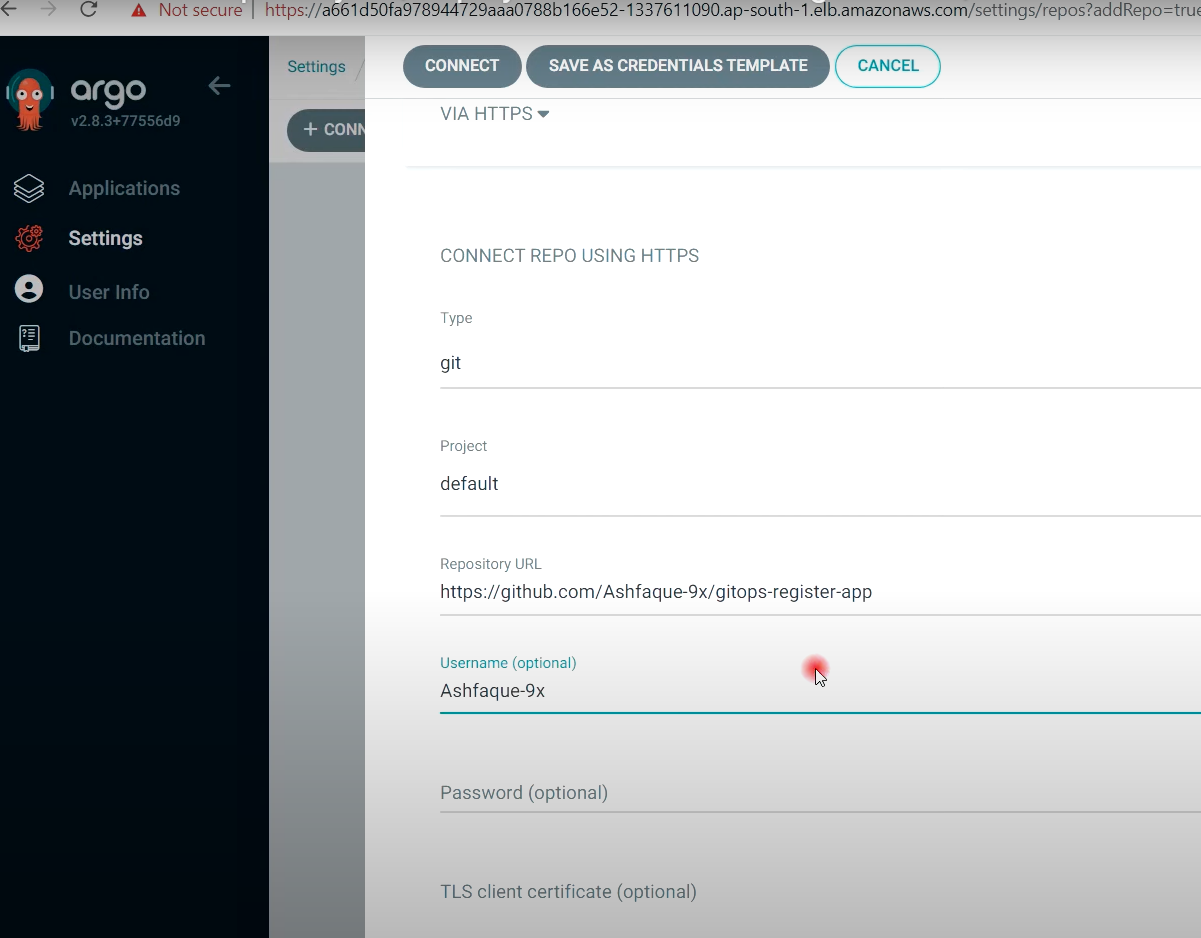
- EKS용 매니페스트 파일 깃허브 연동 성공
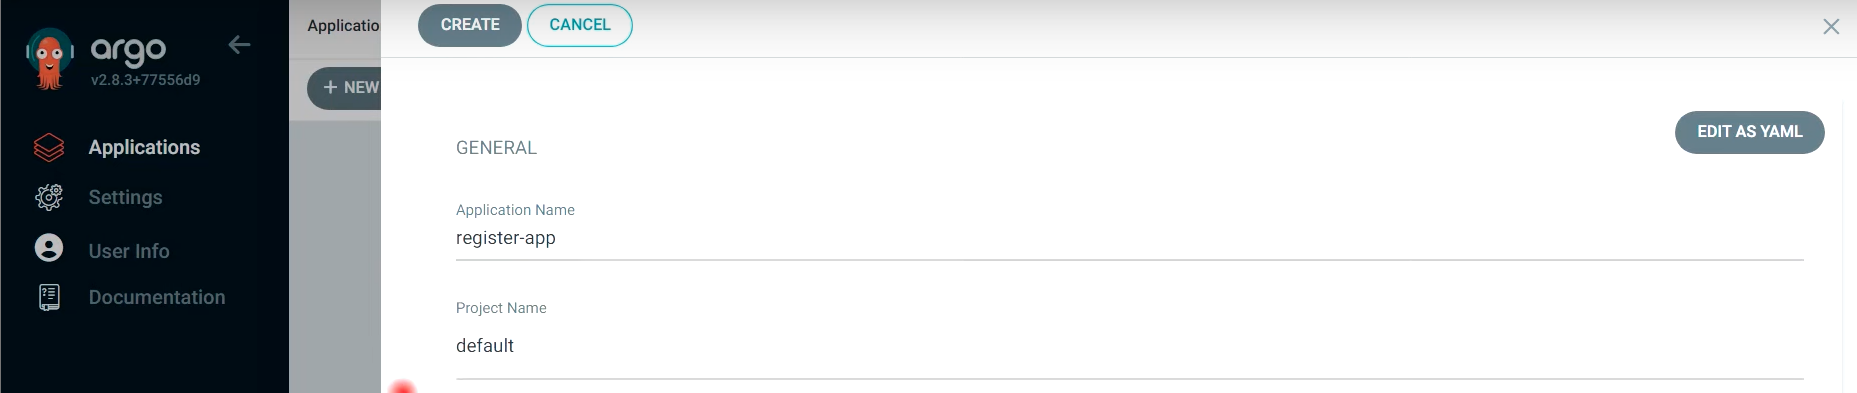
## ArgoCD를 통해 EKS클러스터에 리소스와 APP 배포
- Applications --> 하기내용 설정 --> CREATE 클릭
(생성시 Namespace 와 Image 명 --> yml 파일이 동일한지 확인 할것!!)


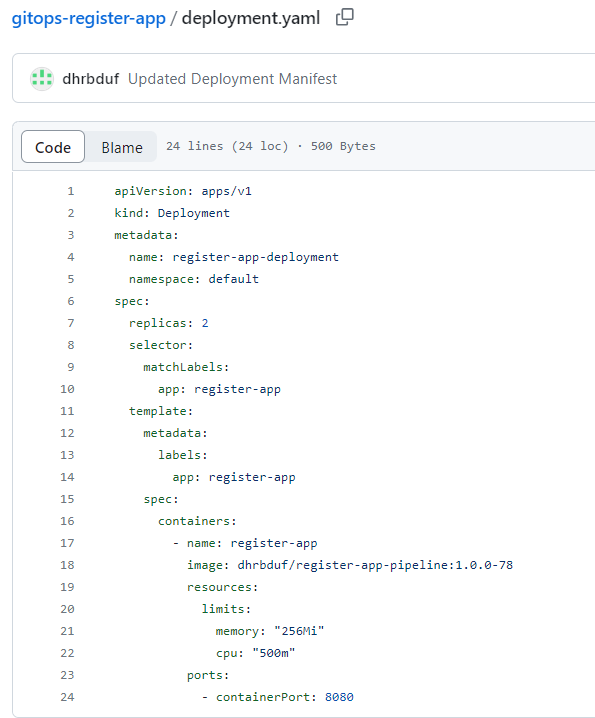
- deployment.yaml 파일
apiVersion: apps/v1
kind: Deployment
metadata:
name: register-app-deployment
namespace: default
spec:
replicas: 2
selector:
matchLabels:
app: register-app
template:
metadata:
labels:
app: register-app
spec:
containers:
- name: register-app
image: dhrbduf/register-app-pipeline:latest
resources:
limits:
memory: "256Mi"
cpu: "500m"
ports:
- containerPort: 8080
- service.yaml 파일
apiVersion: v1
kind: Service
metadata:
name: register-app-service
namespace: default
labels:
app: register-app
spec:
selector:
app: register-app
ports:
- port: 8080
targetPort: 8080
type: LoadBalancer
- kubectl get svc 로 외부서비스 CLB 주소 확인

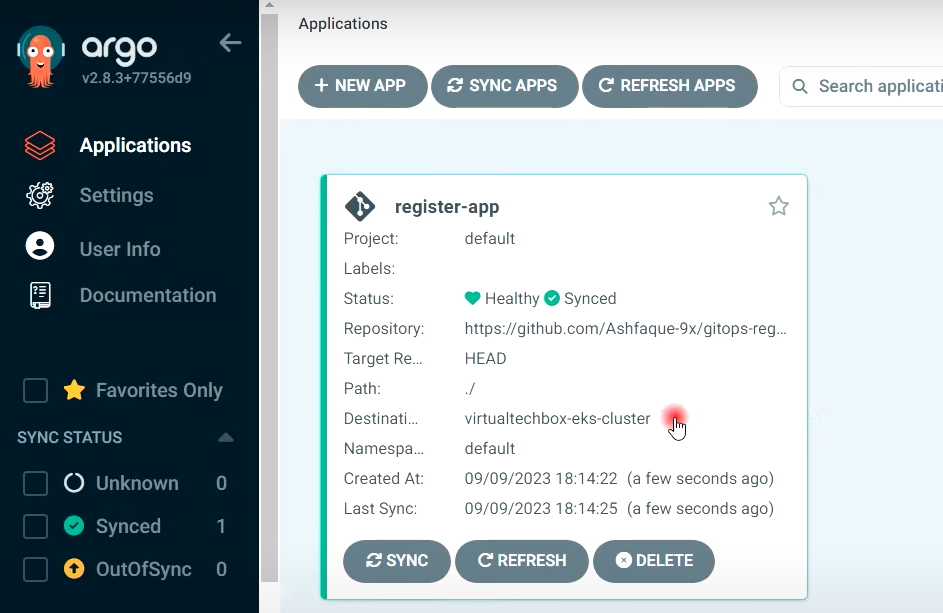
## APP 배포 접속 확인
- ArgoCD를 통해 EKS 클러스터 배포가 완벽하게 진행됨
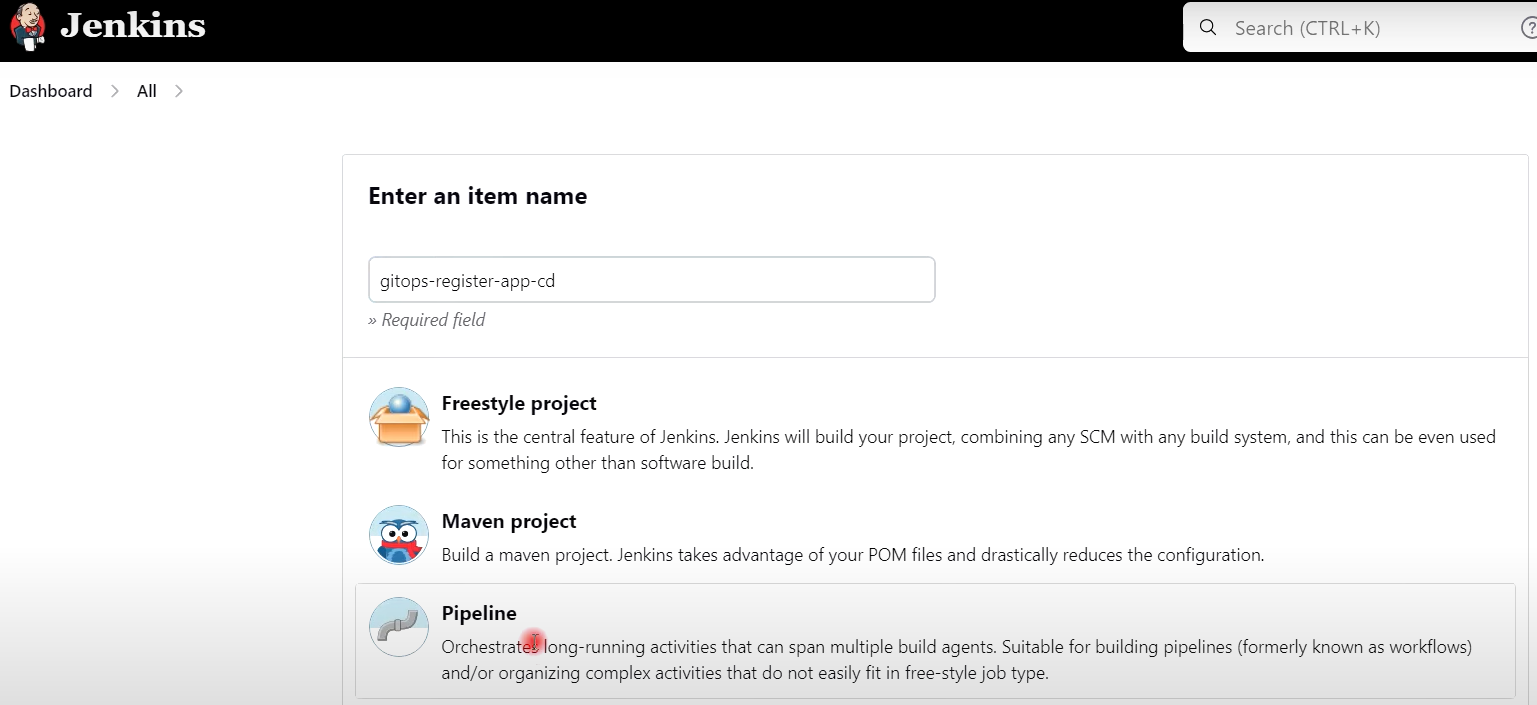
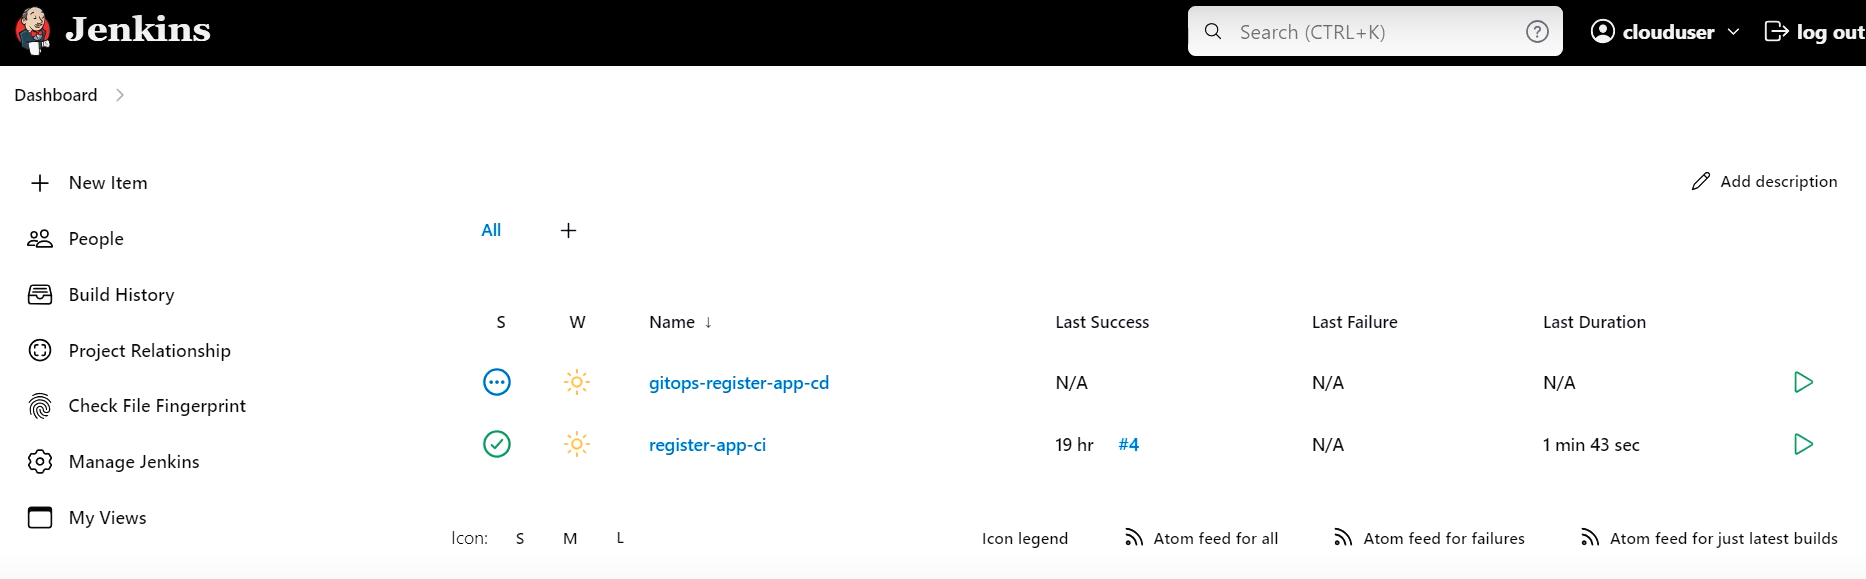
[10] 젠킨스 파이프라인으로 CD 작업 생성 (2:00분)
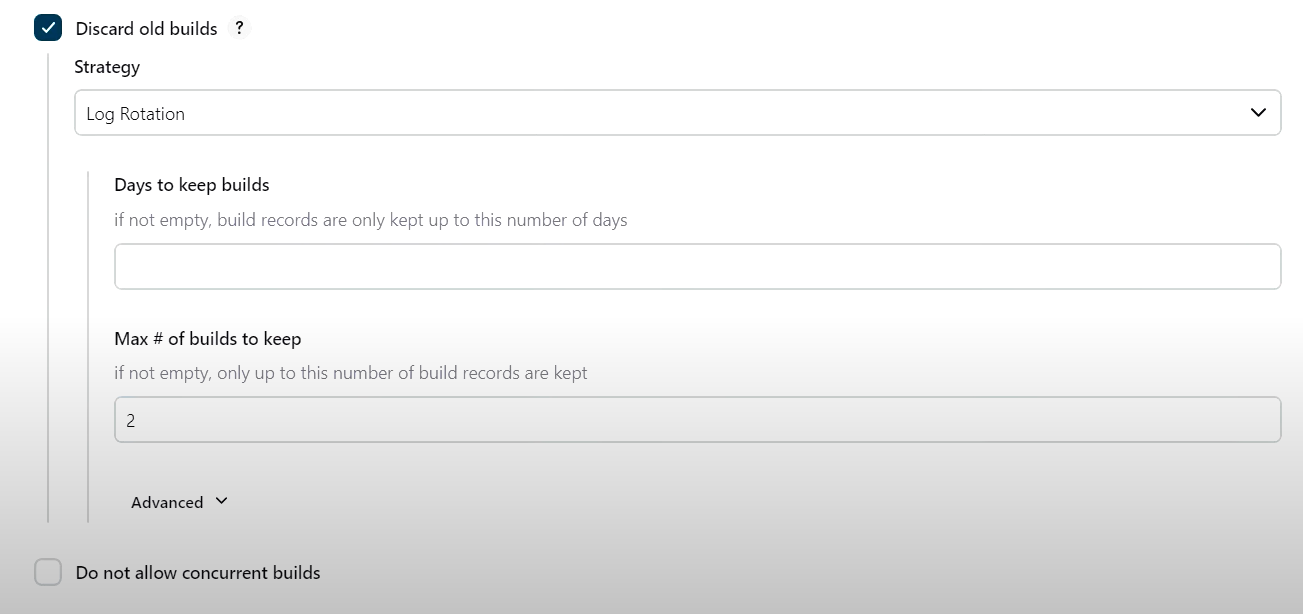
## gitops-register-app-cd 파이프라인 생성
- Old Build 2개로 제한
- 매개변수 설정 (깃허브의 배포 매니페스트 파일의 이미지 태그를 변경할 때마다 이미지 태그를 지정)

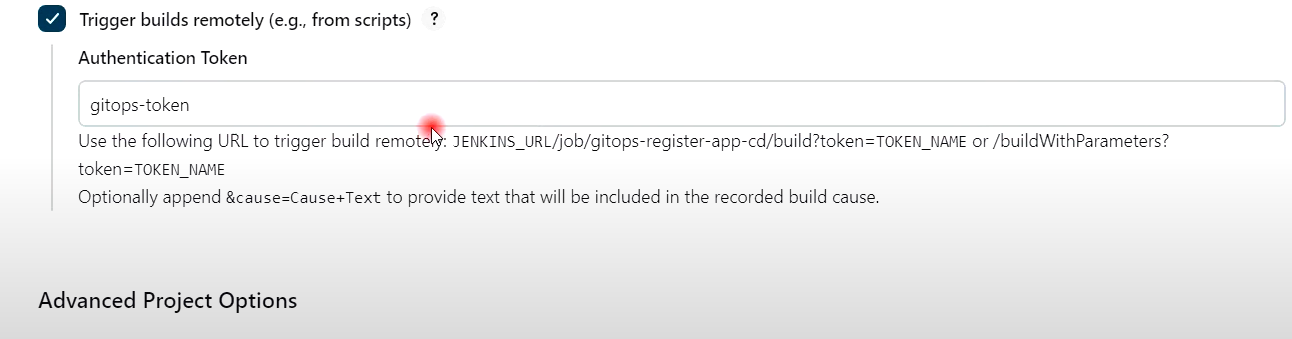
- 빌드를 원격으로 유발
: gitops-token
- 깃허브 설정 후, 저장


- 파이프라인 생성
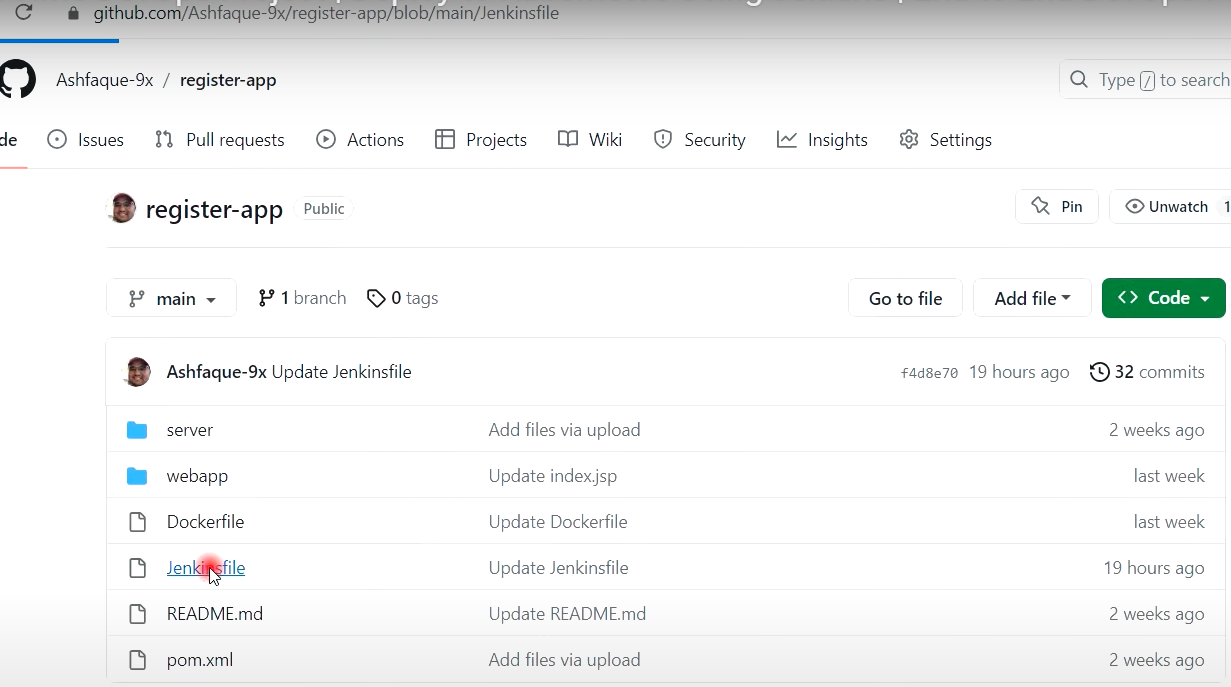
## 깃허브 register-app 이동 (CI 빌드 역할 - Jenkinsfile 수정)
- 한단계 추가 (CD 파이프라인을 트리거)
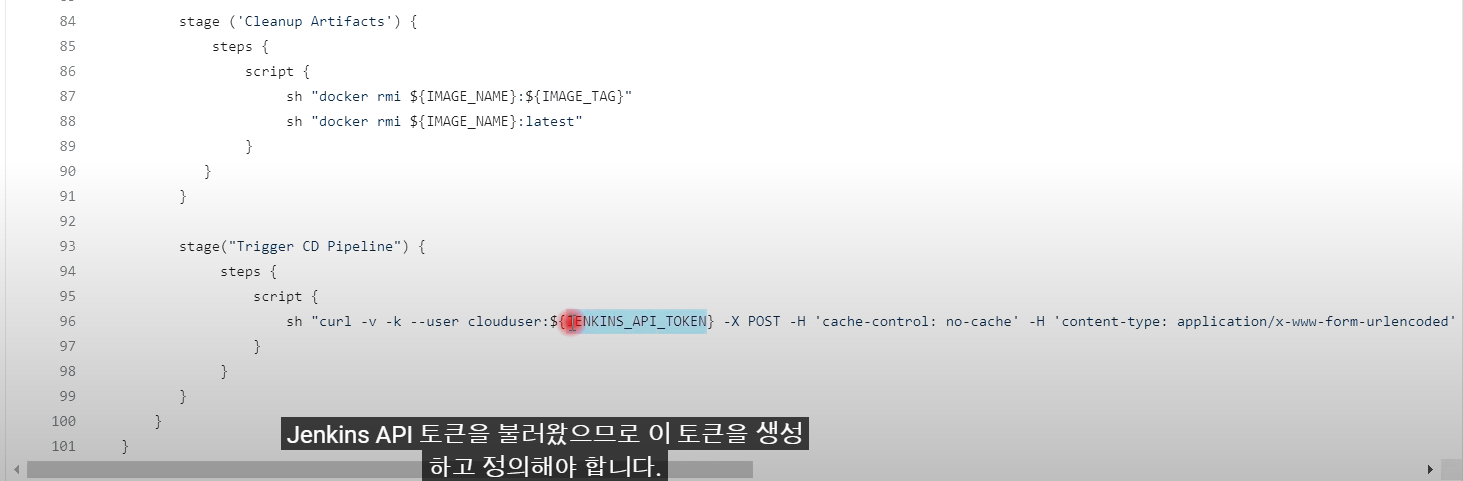
stage("Trigger CD Pipeline") {
steps {
script {
sh "curl -v -k --user clouduser:${JENKINS_API_TOKEN} -X POST -H 'cache-control: no-cache' -H 'content-type: application/x-www-form-urlencoded' --data 'IMAGE_TAG=${IMAGE_TAG}' 'http://젠킨스 내부IP주소:8080/job/gitops-register-app-cd/buildWithParameters?token=gitops-token'"
}
}
}
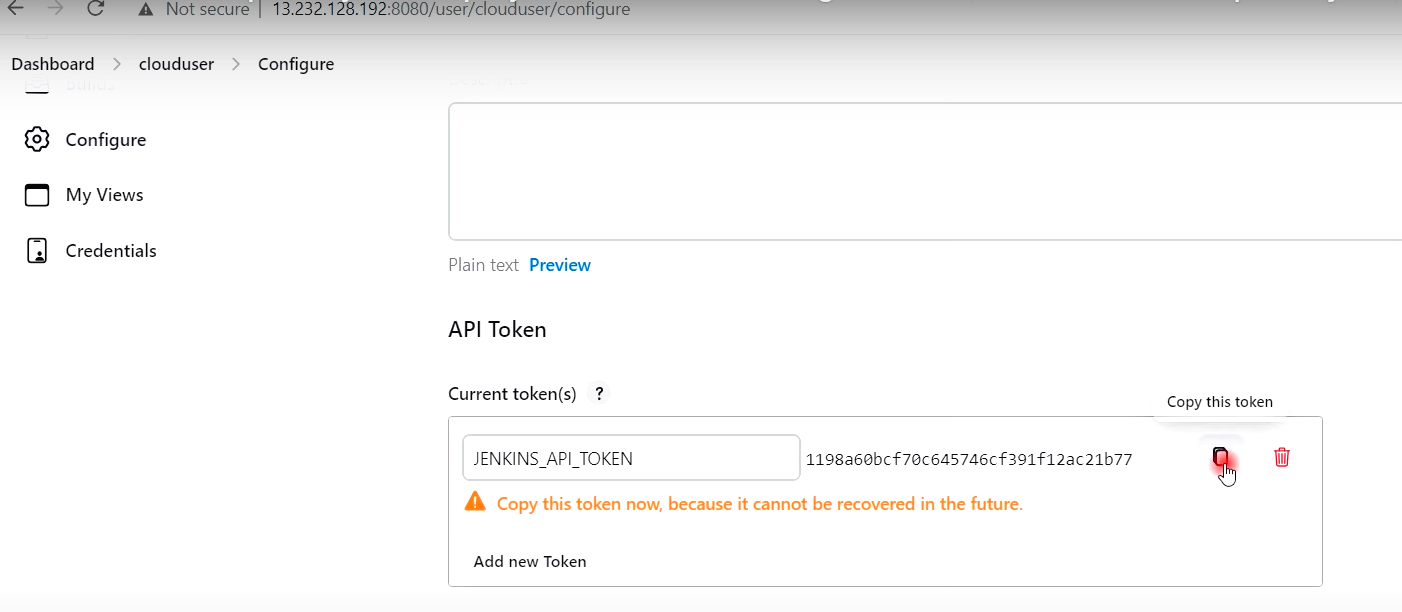
- JENKINS_API_TOKEN 생성 (젠킨스 콘솔)
1) 유저 --> Configure --> API 토큰 생성 및 복사 (HTTPS 방식만 허용)
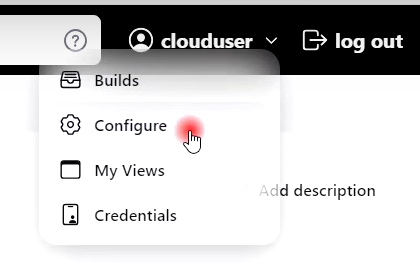
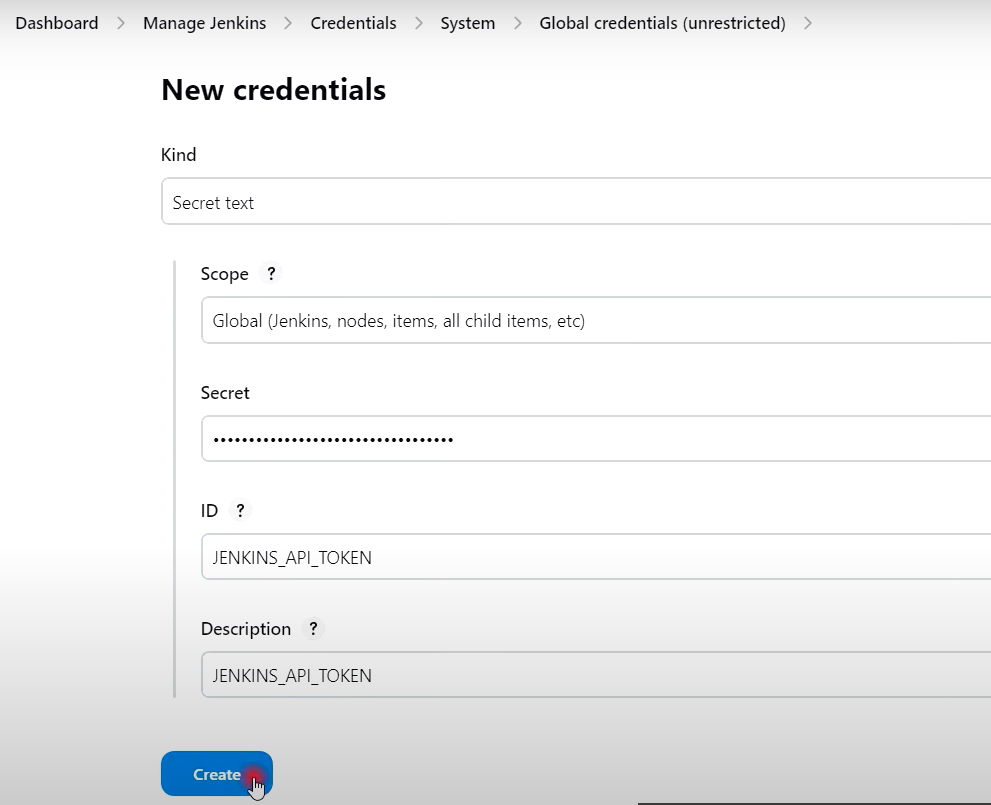
2) 젠킨스관리 --> Credentials --> 시스템 --> Global Credentials 클릭

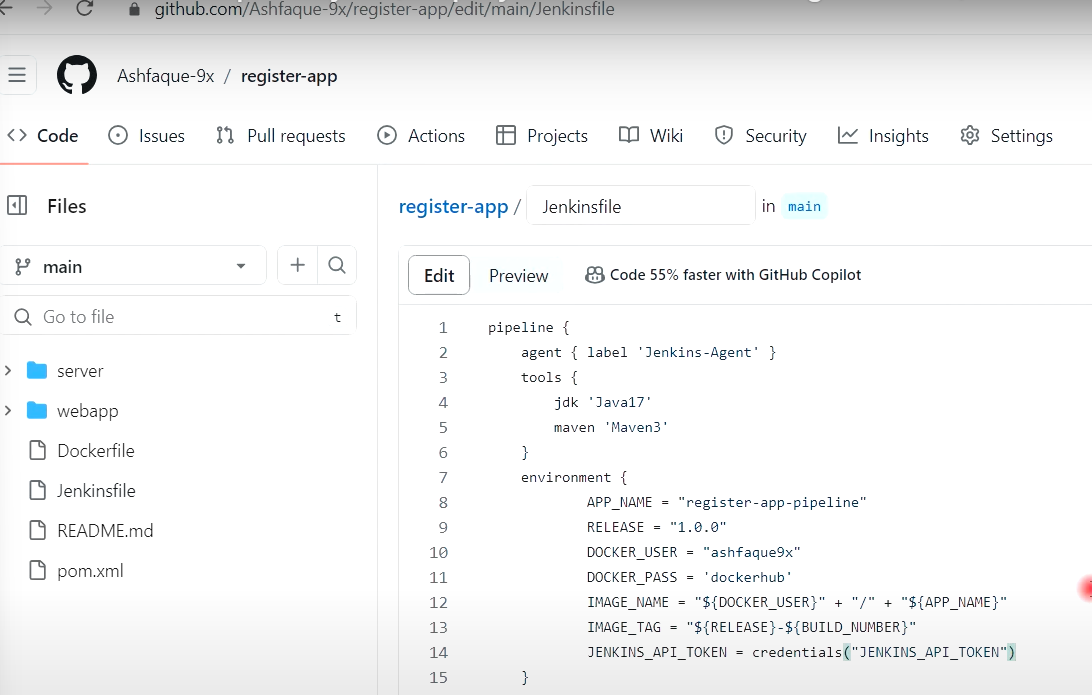
3) Jenkinsfile 에 --> JENKINS_API_TOKEN 을 환경변수로 설정
pipeline {
agent any
tools {
jdk 'Java17'
maven 'Maven3'
}
environment {
APP_NAME = "register-app-pipeline"
RELEASE = "1.0.0"
DOCKER_USER = "dhrbduf"
DOCKER_PASS = 'dockerhub'
IMAGE_NAME = "${DOCKER_USER}"+"/"+"${APP_NAME}"
IMAGE_TAG = "${RELEASE}-${BUILD_NUMBER}"
JENKINS_API_TOKEN = credentials("JENKINS_API_TOKEN")
}
stages{
stage("Cleanup Workspace"){
steps {
cleanWs()
}
}
stage("Checkout from SCM"){
steps {
git branch: 'main', credentialsId: 'github', url: 'https://github.com/dhrbduf/register-app'
}
}
stage("Build Application"){
steps {
sh "mvn clean package"
}
}
stage("Test Application"){
steps {
sh "mvn test"
}
}
stage("SonarQube Analysis"){
steps {
script {
withSonarQubeEnv(credentialsId: 'jenkins-sonar-token') {
sh "mvn sonar:sonar"
}
}
}
}
stage("Quality Gate"){
steps {
script {
waitForQualityGate abortPipeline: false, credentialsId: 'jenkins-sonar-token'
}
}
}
stage("Pom.xml Info"){
steps {
script {
sh "env"
sh "echo ${env.BUILD_ID}"
sh "echo $currentBuild.number"
// def VERSION = readMavenPom().getVersion()
def VERSION = sh(script: 'mvn help:evaluate -Dexpression=project.version -q -DforceStdout', returnStdout: true)
sh "echo $VERSION"
def ARTIFACTID = sh(script: 'mvn help:evaluate -Dexpression=project.artifactId -q -DforceStdout', returnStdout: true)
sh "echo $ARTIFACTID"
def GROUPID = sh(script: 'mvn help:evaluate -Dexpression=project.groupId -q -DforceStdout', returnStdout: true)
sh "echo $GROUPID"
}
}
}
stage("Build & Push Docker Iamge"){
steps {
script {
docker.withRegistry('',DOCKER_PASS) {
docker_image = docker.build "${IMAGE_NAME}"
}
docker.withRegistry('',DOCKER_PASS) {
docker_image.push("${IMAGE_TAG}")
docker_image.push('latest')
}
}
}
}
stage("Trivy Scan") {
steps {
script {
sh ('docker run -v /var/run/docker.sock:/var/run/docker.sock aquasec/trivy image dhrbduf/register-app-pipeline:latest --no-progress --scanners vuln --exit-code 0 --severity HIGH,CRITICAL --format table')
}
}
}
stage ('Cleanup Artifacts') {
steps {
script {
sh "docker rmi ${IMAGE_NAME}:${IMAGE_TAG}"
sh "docker rmi ${IMAGE_NAME}:latest"
}
}
}
stage("Trigger CD Pipeline") {
steps {
script {
sh "curl -v -k --user admin:${JENKINS_API_TOKEN} -X POST -H 'cache-control: no-cache' -H 'content-type: application/x-www-form-urlencoded' --data 'IMAGE_TAG=${IMAGE_TAG}' 'http://10.50.6.98:8080/job/gitops-register-app-cd/buildWithParameters?token=gitops-token'"
}
}
}
}
}
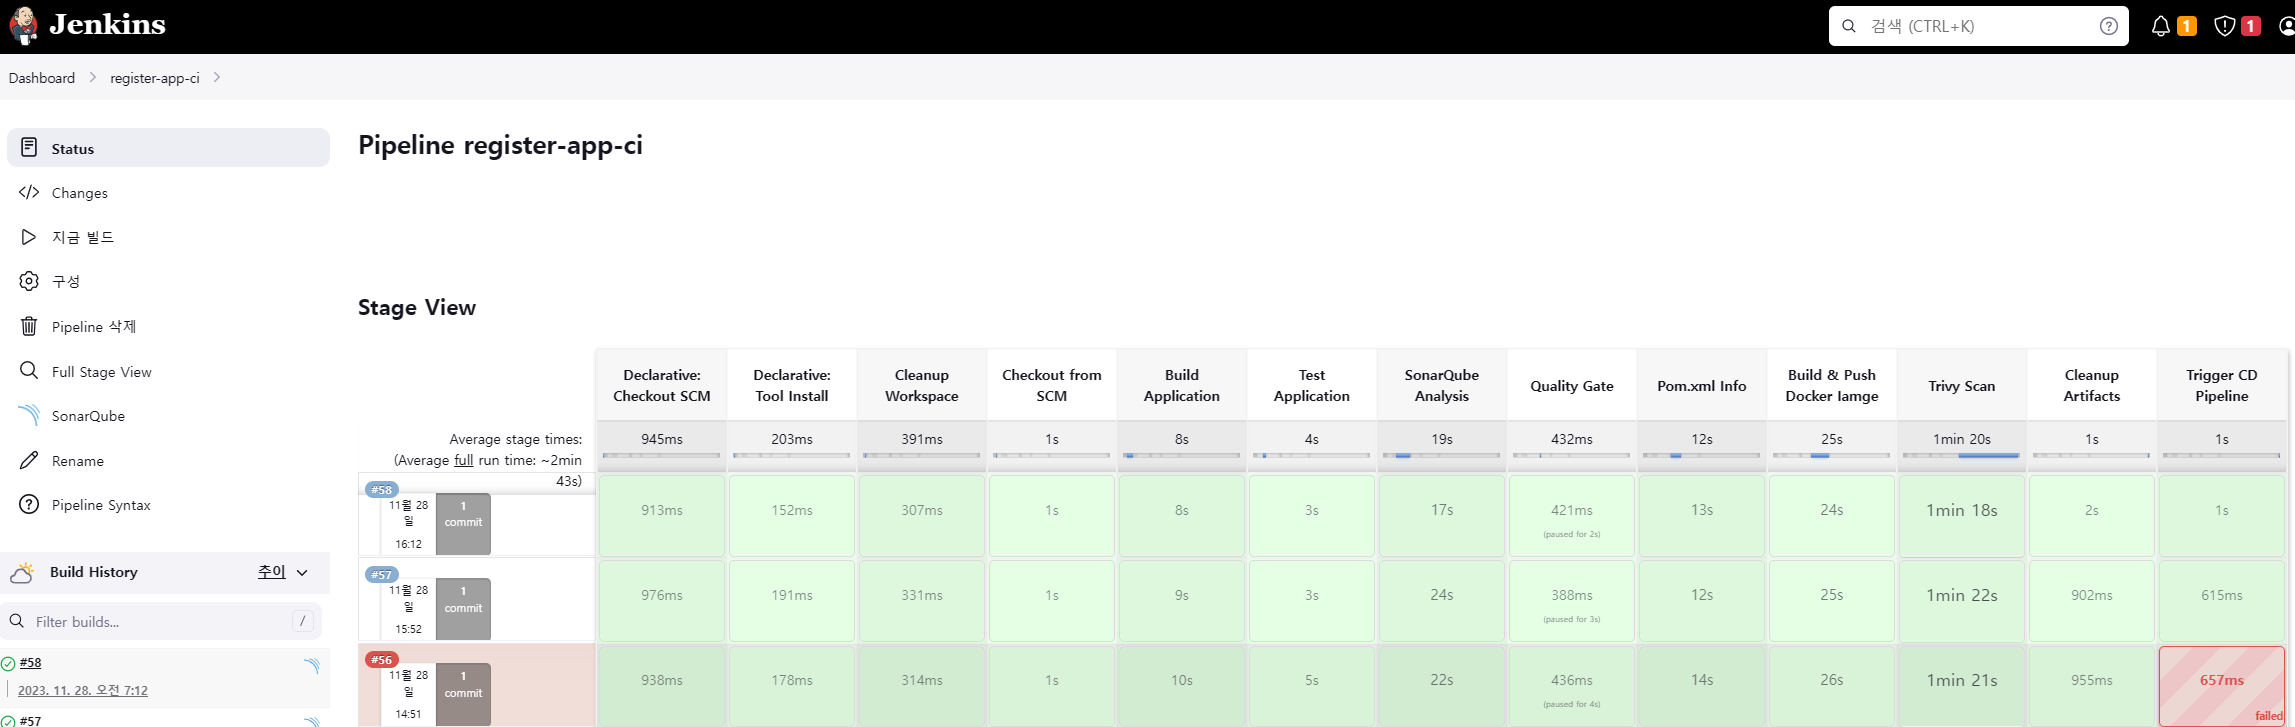
- Pipeline register-app-ci 빌드 성공
: Pipeline gitops-register-app-cd 작업으로 자동 연동됨 (Jenkinsfile 작성 필요)


[11] 깃허브 gitops-register-app (CD용) Jenkinsfile 생성 (2:12분)
## gitops-register-app 깃허브 이동 (쿠번네티스 매니페스트 파일 있음)

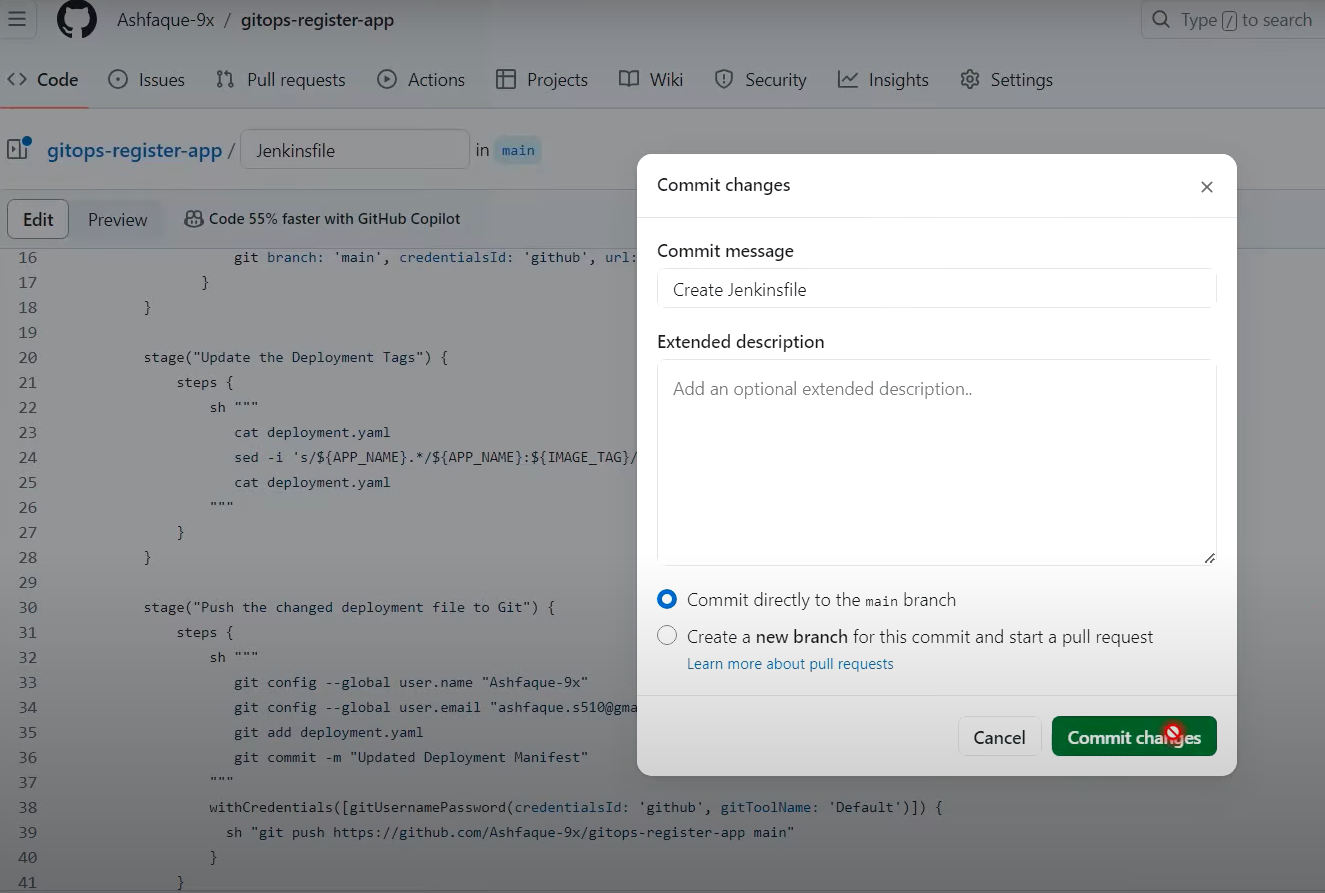
## Jenkinsfile 생성
pipeline {
agent any
environment {
APP_NAME = "register-app-pipeline"
}
stages {
stage("Cleanup Workspace") {
steps {
cleanWs()
}
}
stage("Checkout from SCM") {
steps {
git branch: 'main', credentialsId: 'github', url: 'https://github.com/dhrbduf/gitops-register-app'
}
}
stage("Update the Deployment Tags") {
steps {
sh """
cat deployment.yaml
sed -i 's/${APP_NAME}.*/${APP_NAME}:${IMAGE_TAG}/g' deployment.yaml
cat deployment.yaml
"""
}
}
stage("Push the changed deployment file to Git") {
steps {
sh """
git config --global user.name "dhrbduf"
git config --global user.email "dhrbduf@gmail.com"
git add deployment.yaml
git commit -m "Updated Deployment Manifest"
"""
withCredentials([gitUsernamePassword(credentialsId: 'github', gitToolName: 'Default')]) {
sh "git push https://github.com/dhrbduf/gitops-register-app main"
}
}
}
}
}
## 빌드 테스트 결과 deployment.yaml 에 IMAGE_TAG 내용 변경 확인 (CI 쪽의 이미지 태그를 받아옴)
[12] 깃허브 commit 으로 CI/CD 자동화 테스트 구현 (2:21분)
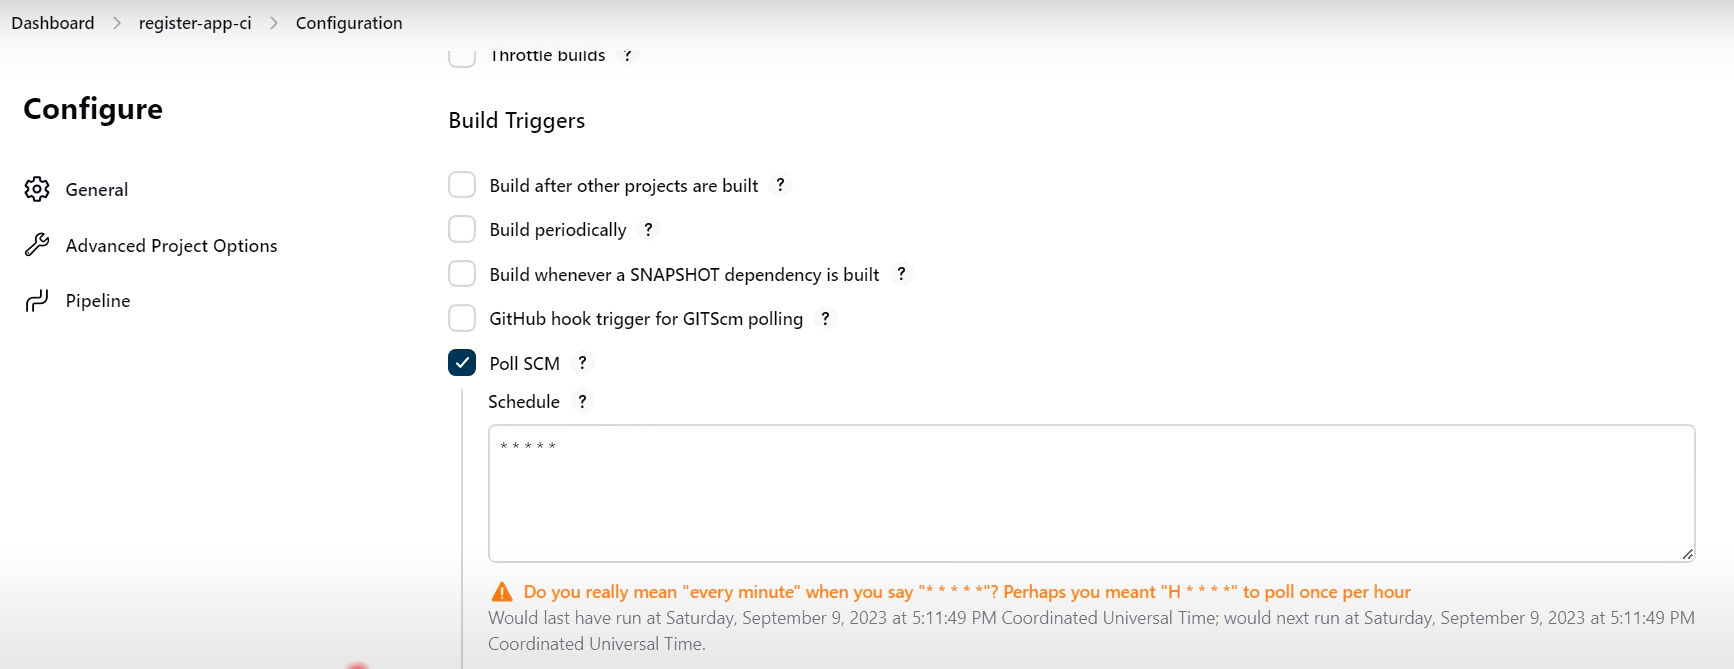
## CI작업에 트리거 설정 (register-app-ci 파이프라인 --> Configure 이동)
- 매 분 깃허브 모니터링 (https://github.com/dhrbduf/register-app.git)

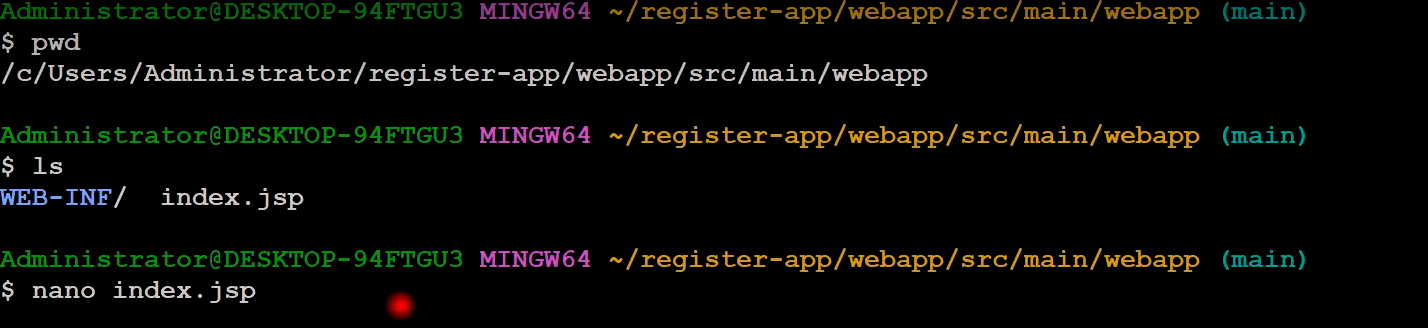
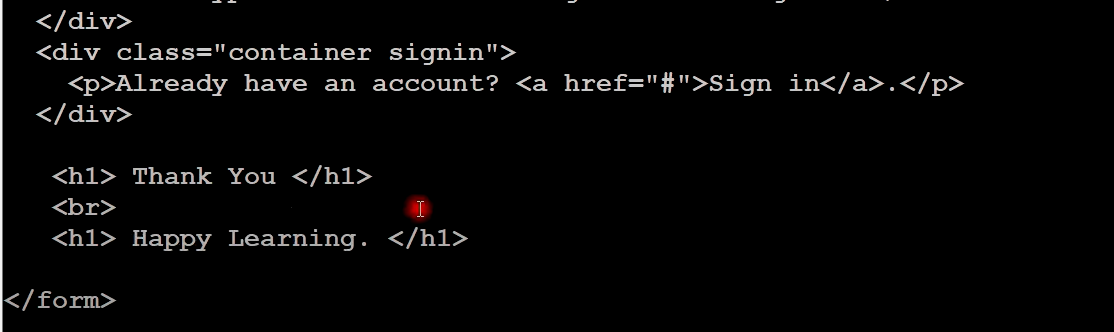
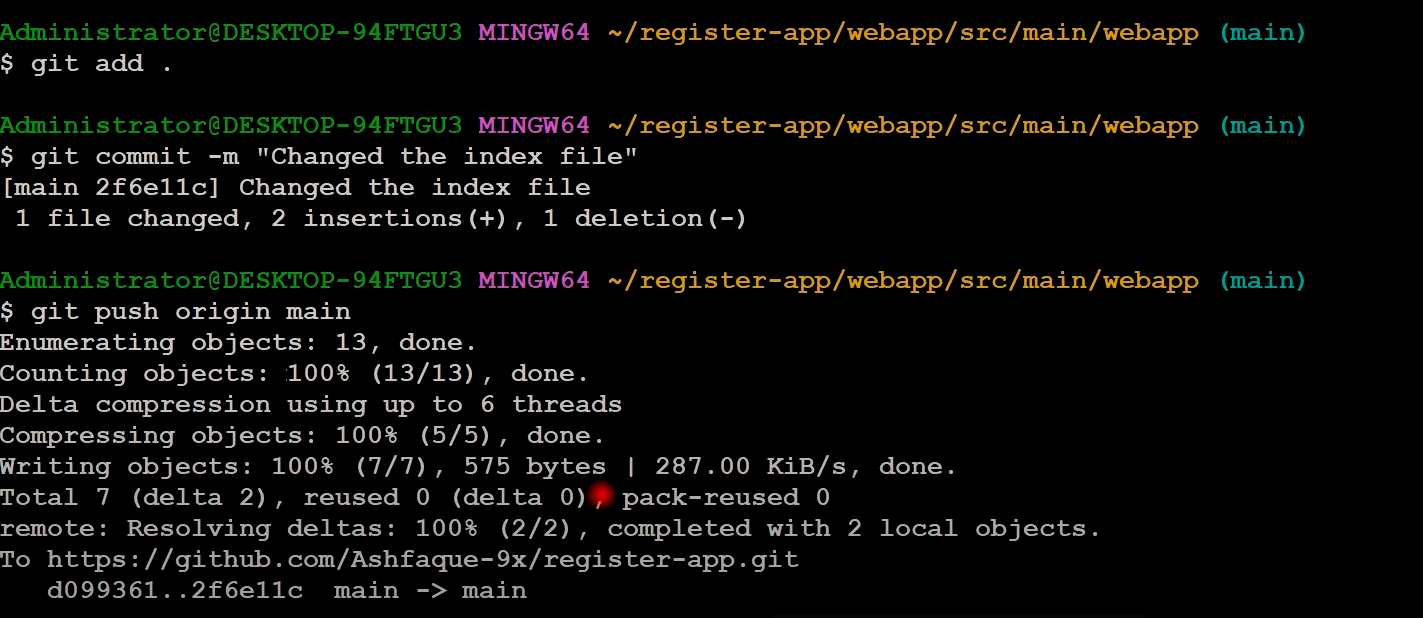
## index.jsp 소스파일 수정 후, git push 완료
## CI Job 수행후, 자동으로 CD Job 수행
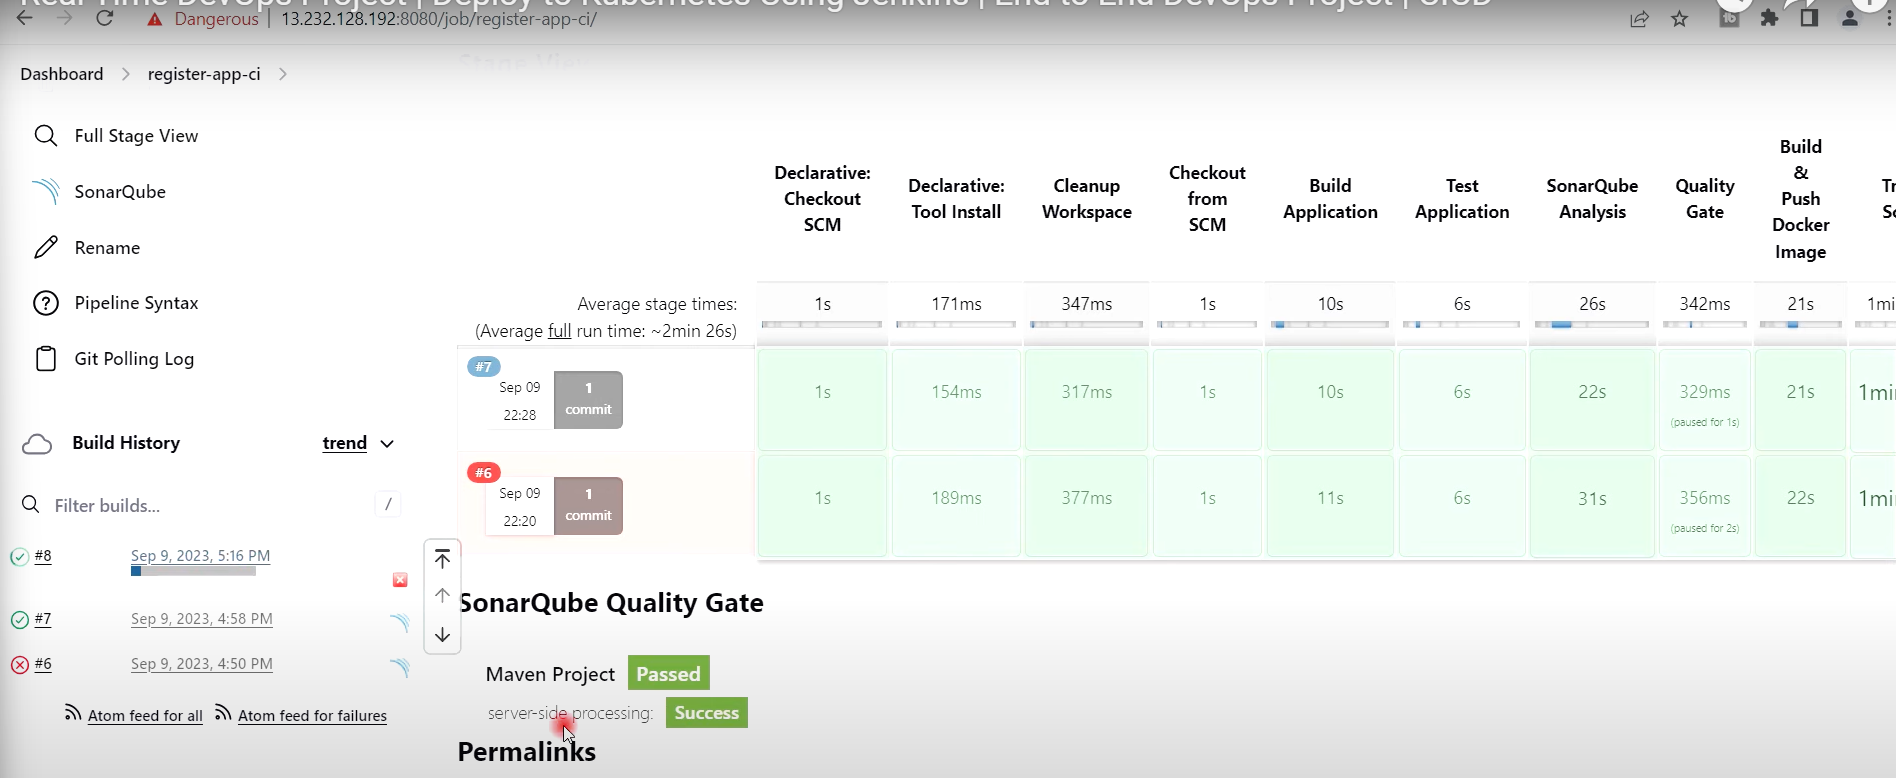

- 도커허브에서 Image 태그 8번 변경 확인
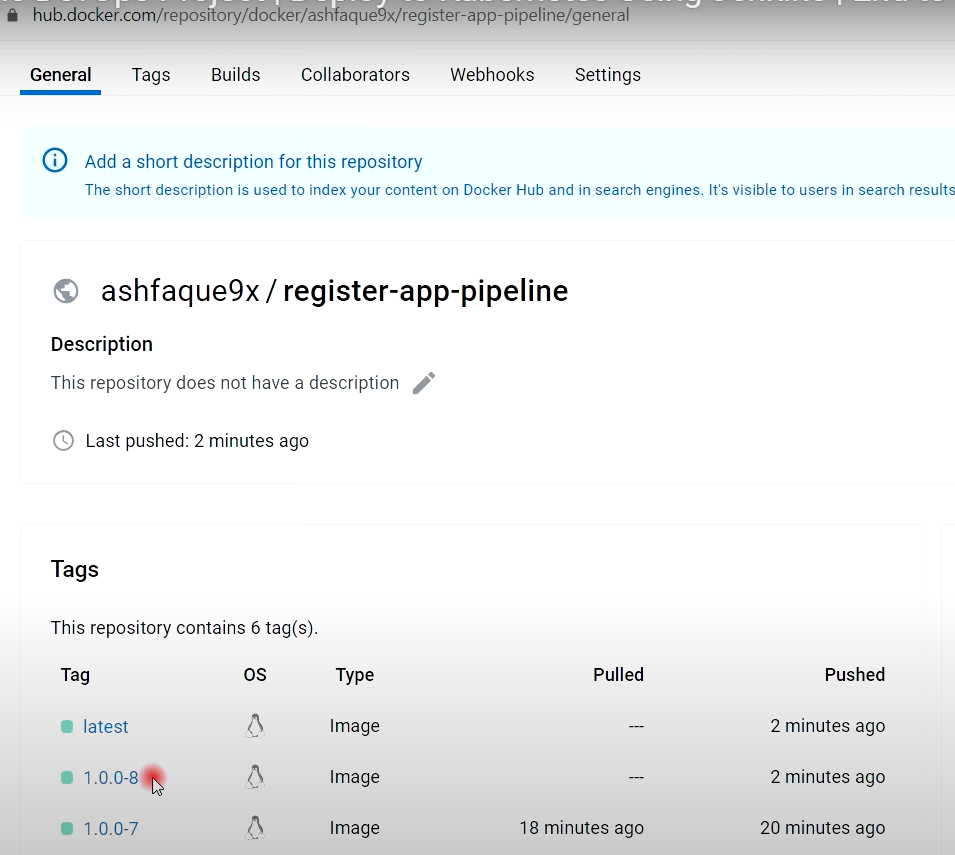
- 깃허브에서 Image 태그 8번 변경 확인 (최신 태그)

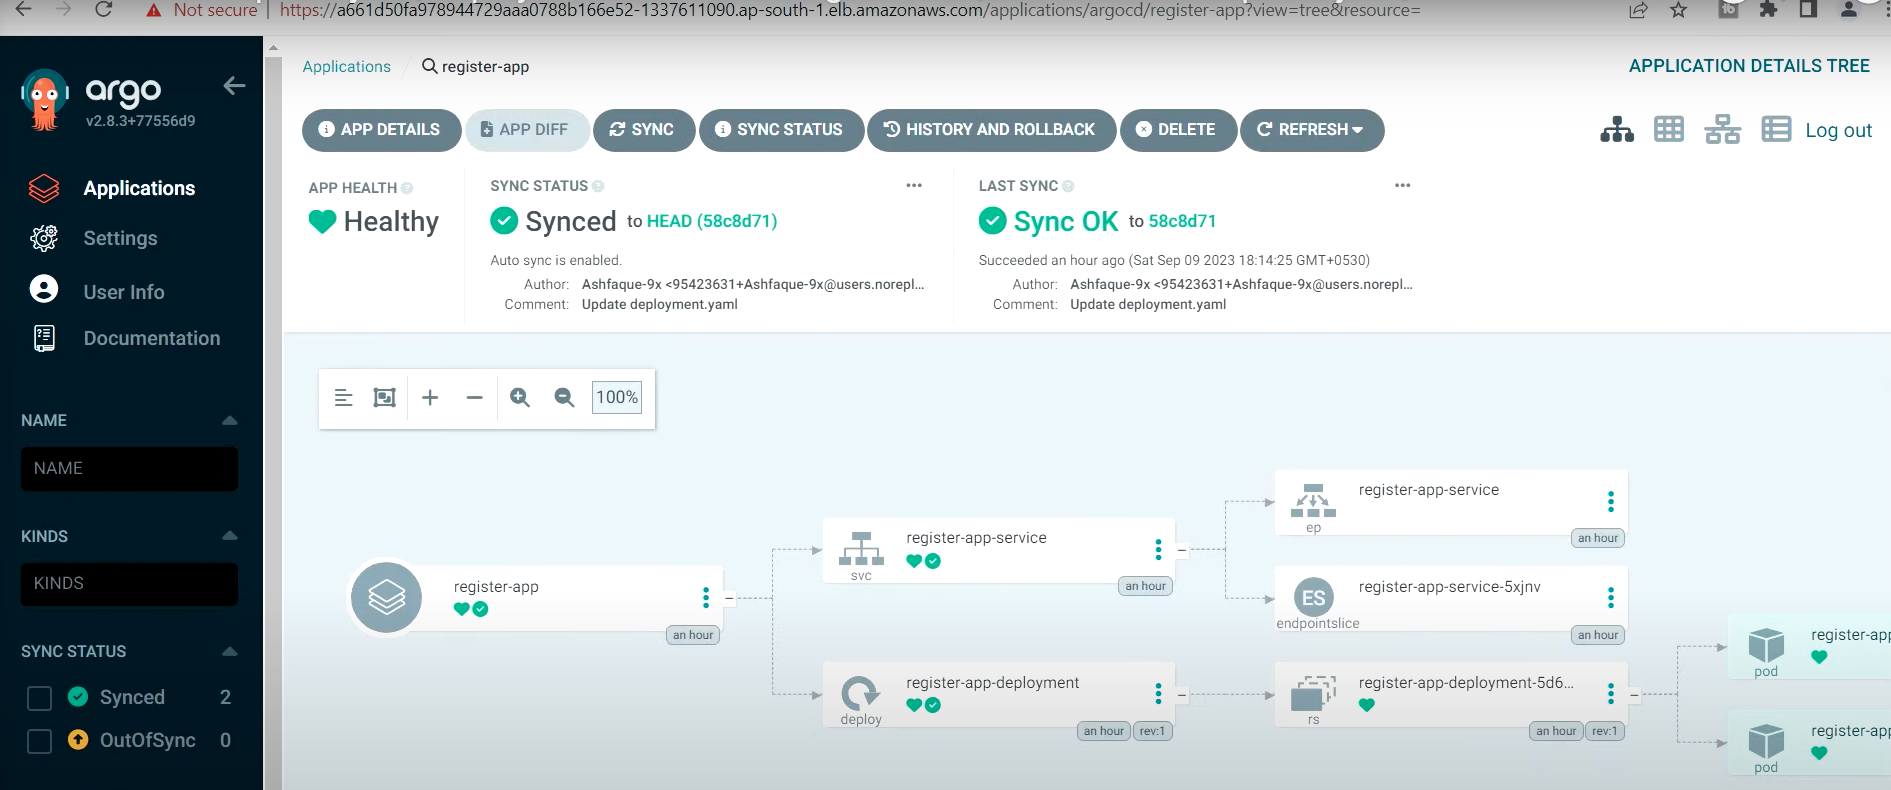
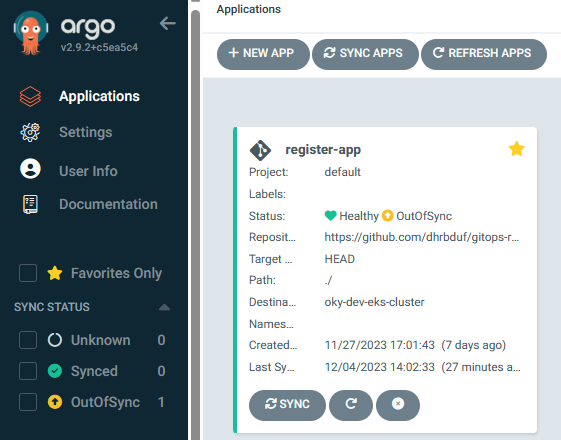
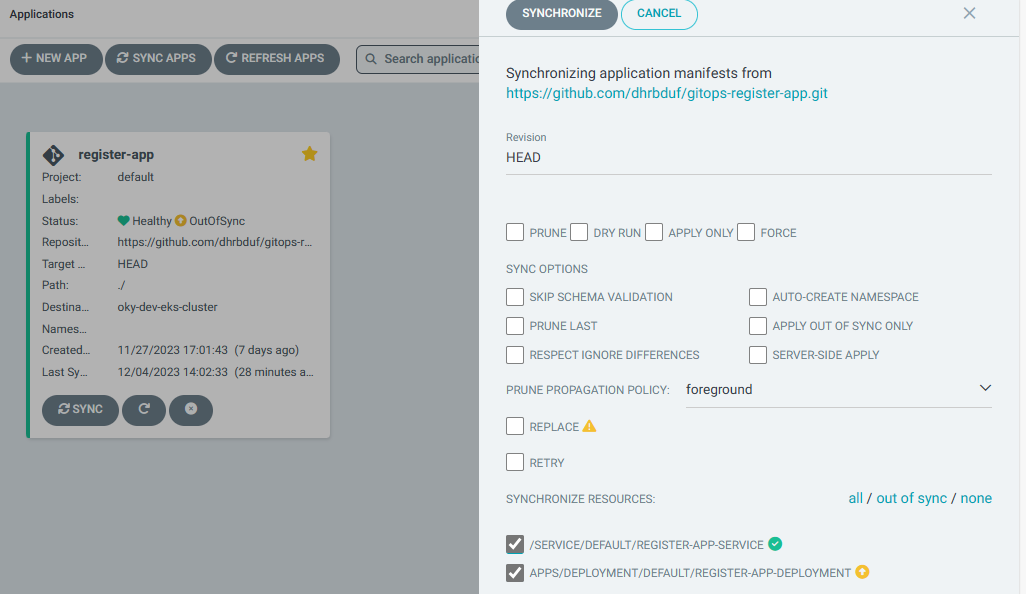
## ArgoCD로 이동하여 새로고침 수행 (2:27분)

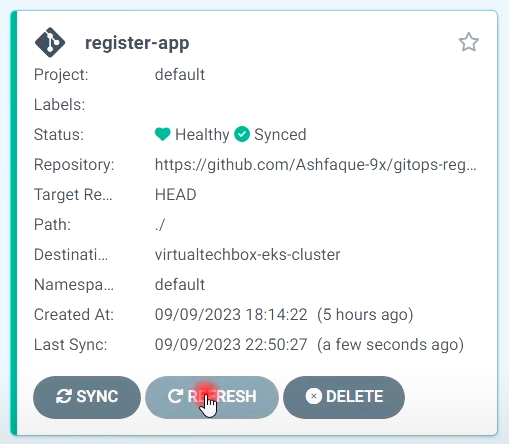
- 테스트시 SYNC --> SYNCHRONIZE 클릭해야 배포됨
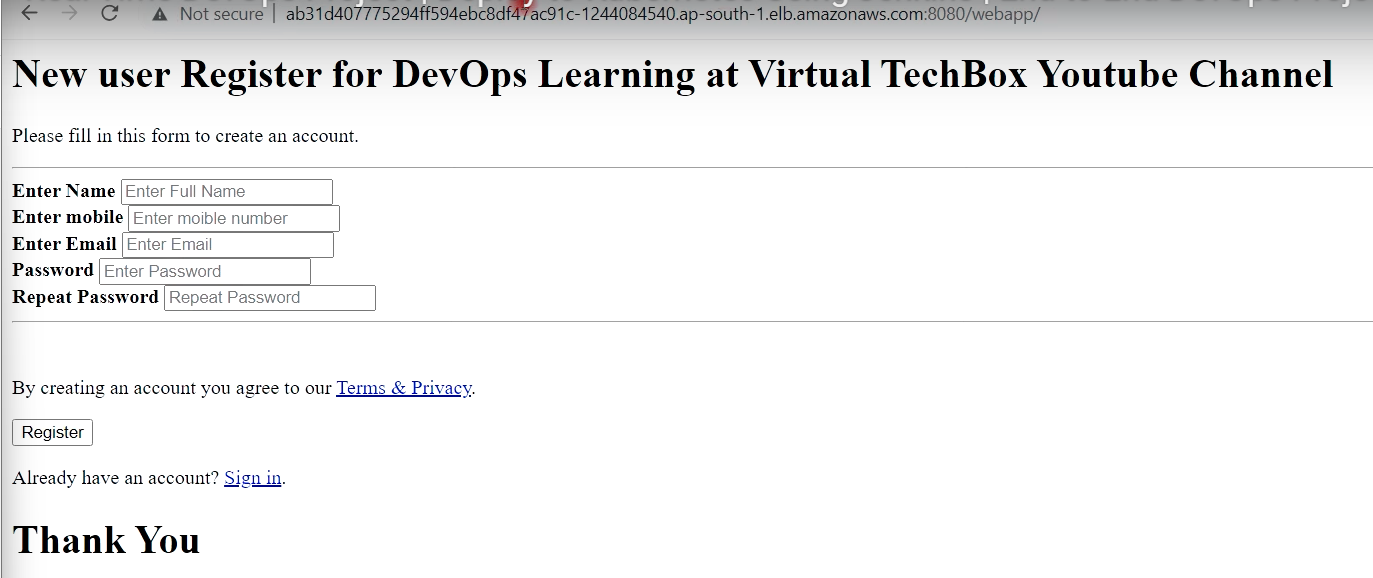
## 배포 후 적용된 화면
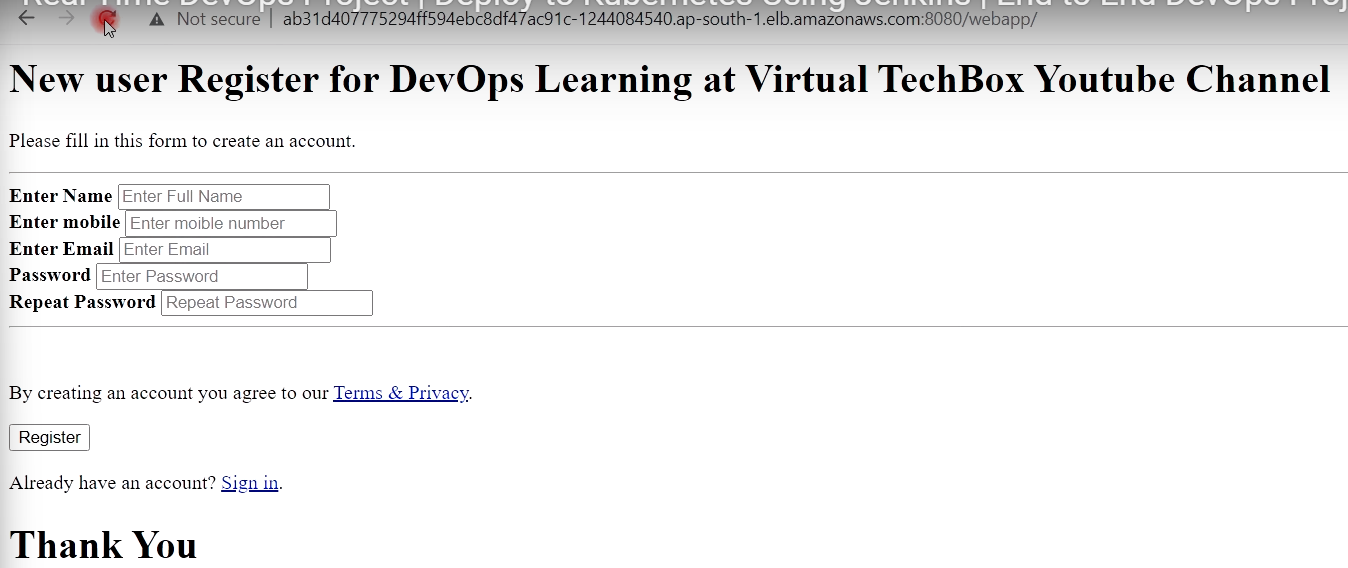
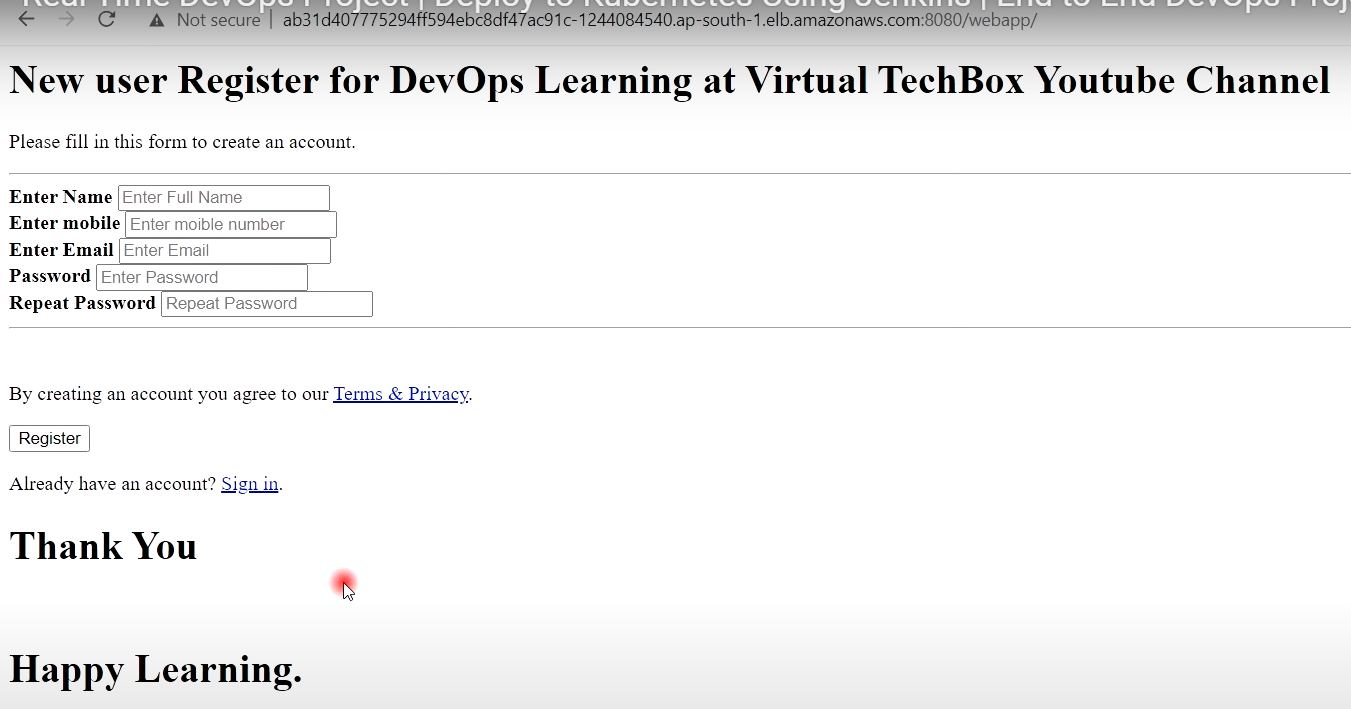
[완료]
## Jenkins & Docker & ArgoCD & EKS 를 사용하여 CI/CD 라이프라인을 구성 !!

